

Easy Cheesecake Cups
Cheesecake is a favorite dessert, but a full sized version takes time and patience to set. These Easy Cheesecake Cups deliver the creamy, tangy, sweet character of classic cheesecake in far less time, and the individual portions suit parties, gatherings, or a quick personal treat.
The recipe comes from Sally Thompson, and it stays flexible from start to finish. Top the cups with fruit compote, a chocolate drizzle, or crushed cookies for crunch. Because nothing goes into the oven, you can put a batch together with minimal effort.
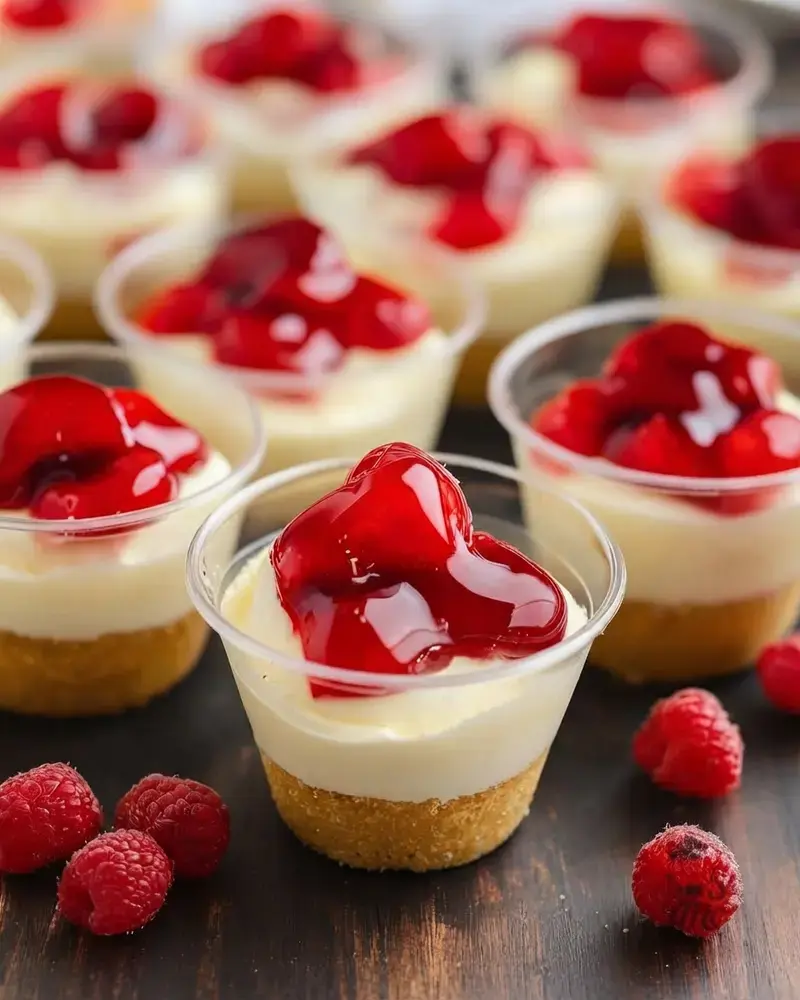
If you are feeding a cheesecake lover or simply want a no fuss dessert, this is a good place to start.
Jump To
- 1. Easy Cheesecake Cups
- 2. Why You’ll Love This Easy Cheesecake Cups Recipe
- 3. What Kind of Crust Should I Use?
- 4. Options for Substitutions
- 5. Ingredients for This Easy Cheesecake Cups Recipe
- 6. Step 1: Prepare the Crust
- 7. Step 2: Make the Cheesecake Filling
- 8. Step 3: Assemble the Cheesecake Cups
- 9. Step 4: Add the Toppings
- 10. How Long to Chill the Easy Cheesecake Cups
- 11. Tips for Perfect Easy Cheesecake Cups
- 12. Watch Out for These Mistakes While Cooking
- 13. What to Serve With Easy Cheesecake Cups?
- 14. Storage Instructions
- 15. FAQs
- 16. Conclusion
- 17. Easy Cheesecake Cups
Why You’ll Love This Easy Cheesecake Cups Recipe
There is a lot to like here, especially when the weather turns warm.
- No oven needed. The recipe is no bake from start to finish, which keeps the kitchen cool on hot days.
- Few steps, little effort. You mix a crust, beat a filling, and chill.
- Neat individual portions. No slicing a whole cheesecake at the table. Each cup is ready to grab and go.
- Flexible toppings. Switch up the fruit, the sauces, or the cookie crumbles to suit the crowd.
- Party ready. The cups work for parties, potlucks, and family desserts.
If you enjoy this style of dessert, take a look at these Mini No Bake Cheesecake Cups for another easy option.
What Kind of Crust Should I Use?
A classic graham cracker crust is the foundation here. It is buttery, slightly crunchy, and a good match for the creamy filling. The full recipe uses 1 1/2 cups of graham cracker crumbs with 1/4 cup of melted butter.
You are not locked into graham crackers. Crushed vanilla wafers, Oreos, or digestive biscuits all work well. Whatever you choose, the crumbs need to be mixed with melted butter so they hold together in the cup instead of scattering when someone takes a bite.
Prefer to skip the crust altogether? Pour the filling straight into the cups. A crustless version is a simple route to a gluten free dessert, and it also feels lighter after a big meal.
Options for Substitutions
The recipe bends easily to what you have on hand.
- Crust: swap graham crackers for Oreos, vanilla wafers, or shortbread cookies.
- Dairy free: use dairy free cream cheese and coconut cream in place of the regular cream cheese and heavy whipping cream.
- Sweetener: replace the powdered sugar with honey, maple syrup, or a sugar substitute for a refined sugar free version.
- Topping: instead of fruit, try melted chocolate, caramel, or crushed candy.
- Flavor boost: add a splash of lemon juice for tang, or mix in vanilla bean paste for a richer note.
Chocolate fans may also want to try this No Bake Chocolate Cheesecake when they want a deeper cocoa flavor.
Ingredients for This Easy Cheesecake Cups Recipe
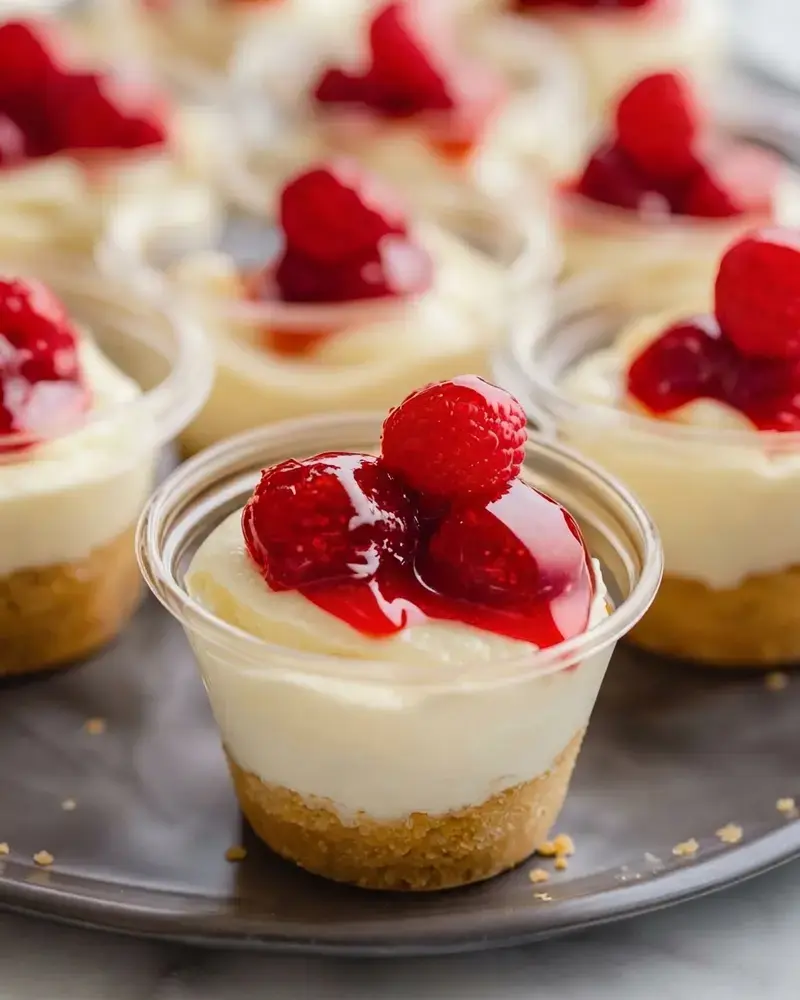
Seven ingredients cover the whole recipe, and each one has a job to do.
| Ingredient | Amount | What it does |
|---|---|---|
| Graham cracker crumbs | 1 1/2 cups | Forms the crust base and adds a sweet, slightly crunchy contrast to the filling. |
| Butter, melted | 1/4 cup | Binds the crumbs into a solid crust. |
| Cream cheese, softened | 8 oz | The star of the filling, creamy and tangy. |
| Powdered sugar | 1/2 cup | Sweetens the filling smoothly without grittiness. |
| Vanilla extract | 1 teaspoon | Adds a warm, slightly floral note. |
| Heavy whipping cream | 1 cup | Lightens the filling and gives it a fluffy texture. |
| Cherry pie filling | 1 cup, optional | Adds sweetness and color. Any favorite topping works here. |
The recipe makes 6 to 8 servings. Per serving, based on a standard recipe with graham cracker crust and cherry topping, the source estimates about 250 to 300 calories, 30g carbohydrates, 3g protein, 15g fat, 9g saturated fat, 1g fiber, 18g sugar, and 150mg sodium.
Step 1: Prepare the Crust
In a bowl, mix the graham cracker crumbs with the melted butter until everything is combined and the texture looks like wet sand. Divide the mixture evenly among small dessert cups or muffin liners, then press it down firmly to form a solid base. Refrigerate the crusts while you prepare the filling.
Step 2: Make the Cheesecake Filling
In a large bowl, beat the softened cream cheese with the powdered sugar and the vanilla extract until the mixture is smooth and creamy. In a separate bowl, whip the heavy cream until stiff peaks form. Gently fold the whipped cream into the cream cheese mixture, keeping as much air in the filling as you can.
Step 3: Assemble the Cheesecake Cups
Spoon or pipe the filling into the prepared crust cups, then smooth the tops for an even finish. Refrigerate the filled cups for at least 2 hours so the cheesecake sets properly. A piping bag gives a tidier look than a spoon if you want clean edges.
Step 4: Add the Toppings
Just before serving, spoon a generous amount of cherry pie filling over each cup, or use whatever topping you prefer. Chocolate shavings, crushed cookies, and fresh fruit all work well. Adding the topping at the last minute keeps the filling from turning soft.
How Long to Chill the Easy Cheesecake Cups
Plan on at least 2 hours in the refrigerator so the cups set. If your schedule allows, 4 hours or overnight gives a firmer, creamier texture. Try not to rush this step. The chill time is what lets the flavors settle and helps the filling hold its shape on the spoon.
Tips for Perfect Easy Cheesecake Cups
A few small habits make a noticeable difference.
- Use room temperature cream cheese. Cold cream cheese mixes poorly and leaves lumps behind.
- Whip the cream to stiff peaks. Fold it in gently so the filling stays light instead of heavy.
- Press the crust firmly. The back of a spoon does the job well and helps prevent crumbling.
- Chill for at least 2 hours. This is the step that lets the cups set and hold their shape.
- Customize the topping. Fresh berries, caramel sauce, or crushed cookies can stand in for cherry pie filling.
- Pipe the filling. A piping bag gives a neater look than spooning it in.
- Make them ahead. The cups store well in the refrigerator, so they can be ready before guests arrive.
Make ahead note: these cups hold up nicely in the fridge, which makes them a calm choice for a party day when you would rather not be working in the kitchen at the last minute.
Watch Out for These Mistakes While Cooking
Even a no bake recipe can go sideways. These are the usual culprits.
- Cold cream cheese. It will not mix smoothly, and the filling stays lumpy. Let it sit at room temperature first.
- Overmixing the filling. A smooth mixture is the goal, but too much stirring deflates the light, airy texture. Fold the whipped cream in gently.
- Skipping the chill. Without enough time in the refrigerator, the texture turns soft and runny instead of firm and creamy.
- Too much butter in the crust. An overloaded crust can taste greasy or harden too much once it is chilled, so follow the recommended amount.
- A loosely packed crust. If the crumbs are not pressed down well, the base crumbles when someone takes a bite.
- Topping too early. Fruit toppings added before chilling let moisture seep into the filling and soften it, so add them just before serving.
What to Serve With Easy Cheesecake Cups?
These little cups are rich on their own, so simple pairings work best. Here are some easy ways to round out the plate or the table.
Fresh Berries
Strawberries, raspberries, or blueberries piled on top add natural sweetness and a pop of color. They also keep the dessert feeling fresh on a hot day.
Whipped Cream
A light dollop of homemade whipped cream makes the cups more indulgent. Keep the dollop small so the creamy filling stays the star.
Chocolate Drizzle
Melted chocolate or a chocolate ganache drizzle gives a rich and elegant touch. It looks lovely on a dessert table.
Caramel Sauce
Warm caramel sauce drizzled over the top brings a sweet, buttery contrast to the tangy filling.
Crushed Nuts
Chopped almonds, pecans, or walnuts sprinkled over the top add texture and a nutty flavor that pairs well with cherry.
Graham Cracker Crumbs
A little extra sprinkle of graham cracker crumbs on top boosts the crust flavor in every bite.
Espresso or Coffee
Pairing cheesecake with a strong espresso or an iced coffee balances the sweetness of the dessert.
Mini Chocolate Chips
A handful of mini chocolate chips adds crunch and extra chocolate flavor without much effort.
Storage Instructions
Refrigerate the cups in an airtight container for up to 5 days. That keeps them firm and stops them from picking up other flavors from the fridge.
For longer storage, freeze them without toppings for up to 2 months. Wrap each cup in plastic wrap and place it in a sealed container, then thaw in the refrigerator overnight before serving.
If you use fruit or syrup toppings, add them just before serving so they do not make the cups soggy.
FAQs
How long do cheesecake cups need to chill?
Cheesecake cups need to chill for at least 2 hours to allow the filling to set properly. For a firmer, creamier texture that is easier to slice or serve, refrigerate for 4 hours or overnight. Do not skip the chilling step, as the cups will be too soft and runny.
What is the best crust for cheesecake cups?
A classic graham cracker crust is the best and most traditional choice for cheesecake cups, offering a buttery and slightly crunchy base. You can substitute crushed vanilla wafers, Oreos, shortbread cookies, or digestive biscuits. Press the crust mixture firmly into each cup to prevent crumbling.
Can you use low fat cream cheese in cheesecake cups?
Yes, you can use low-fat or Neufchatel cream cheese, though the filling will be slightly less creamy and rich than the full-fat version. The recipe calls for 8 ounces of full-fat cream cheese for the best texture and flavor. If using low-fat, ensure it is softened to room temperature to avoid lumps.
How far in advance can you make cheesecake cups?
Cheesecake cups can be made up to 2 days in advance and stored covered in the refrigerator. For longer storage, freeze the cups without toppings for up to 2 months, wrapped tightly in plastic wrap and sealed in a container. Thaw frozen cups overnight in the refrigerator, and add any toppings just before serving.
Conclusion
Easy Cheesecake Cups are a no bake dessert that works just as well on a party table as it does on a quiet weeknight.
The graham crust, the creamy filling, and the fruit topping come together quickly, and the refrigerator does the rest of the work. This article is adapted from the original Easy Cheesecake Cups recipe by Sally Thompson.
Print
Easy Cheesecake Cups
Easy Cheesecake Cups Cheesecake is a favorite dessert, but a full sized version takes time and patience to set. These Easy Cheesecake Cups deliver the creamy, tangy, sweet character of classic cheesecake in far less time, and the individual portions suit parties, gatherings, or a quick personal treat.
- Total Time: 135 min
- Yield: 6–8 servings 1x
Ingredients
1 1/2 cups graham cracker crumbs
1/4 cup butter, melted
8 oz cream cheese, softened
1/2 cup powdered sugar
1 teaspoon vanilla extract
1 cup heavy whipping cream
1 cup cherry pie filling, or preferred topping
Instructions
1-In a bowl, mix graham cracker crumbs: In a bowl, mix graham cracker crumbs with melted butter until combined.
2-Divide the mixture into small dessert cups: Divide the mixture into small dessert cups and press down to form a crust. Refrigerate while preparing the filling.
3-In a large bowl, beat softened cream: In a large bowl, beat softened cream cheese with powdered sugar and vanilla extract until smooth.
4-In a separate bowl, whip the heavy: In a separate bowl, whip the heavy cream until stiff peaks form.
5-Gently fold the whipped cream into the: Gently fold the whipped cream into the cream cheese mixture.
6-Spoon or pipe the cheesecake filling into: Spoon or pipe the cheesecake filling into the prepared crust cups.
7-Refrigerate for at least 2 hours to: Refrigerate for at least 2 hours to allow the cheesecake to set.
8-Top with cherry pie filling or your: Top with cherry pie filling or your favorite topping before serving.
Last Step:
Please leave a rating and comment letting us know how you liked this recipe! This helps our business to thrive and continue providing free, high-quality recipes for you.- Prep Time: 15 min
- Method: no_cook
Nutrition
- Calories: 250-300
- Sugar: 18g
- Sodium: 150mg
- Fat: 15g
- Saturated Fat: 9g
- Carbohydrates: 30g
- Fiber: 1g
- Protein: 3g


