


Easy Caramel Apple Magic Bars
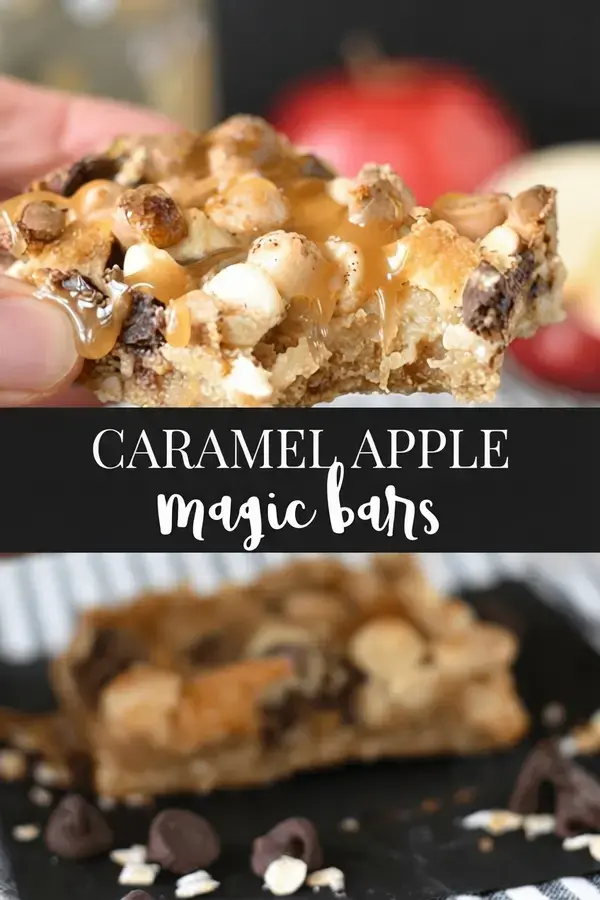
Fall baking does not get any easier than this, friends! These Caramel Apple Magic Bars are honestly simpler than apple pie, and they taste like a big warm hug from the orchard.
Instead of a graham cracker crust, we use an oatmeal crust that tastes just like apple crisp. That oat layer is my favorite part, and I have a feeling it will be yours too.
Here is the magic of magic bars: there is no measuring cup chaos and no mixer involved. You sprinkle on chocolate chips, apples, coconut, and walnuts, then drizzle sweetened condensed milk over the top.
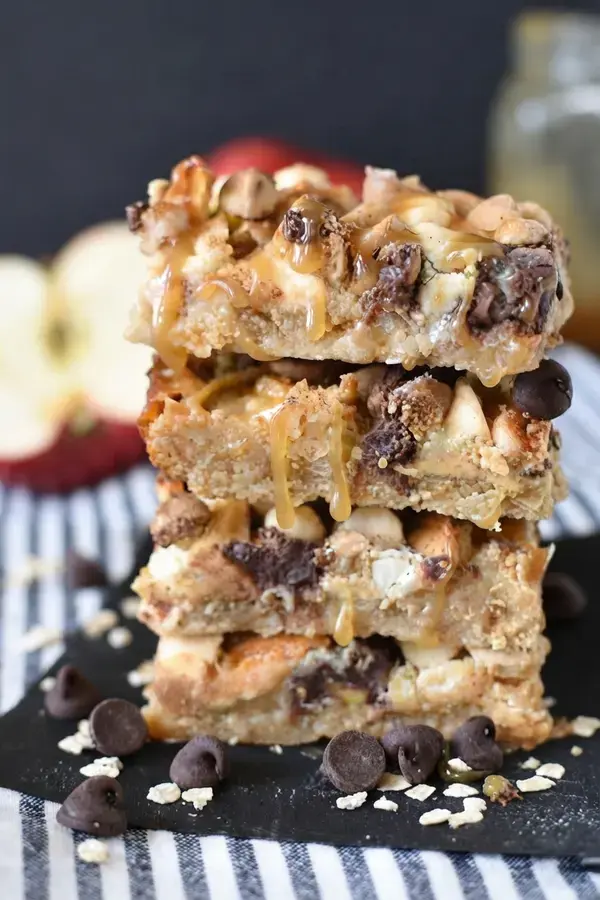
As they bake, that milk turns into a gooey caramel layer that holds everything together. Chocolate, apples, and caramel all in one bar cookie? You will love these!
I bake a batch every October when the kitchen starts smelling like fall, and the pan never lasts more than two days around here.
What are magic bars?
If you have never heard of magic bars, let me introduce you to one of the easiest desserts on the planet. They go by several names: 7 Layer Bars, 5 Layer Bars, and Hello Dolly Bars. They are all variations of the same wonderful layered dessert.
The classic version starts with a graham cracker crumb crust. On top of that you layer things like chocolate chips, butterscotch chips, coconut, and chopped pecans, whatever toppings sound good to you that day. The final layer is a can of sweetened condensed milk drizzled right over the cookies.
While the bars bake, the sweetened condensed milk turns into a gooey caramel layer that magically (hence the name!) glues every topping together. No stirring, no folding, no fuss. Just layer, drizzle, and bake. That is why we call them magic!
Jump To
- 1. What are magic bars?
- 2. Tips for making magic bars
- 3. How to make magic bars
- 4. What kind of apples are best for baking?
- 5. Caramel Apple Magic Bars Recipe
- 6. Can you freeze magic bars?
- 7. How to store magic bars?
- 8. Do I need to refrigerate magic bars?
- 9. What’s happening on the farm?
- 10. Here’s a few other apple recipes you will love!
- 11. FAQs
- 12. Caramel Apple Magic Bars
Tips for making magic bars
Let me get a little honest with you here. My mom made classic magic bars when I was growing up, and I never loved them. There were two reasons.
First, I am just not a graham cracker person, unless those crackers are holding marshmallows and chocolate in a s’more.
Second, her recipe poured the sweetened condensed milk over the graham cracker crust before adding the toppings, and I always thought the whole thing tasted better with the milk on top of everything instead.
Sorry, Mom! The good news is that once I started playing with the method, magic bars became one of my favorite desserts. Here is what I have learned.
Experiment with the crust
You do not have to stick with graham crackers! Some fun crust options to try include:
- Crushed Oreos
- Vanilla Wafers
- Peanut butter sandwich cookies
- An oatmeal crust, which is what we use in this recipe
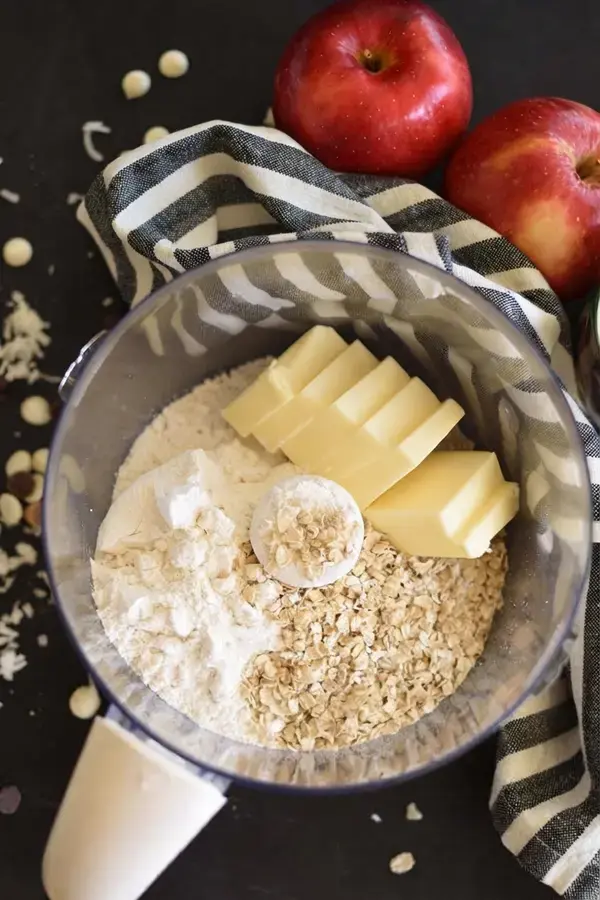
The oatmeal crust made from butter, flour, brown sugar, and oats gives these bars that apple crisp flavor, and it is absolutely the best pairing for the apple and caramel layers.
Bake the crust for 5 minutes first
Whatever crust you choose, bake it for 5 minutes before adding your toppings. This little step helps the crust set up so the sweetened condensed milk does not soak in and make everything soggy. It takes almost no extra effort and makes a big difference!
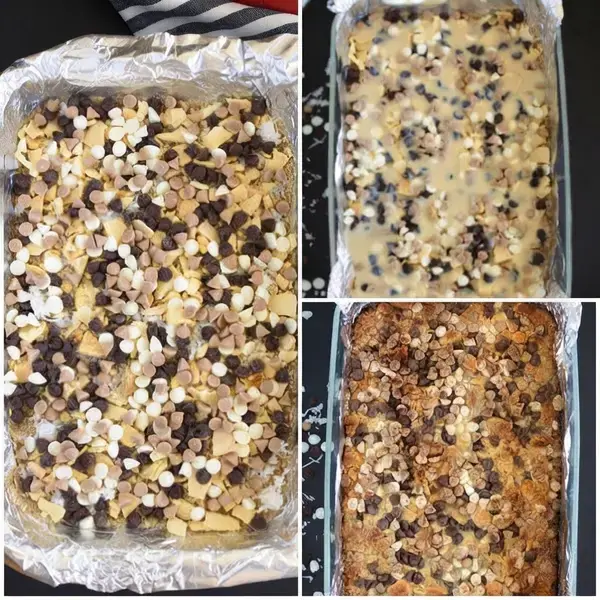
Pour the condensed milk over the toppings, not under them
This is my number one tip. Pour the sweetened condensed milk over the toppings instead of under them. It keeps everything extra gooey and caramel like. When the milk sits on top, it bakes down through all the layers and makes every bite rich and sticky in the best way.
Line the pan for easy removal
Magic bars are gooey, and gooey desserts can stick. Line your baking pan with aluminum foil, then spray it with nonstick baking spray. Once the bars have cooled completely, lift the whole thing out of the pan using the foil. Then cut the bars into squares with a knife. No crumbling, no sticking, no sad broken bars!
The secret to perfect magic bars: bake the crust briefly, drizzle the milk on top of the toppings, and let the bars cool completely before cutting.
How to make magic bars
The method could not be simpler. Press the crust into a greased pan and bake it for 5 minutes. Sprinkle your toppings over the warm crust. Drizzle sweetened condensed milk over the toppings. Bake the assembled bars, then let them cool and cut into squares. That is the whole process!
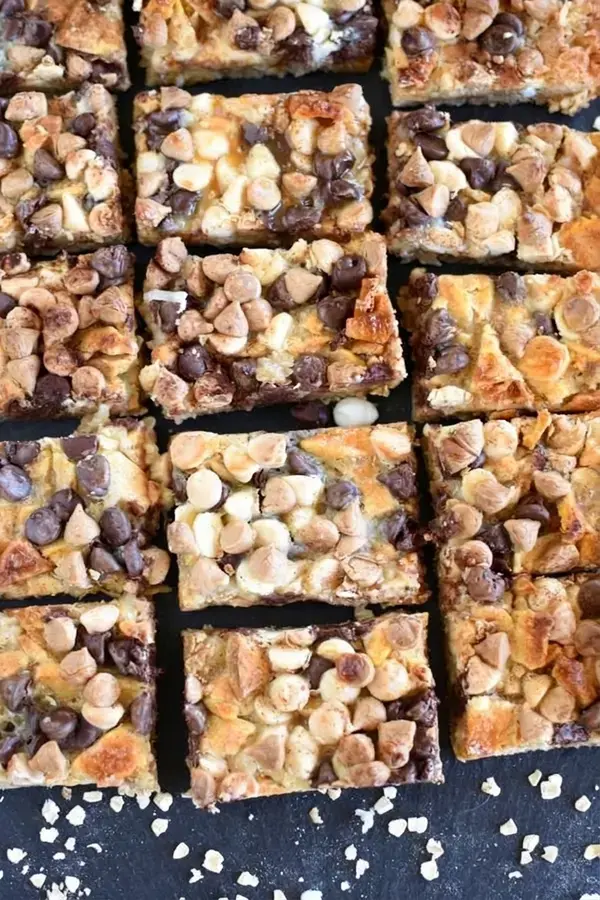
What kind of apples are best for baking?
Here is a question I get asked a lot. Every baking recipe is a little different when it comes to apples, because it depends on how long the apples will bake and how sweet you want the finished dessert to be.
Apples that shine in a quick pie can turn mushy in a slow baked cake, and tart apples might need extra sugar in a mild dessert.
For these magic bars, my favorite trick is to use chopped dehydrated apples. Two reasons. First, I always keep them on hand in my pantry, so I can make this dessert any time the craving hits.

Second, dehydrated apples contain no extra moisture, so they will not add water to the magic bar cookies and make them soggy. They simply soften as the bars bake and give you apple flavor in every bite.
If you would rather use fresh apples, that works too! Just peel, core, and dice them, then add them to the magic bars the same way. If you are looking for my favorite baking apple varieties, my Simple Apple Tart recipe lists them all out for you.
Caramel Apple Magic Bars Recipe
Here is the full recipe card so you can print it and pin it for fall baking season. This makes 24 bars, with about 15 minutes of prep and 30 minutes of bake time.
Ingredients
- 1/2 cup butter
- 1 cup flour
- 3/4 cup oats
- 3/4 cup brown sugar
- 1 cup chopped dehydrated apples
- 1 cup white chocolate chips
- 1 cup semi sweet chocolate chips
- 1 cup shredded coconut
- 1/2 cup chopped walnuts
- 1 can (14 ounces) sweetened condensed milk
- 1/2 teaspoon apple pie spice
Instructions
- Preheat the oven to 350 degrees. Line a 9×13 inch baking pan with aluminum foil, then spray with nonstick baking spray. Set aside.
- Cut the butter into 8 pieces. Add the butter, flour, and brown sugar to a food processor. Pulse until it resembles coarse crumbs. Add the oats and pulse to combine.
- Press the oat crumb mixture into the bottom of the prepared baking pan. Bake for 5 minutes.
- Sprinkle the chopped apples, white and semi sweet chocolate chips, coconut, and walnuts over the top of the baked crust.
- Mix the sweetened condensed milk and apple pie spice together. Drizzle it evenly over the baking pan. Do not worry about stirring or spreading it!
- Bake for 25 to 30 minutes. Watch it closely and do not over bake, or the bars will be dry.
- Cool completely. Cut into squares. Serve.
- Store in an airtight container at room temperature for up to 3 days.
Nutrition (per bar)
| Nutrient | Amount |
|---|---|
| Calories | 320 kcal |
| Carbohydrates | 36 g |
| Protein | 4 g |
| Fat | 18 g (10 g saturated) |
| Fiber | 3 g |
| Sugar | 21 g |
| Sodium | 74 mg |
| Cholesterol | 13 mg |
Can you freeze magic bars?
Yes, magic bars freeze beautifully, which makes them a wonderful make ahead dessert! Cut the bars into individual squares first, then freeze them. Freezing them already cut means you can pull out exactly how many you need instead of thawing the whole batch.
I like to tuck a few squares into the freezer before a busy week. When friends drop by or the kids want an after school treat, there is dessert ready and waiting.
The gooey caramel layer firms up in the freezer, and once the bars come back to room temperature, they taste just as chewy and delicious as the day you baked them.
How to store magic bars?
Store your magic bars at room temperature in an airtight container. Keep the lid on tight so the bars stay soft and chewy instead of drying out. Stored this way, they will keep for up to 3 days.
One tip from my kitchen: if your counter is warm, the chocolate chips can get a little soft, so choose a cool spot away from the stove or a sunny window.
Do I need to refrigerate magic bars?
Good news for fridge space hoarders like me: most magic bars do not need refrigeration! The sweetened condensed milk bakes right into the bars, so they hold up just fine at room temperature in an airtight container.
That said, refrigerating them would help them stay good longer. If you have made a big pan and you know it will take your family more than three days to work through it, pop the container in the fridge for extra keeping time.
The chill also makes the bars slightly firmer, which some folks actually prefer for cutting clean squares. Cold or room temperature, they are delicious either way!

What’s happening on the farm?
It is potato harvest break around here! The kids are home from school for two whole weeks, and I love having them underfoot, even if the house gets a lot louder.
Funny thing is, we do not actually grow potatoes, so there is nothing to harvest on our place. But there is plenty of other work to finish before winter rolls in, and fall is when we hustle.
Our big project right now is building a new feed bunk for some of our cows. That means pouring concrete, and lots of it. We are putting in about four loads of concrete every day.
The boys have been champs about it. They set up the forms, wet the ground down so the dry dirt does not pull moisture out of the wet concrete too fast, and then rake, tamp, and float the concrete until it is smooth.
Last week I carried lunch out to the crew, and before I knew it, I had a trowel in my hand helping finish a section. Here is a little secret: before the kids were big enough to help, finishing concrete was my job!
I used to tell people it is a lot like frosting a cake. You work the surface until it is smooth and even, and there is real satisfaction in stepping back to look at your work.

When this project is finished, the new manger space will let us feed about 400 cows. That is a lot of hungry mouths! I cannot wait to cross this job off the to do list, because right now it eats up all our time, and concrete is not cheap.
In the meantime, warm pans of these magic bars keep everyone fueled. Nothing motivates a concrete crew quite like the promise of caramel apple bars at lunch break!
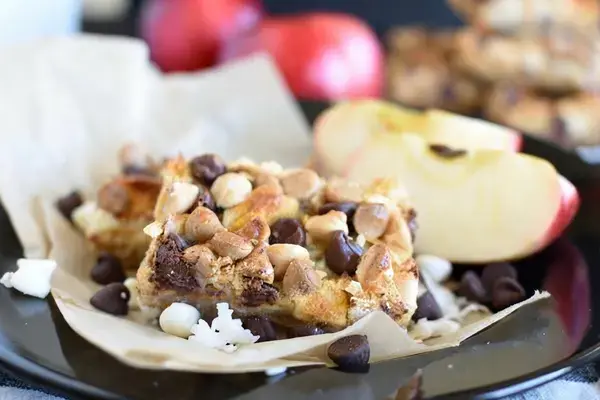
Here’s a few other apple recipes you will love!
If your kitchen is as apple obsessed as mine is this time of year, here are more recipes to try.
Apple Dessert Recipes
For more sweet apple treats, check out these favorites: Caramel Apple Blondies, Caramel Apple Sliders, Apple Cheesecake Bars, Caramel Apple Dip, and Salted Caramel Dip.
Apple Salads and Dips
If you want something on the lighter side, try these: Apple Salad, Greek Yogurt Apple Salad, Peanut Butter Fruit Dip, and Toffee Apple Dip. And when you are in the mood for more easy baking, browse my other easy bar cookie recipes, plus a whole collection of Halloween recipes for spooky season!
FAQs
What is the best way to keep caramel apple magic bars from getting soggy?
To prevent a soggy crust, pre-bake the oatmeal crust for 5 minutes at 350°F before adding the toppings. This sets the crust and creates a barrier against the moist sweetened condensed milk. Using dehydrated apples instead of fresh ones also helps, as they add moisture without introducing excess water.
Can I use fresh apples instead of dehydrated apples in this recipe?
Yes, you can substitute fresh apples for dehydrated apples. Peel, core, and dice the fresh apples into small, uniform pieces before adding them to the bars. Good varieties for baking include Honeycrisp, Granny Smith, or Braeburn, as they hold their shape well and offer a balance of sweetness and tartness.
How should I store caramel apple magic bars and can they be frozen?
Store caramel apple magic bars in an airtight container at room temperature for up to 3 days. For longer storage, you can freeze them for up to 3 months. To freeze, cut the bars into individual squares, wrap each tightly in plastic wrap, and place them in a freezer-safe bag or container. Thaw at room temperature before serving.
What is the best way to cut and remove magic bars from the pan?
Line the 9×13 inch baking pan with aluminum foil and spray it with nonstick baking spray before adding the crust. After baking, allow the bars to cool completely before lifting them out using the foil. Use a sharp knife, wiping it clean between cuts, to slice the bars into neat squares for serving.
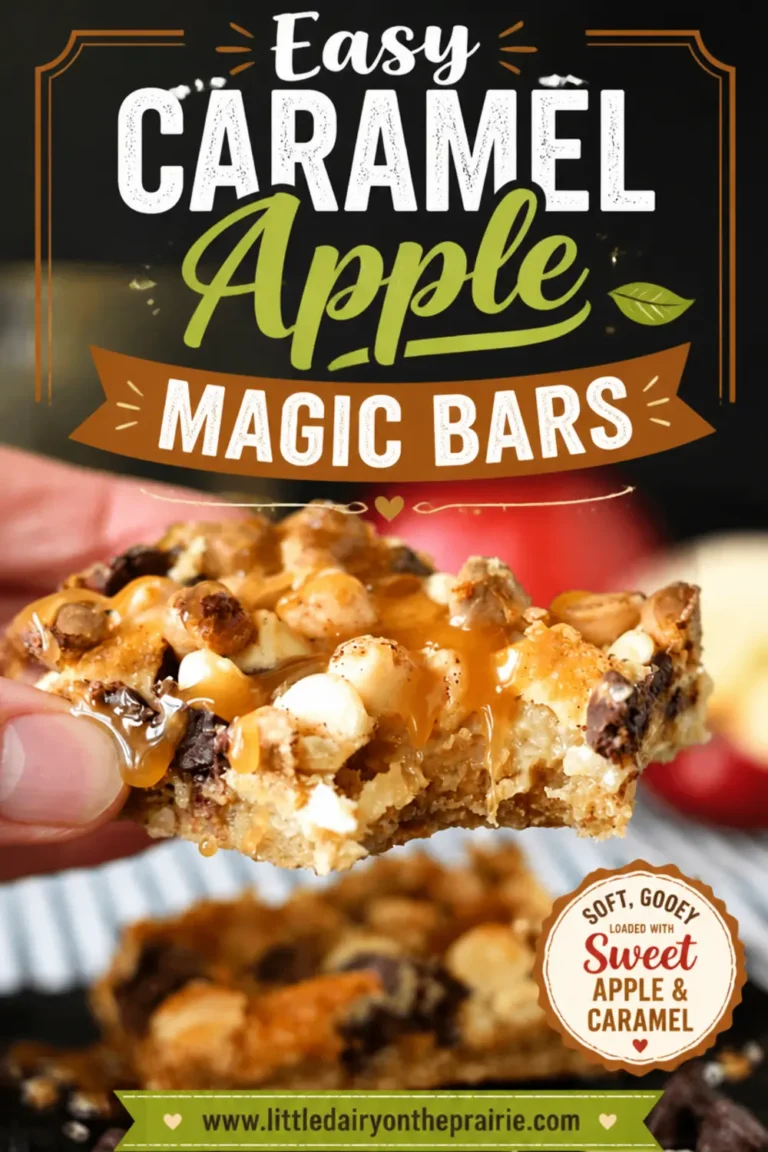
Caramel Apple Magic Bars
Easy Caramel Apple Magic Bars Fall baking does not get any easier than this, friends! These Caramel Apple Magic Bars are honestly simpler than apple pie, and they taste like a big warm hug from the orchard.
- Total Time: 105 min
- Yield: 24 bars 1x
Ingredients
Ingredients
1/2 c. butter
1 c. flour
3/4 c. oats
3/4 c. brown sugar
1 c. dehydrated apples, chopped
1 c. white chocolate chips
1 c. semi-sweet chocolate chips
1 c. shredded coconut
1/2 c. walnuts, chopped
1 14 oz can sweetened condensed milk
1/2 tsp. apple pie spice
Instructions
Instructions
1-Preheat oven to 350 degrees: Preheat oven to 350 degrees. Line 9″ x 13″ baking pan with aluminum foil, then spray with nonstick baking spray. Set aside.
2-Cut butter into 8 pieces: Cut butter into 8 pieces. Add butter, flour, and brown sugar to food processor. Pulse until it resembles course crumbs. Add oats and pulse to combine.
3-Press oat crumb mixture into the bottom: Press oat crumb mixture into the bottom of prepared baking pan. Bake for 5 minutes.
4-Sprinkle chopped apples, white and semi-sweet chocolate: Sprinkle chopped apples, white and semi-sweet chocolate chips, coconut, and walnuts over the top of baked crust.
5-Mix sweetened condensed milk and apple pie: Mix sweetened condensed milk and apple pie spice together. Drizzle it evenly over the baking pan. Don’t worry about stirring or spreading it.
6-Bake for 25-30 minutes: Bake for 25-30 minutes. Watch it close and don’t over bake or it will be dry.
7-Cool: Cool. Cut into squares. Serve.
8-Store in an airtight container at room: Store in an airtight container at room temperature for up to 3 days.
Last Step:
Please leave a rating and comment letting us know how you liked this recipe! This helps our business to thrive and continue providing free, high-quality recipes for you.- Prep Time: 15 min
- Cook Time: 30 min
- Method: bake
Nutrition
- Calories: 320kcal
- Sugar: 21g
- Sodium: 74mg
- Fat: 18g
- Saturated Fat: 10g
- Carbohydrates: 36g
- Fiber: 3g
- Protein: 4g
- Cholesterol: 13mg


