

Vietnamese Pickled Vegetables (Đồ Chua)
If you have ever bitten into a Banh Mi and wondered what gives it that bright, snappy lift, the answer is often Đồ Chua, the Vietnamese pickle of daikon radish and carrot. These pickled vegetables are a quiet staple in Vietnamese cooking.
They are vegan, they need no cooking at all, and they keep beautifully in the refrigerator, ready to be pulled out whenever a dish needs a little crunch.
I make a jar almost every week. The prep is short, just 15 minutes at the cutting board, plus a 30 minute soak while the vegetables release their extra liquid. After that, the jar does the rest of the work.

The flavor is sweet, tangy and lightly salty, and the texture stays crisp rather than soft. That combination is why these pickles show up beside so many dishes.
Spoon them over Bun cha bowls, tuck them into Banh Mi, or set the jar on the table at a cookout and watch it empty. They are simple enough for a beginner and useful enough that you will want a backup jar in the fridge.
Jump To
- 1. Vietnamese Pickled Vegetables (Đồ Chua)
- 2. I personally enjoy a 50 50 ratio of carrots and radish for these pickled vegetables but in Vietnam, there are usually way more radish than carrots.
- 3. PREPARING THE VEGETABLES
- 4. PICKLING LIQUID
- 5. Drain the vegetables from the water before adding to the jar with the pickling liquid.
- 6. I also recommend using these for:
- 7. You can pin this image:
- 8. Ingredients
- 9. Instructions
- 10. Recipe details
- 11. FAQs
- 12. Vietnamese Pickled Daikon Radish and Carrots (Đồ Chua)
I personally enjoy a 50 50 ratio of carrots and radish for these pickled vegetables but in Vietnam, there are usually way more radish than carrots.
There is no single correct ratio here, and that is part of the charm. I personally enjoy a fifty fifty split of carrots and radish, mostly because I love the orange color and the slightly sweeter bite that carrot brings to the jar.
In Vietnam, the pickle usually leans much heavier on radish, and the carrot plays a supporting role instead of sharing the spotlight.

Both versions taste wonderful. If you are working with what you already have in the refrigerator drawer, use whatever ratio your vegetables allow. If you are cooking for someone who finds radish a little sharp, push the carrot up.
If you want the more traditional flavor, let the radish lead the way. The pickling liquid stays the same either way, so the choice is entirely about your own taste and your pantry.
PREPARING THE VEGETABLES
Start by peeling both the daikon radish and the carrot. Peeling matters more than it sounds, because the outer skin can stay tough even after the vegetables sit in brine. Then slice them thin.
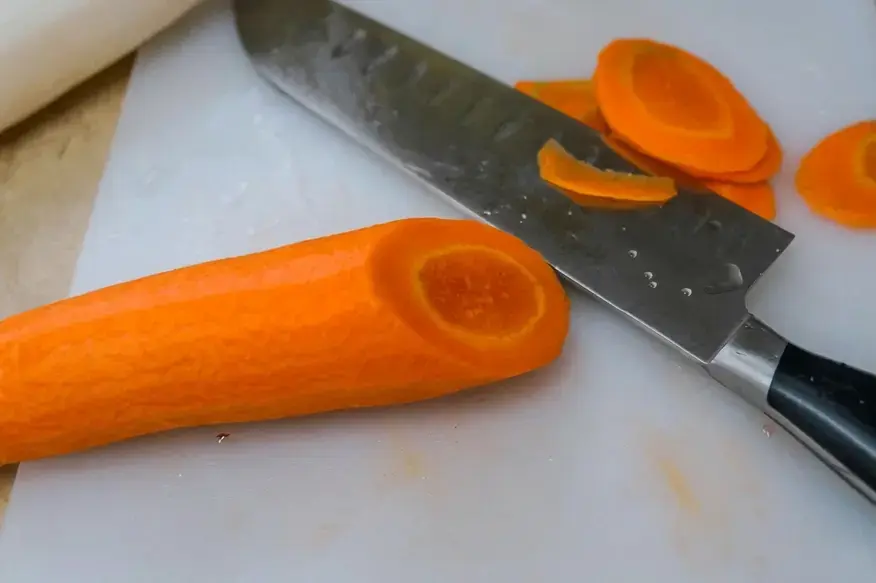
The target is about 1/4 inch thick, and you can get there in two ways. A mandolin makes fast, even work of it.
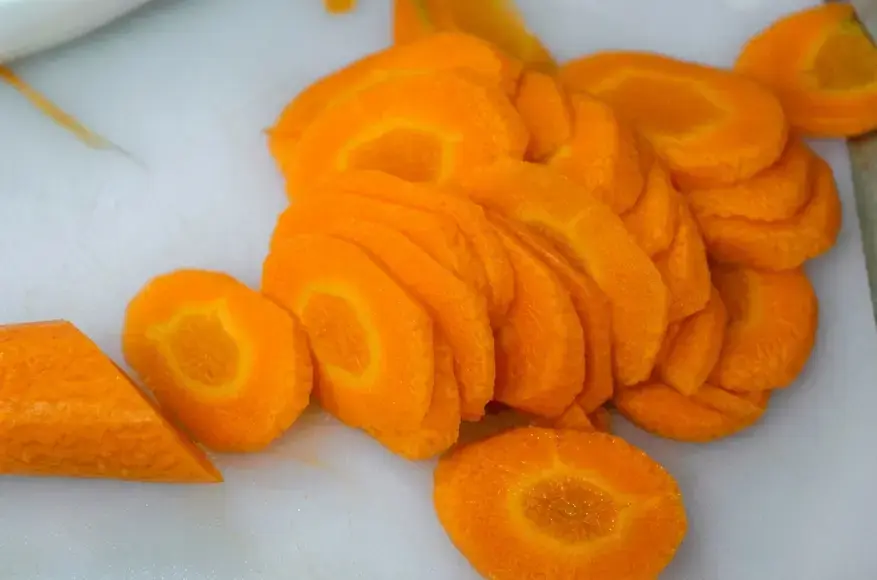
If you do not have one, lay each vegetable on the board and cut it on a sharp diagonal, which gives you long oval slices that are easier to stack.
Once you have your thin slices, stack a few at a time and cut them into matchstick pieces, roughly the size of a short wooden match. Try to keep the pieces similar in size, because even pieces pickle at the same rate.
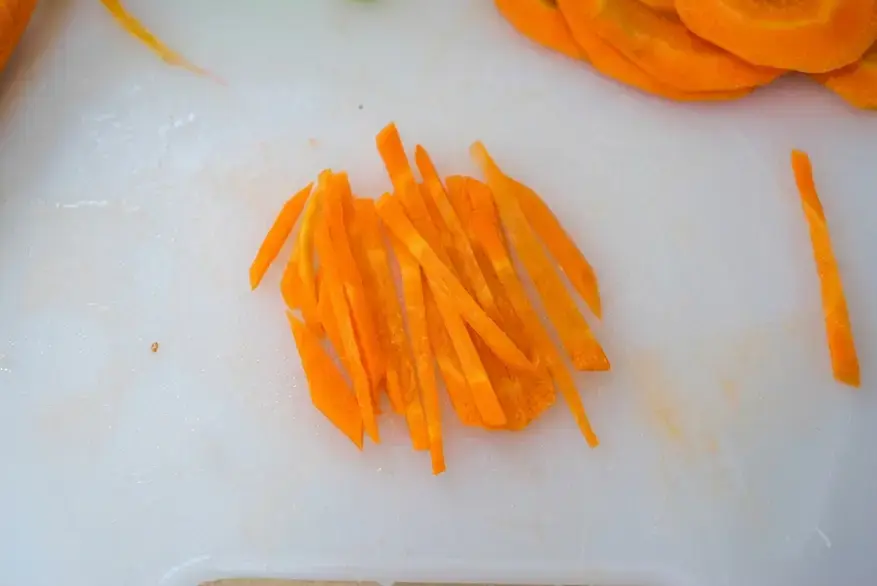
If some are thick and some are paper thin, the thin ones will soften long before the thick ones are ready.
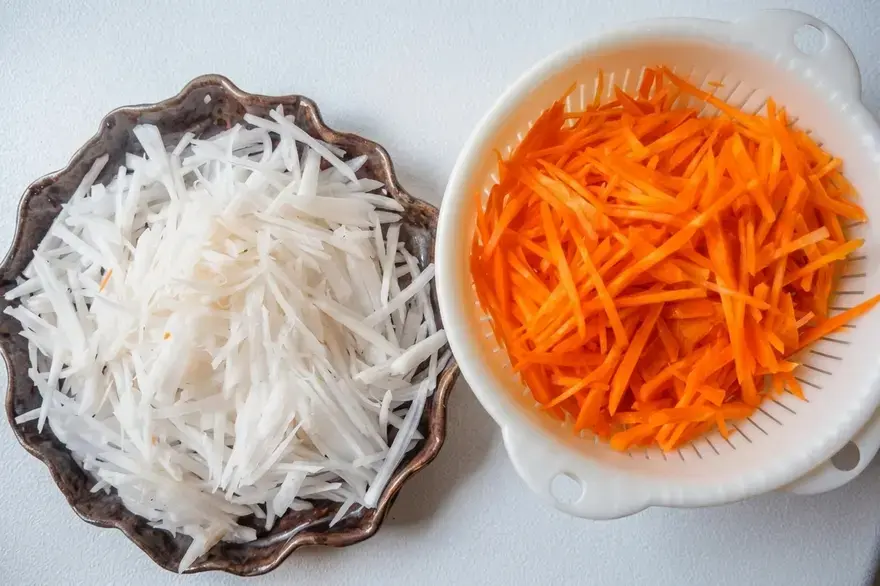
This is the step where I usually put on some music. It takes a few minutes, and a sharp knife makes it feel easy. A slightly messy pile of matchsticks is perfectly fine. Nobody is grading the shape once everything is in the jar.
PICKLING LIQUID
The brine comes together in one bowl, and it takes less than two minutes. Pour 1 cup of boiling hot water into a heatproof bowl or jug. Add 6 tbsp of cane sugar and stir until the sugar has fully dissolved.
Hot water is doing the work here, which is why we start with it rather than cold water. Once the sugar is gone, stir in 4 tbsp of vinegar.
Now taste it. This is the moment to adjust the sweetness and sourness to your liking. If you prefer a sharper pickle, add a little more vinegar.

If you like a rounder, sweeter pickle, add a little more sugar. Then set the liquid aside and let it cool completely. This part is not optional.
Warm brine poured over the vegetables will soften them and undo the crunch you are working for.
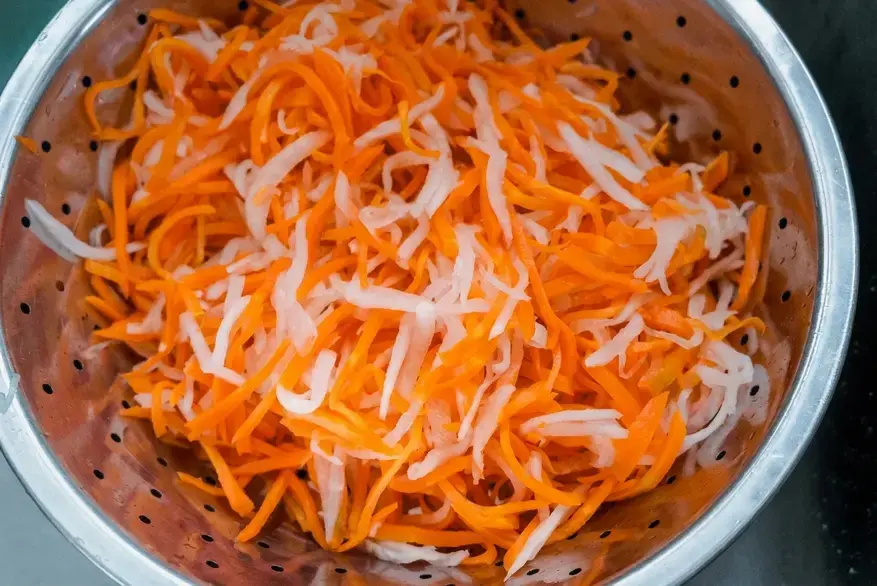
While the liquid cools, salt the vegetables. Place the sliced radish and carrot in a large strainer set over a catch basin or a bowl, add 1 heaping tbsp of salt, and mix well so every piece is coated.
Then walk away for at least 30 minutes. The salt pulls water out of the vegetables, and you will see it collecting in the basin below. That is exactly what you want, because drier vegetables stay crisp in the jar.
After the resting time, rinse the vegetables under running water 2 to 3 times to wash away the salt. Do not skip this, or the finished pickle will taste salty rather than balanced.
Drain the vegetables from the water before adding to the jar with the pickling liquid.
Once the vegetables are rinsed, drain them well and squeeze them gently with your hands to press out the excess liquid. Be firm but kind. You want them dry enough that they will not water down the brine, but you do not want to crush them into a paste.

Pack the vegetables into a clean jar and press them down as you go. Compressing them leaves less empty space and helps keep everything under the liquid. Then pour the cooled pickling liquid over the top so the vegetables are completely submerged.


If a few pieces still float above the surface, add 2 to 3 tbsp of extra water to cover them. Seal the jar tightly, and if you added that extra water, give the jar a good shake to mix everything together.

Now the jar needs time. You can leave it at room temperature to pickle. I left mine for 24 hours before moving it to the refrigerator, and that timing worked beautifully for me.

Keep in mind that this depends on how warm your kitchen is. The room temperature where I cook is usually around 30C, which is on the warm side, so the pickles move quickly.


In a cooler kitchen, give them a little longer and taste as you go.

After that first day, transfer the jar to the refrigerator. The pickles keep well there and actually get better over the next few days as the brine reaches the center of every piece. Serve them with barbecue, noodles, rice dishes, or anything that needs a bright, tangy crunch.
I also recommend using these for:
These pickles are more than a sandwich topping. They add crunch and acidity to all sorts of dishes, and I reach for them constantly.
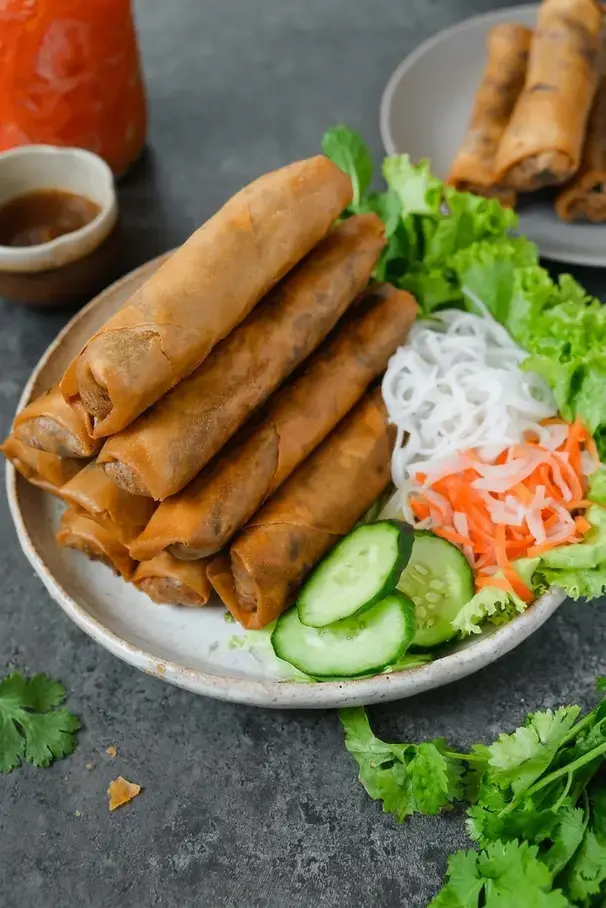
- Cha Gio Chay, Vietnamese fried vegetarian spring rolls. The cool, tangy pickles balance the hot, crispy rolls.
- Bun Cha Gio Chay, noodle bowls with those same fried vegetarian spring rolls. A spoonful of pickles over the noodles wakes up the whole bowl.
- Barbecue plates, where the acidity cuts through rich grilled meat and smoky sauces.
- Rice bowls, grain bowls and simple weeknight dinners that need one more layer of flavor.
If you are building a Vietnamese meal at home, keep the jar on the table. People add more than you expect, and the bowl of noodles disappears faster.
You can pin this image:
If you want to keep this recipe handy, pin the image above to your favorite recipe board. That way, the next time you are planning Banh Mi or a noodle night, the recipe is right where you left it.
Ingredients
The recipe makes 1 large jar. Here is everything you need, grouped the way I like to set it out on the counter before I start.
| Component | Ingredients |
|---|---|
| Veggies | 250 g daikon radish, peeled and sliced into matchsticks 250 g carrot, peeled and sliced into matchsticks 1 heaping tbsp salt |
| Pickling liquid | 1 cup boiling hot water 6 tbsp cane sugar, or to taste 4 tbsp vinegar |
| Additional liquid | 2 to 3 tbsp water, extra if needed to submerge the vegetables |
A mandolin or a sharp knife and a cutting board will get the vegetables into thin 1/4 inch slices that you then cut into matchsticks.
A large strainer with a catch basin is the other piece of equipment that really helps, since the salted vegetables release a surprising amount of liquid. You will also need one clean jar with a tight fitting lid.
Instructions
Veggies
- In a large strainer with a catch basin, place the sliced radish and carrot. Add the salt and mix well to coat the vegetables in the salt.
- Leave to sit for at least 30 minutes to remove some of the liquid from the vegetables.
Pickling liquid
- Meanwhile, mix together the hot water and sugar until the sugar has dissolved. Mix in the vinegar. Feel free to adjust to your desired sweetness and sourness levels. Leave this mixture to completely cool.
Pickling the veggies
- After leaving the vegetables to sit, run them through water 2 to 3 times to wash out the salt.
- Drain the vegetables from the water and carefully squeeze to remove the excess liquid.
- Transfer the vegetables into the jar and carefully compress them down.
- Pour the liquid into the jar to completely submerge the vegetables. If they are not submerged, add 2 to 3 tbsp more water to cover them.
- Seal the jar well, then give it a good shake if you added more water.
Storage
- You can leave the jar at room temperature to allow it to pickle. I left mine for 24 hours before placing it in the refrigerator. Note that this can depend on your room temperature. The room temperature where I cook is usually around 30C.
One small note that makes a big difference: let the brine cool completely before it touches the vegetables. Warm liquid softens the crisp texture you are trying to build.
Recipe details
Here is the short version of what this jar asks of you. There is no cooking involved, only a little patience while the salt does its work and the brine cools.
| Detail | Value |
|---|---|
| Prep time | 15 minutes |
| Soak time | 30 minutes |
| Total time | 45 minutes |
| Yield | 1 large jar |
| Method | No cook |
If you like to keep track of the numbers, the source nutrition for the whole jar is listed below. Keep in mind that this is for the full jar, not a single serving, and your own jar will vary a little depending on how much brine you use and how much sugar and vinegar you add to taste.
| Nutrient | Amount per jar |
|---|---|
| Calories | 438 kcal |
| Carbohydrates | 106 g |
| Protein | 4 g |
| Fat | 1 g |
| Saturated fat | 1 g |
| Fiber | 11 g |
| Sugar | 90 g |
| Sodium | 229 mg |
Make a jar this week and see how quickly it becomes a habit. Once the pickles are in the refrigerator, dinner gets a little brighter and a lot crunchier with almost no effort at all.
FAQs
What is the best ratio of daikon to carrots for authentic Vietnamese Đồ Chua?
While many home cooks prefer a 50-50 balance for a milder, colorful pickle, authentic Vietnamese Đồ Chua traditionally uses significantly more daikon radish than carrots. The pickle is defined by the crunchy, subtly peppery daikon, with carrots used more sparingly as a color accent. You can adjust this ratio entirely to your taste or what is available at the store.
Why do you salt the vegetables before making Đồ Chua, and how is it done?
Salting is the key step for achieving crunchy, not soggy, pickles. The salt draws out excess moisture from the sliced daikon and carrots. To do this, toss the cut vegetables with one heaping tablespoon of salt and let them sit in a strainer over a bowl for at least 30 minutes. You must then rinse the vegetables 2 to 3 times and squeeze them dry to remove the salt before pickling.
How long should I let Đồ Chua pickle before eating?
The pickles are ready to eat after sitting at room temperature for about 24 hours. A cooler room (around 70°F or 21°C) might need slightly more time. After this initial pickling period, you should transfer the jar to the refrigerator. The flavor will continue to develop and deepen as they chill.
What is the correct vinegar and sugar ratio for the pickling brine?
A classic and balanced brine starts with one cup of boiling water, six tablespoons of cane sugar, and four tablespoons of distilled white vinegar. The sugar must be fully dissolved in the hot water before adding the vinegar. Always let this mixture cool completely before pouring it over your salted and dried vegetables to maintain their crunch.

Vietnamese Pickled Daikon Radish and Carrots (Đồ Chua)
Vietnamese Pickled Vegetables (Đồ Chua) If you have ever bitten into a Banh Mi and wondered what gives it that bright, snappy lift, the answer is often Đồ Chua, the Vietnamese pickle of daikon radish and carrot. These pickled vegetables are a quiet staple in Vietnamese cooking.
- Total Time: 45 min
- Yield: 1 large jar 1x
Ingredients
Veggies
250 g daikon radish, peeled and sliced into matchsticks
250 g carrot, peeled and sliced into matchsticks
1 heaping tbsp salt
Pickling Liquid
1 cup boiling hot water
6 tbsp cane sugar, or to taste
4 tbsp vinegar
Additional Liquid
2–3 tbsp water, extra if needed
Instructions
Veggies
1-In a large strainer with a catch: In a large strainer with a catch basin, place the sliced radish and carrot. Add in the salt and mix well to coat the veggies in the salt.
2-Leave to sit for at least 30: Leave to sit for at least 30 minutes to remove some of the liquid from the veggies.
Pickling Liquid
3-Meanwhile, prepare the pickling liquid by mixing: Meanwhile, prepare the pickling liquid by mixing together the hot water and sugar until the sugar has dissolved. Mix in the vinegar. Feel free to adjust to your desired sweetness and sourness levels. Leave this mixture to completely cool.
Pickling the Veggies
4-After leaving the veggies to sit, run: After leaving the veggies to sit, run it through water 2-3 times to wash out the salt.
5-Drain the veggies from the water and: Drain the veggies from the water and carefully squeeze to remove the excess liquid.
6-Transfer the veggies into the jar: Transfer the veggies into the jar. Carefully compress into the jar.
7-Pour the liquid into the jar to: Pour the liquid into the jar to completely submerge the veggies. If the veggies aren’t submerged, feel free to add 2-3 tbsp more water to completely submerge.
8-Seal the bottle well then give the: Seal the bottle well then give the bottle a good shake (if you added more water).
Storage
9-You can leave the jar in room: You can leave the jar in room temperature to allow it to pickle. I left mine for 24 hours before placing it in the refrigerator. Note that this can depend on your room temperate. The room temperature here is usually at 30C.
Last Step:
Please leave a rating and comment letting us know how you liked this recipe! This helps our business to thrive and continue providing free, high-quality recipes for you.- Prep Time: 15 min
- Cook Time: 0 min
- Method: no_cook
Nutrition
- Calories: 438 kcal
- Sugar: 90 g
- Sodium: 229 mg
- Fat: 1 g
- Saturated Fat: 1 g
- Carbohydrates: 106 g
- Fiber: 11 g
- Protein: 4 g


