Ingredients
– 1/2 cup graham cracker crumbs – Creates the classic crunchy base that provides texture contrast to the creamy filling
– 2 tablespoons melted butter – Binds the crust together and adds rich flavor
– 1 tablespoon sugar – Sweetens the crust for a balanced foundation
– 12 ounces softened cream cheese – The star of the show, providing that signature tangy creaminess
– 1/3 cup sugar – Sweetens the filling without overpowering the cream cheese flavor
– 1 large egg – Gives structure to the cheesecake while maintaining a silky texture
– 1 teaspoon vanilla extract – Enhances the overall flavor profile with aromatic depth
– 1 tablespoon lemon juice – Adds brightness that balances the richness of the cream cheese
Instructions
1-First Step: Prepare the Crust Start by preheating your oven to 325°F (165°C). While the oven heats, prepare your baking vessel. For this recipe, a 7×4-inch loaf pan works perfectly, but you could also use a 6-inch cake pan or four 6-ounce ramekins. Line your chosen pan with parchment paper, leaving an overhang on the sides to make removing the cheesecake easier later. In a small bowl, combine the graham cracker crumbs, melted butter, and sugar. Mix until all the crumbs are evenly coated and the mixture holds together when pressed. Pour the crumbs into your prepared pan and press firmly into the bottom using the back of a spoon or the bottom of a measuring cup. Creating an even, compact crust is essential for structural stability. Once pressed, place the pan in the refrigerator while you prepare the filling.
2-Second Step: Prepare the Filling In a medium mixing bowl, beat the softened cream cheese with an electric mixer until completely smooth. This is a crucial step – any lumps in the cream cheese will remain in the finished cheesecake. Scrape down the sides of the bowl to ensure everything is evenly incorporated. Add the sugar and continue mixing until well combined. The mixture should be smooth and free of graininess. Next, add the vanilla extract and lemon juice, mixing briefly to incorporate. These flavor enhancers work together to create that classic cheesecake taste profile. Add the egg and mix just until combined. Be careful not to overmix at this stage, as incorporating too much air can lead to cracks during baking. The batter should be smooth and creamy with a slight sheen.
3-Third Step: Assemble and Bake Remove the crust from the refrigerator and pour the filling over it, spreading evenly. Gently tap the pan on the counter a few times to release any air bubbles trapped in the batter. For the best results, bake your cheesecake in a water bath. Place your filled pan inside a larger baking dish, then carefully pour hot water into the larger dish until it reaches halfway up the sides of your cheesecake pan. This technique helps regulate temperature and creates steam, resulting in a smoother texture and fewer cracks. Bake for 30-35 minutes, or until the edges are set but the center still jiggles slightly when you gently shake the pan. The center should be about 2 inches in diameter and have a gentle wobble like gelatin. The residual heat will continue cooking the cheesecake as it cools.
4-Fourth Step: Cool Gradually This cooling process is just as important as the baking itself. Turn off the oven and crack the door open slightly, leaving the cheesecake inside for 1 hour. This gradual cooling helps prevent cracks from forming due to sudden temperature changes. After the hour, remove the cheesecake from the oven and run a thin knife around the edges to loosen it from the pan. This prevents the cheesecake from pulling away from the sides as it cools further, which can also cause cracks. Let it cool at room temperature for 30 minutes, then cover and refrigerate for at least 4 hours, though overnight is even better. This chilling time allows the flavors to develop and the texture to set properly.
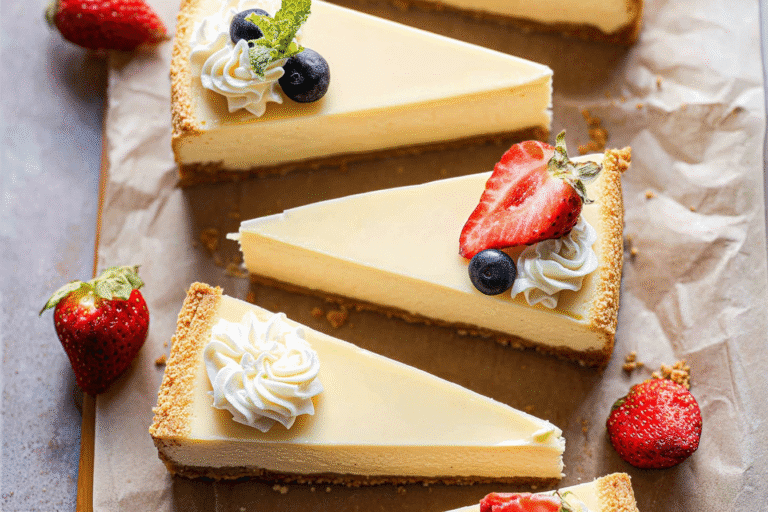
5-Final Step: Serve and Enjoy Once fully chilled, remove the cheesecake from the refrigerator. If using a loaf pan with parchment paper, simply lift the cheesecake out using the parchment overhang. For other pans, run a warm knife around the edges and carefully release the springform or invert onto a plate. Slice with a sharp knife that has been dipped in hot water and wiped clean between cuts for the cleanest slices. The small batch nature of this recipe means each slice will be perfectly portioned, typically serving 4-6 people. Top with fresh berries, a dollop of whipped cream, or a drizzle of chocolate sauce if desired. For more fruity dessert inspiration, you might enjoy our cherry crisp recipe or our fresh cherry pie recipe, both of which pair beautifully with cheesecake flavors.
Last Step:
Please leave a rating and comment letting us know how you liked this recipe! This helps our business to thrive and continue providing free, high-quality recipes for you.Notes
🧀 Room temperature ingredients blend lump-free for ultra-creamy results.
💧 Water bath prevents cracks; foil seals perfectly.
❄️ Overnight chill maximizes flavor and firm slicing.
- Prep Time: 15 minutes
- Chill: 4 hours
- Cook Time: 55 minutes
- Category: Dessert
- Method: Bake
- Cuisine: American
- Diet: Vegetarian
Nutrition
- Serving Size: 1 slice
- Calories: 320 kcal
- Sugar: 18g
- Sodium: 260mg
- Fat: 25g
- Saturated Fat: 14g
- Unsaturated Fat: 9g
- Trans Fat: 0g
- Carbohydrates: 20g
- Fiber: 0g
- Protein: 6g
- Cholesterol: 105mg