Why You’ll Love This No Churn Ice Cream
Making ice cream at home has never been easier or more satisfying. This no churn ice cream recipe brings the joy of homemade frozen treats to your kitchen without requiring expensive equipment or specialized skills. The simplicity of this method opens up a world of dessert possibilities for everyone from beginners to experienced home cooks.Benefits of This Easy Method
- Ease of preparation: No churn ice cream requires just three basic ingredients and comes together in under 15 minutes. There’s no need for an ice cream maker, which makes this recipe accessible to anyone with a mixing bowl and hand mixer. The active preparation time is minimal, allowing you to create a delicious dessert even on busy weeknights.
- Health benefits: By making your own ice cream at home, you control the ingredients. This means no artificial preservatives, colors, or unwanted additives. Heavy whipping cream provides beneficial fats that help you feel satisfied, and you can adjust the sweetness level to your preference. The natural vanilla extract adds flavor without the artificial ingredients found in many commercial products.
- Versatility: This basic recipe serves as a canvas for countless flavor variations. Whether you’re following a specific diet or just have different taste preferences, you can easily adapt this recipe. Make it dairy-free with coconut cream, reduce the sugar content, or add your favorite mix-ins to create a personalized treat.
- Distinctive flavor: Homemade no churn ice cream has a fresh, pure taste that often surpasses store-bought versions. Without the need for stabilizers and excessive air incorporation found in commercial products, you get a richer, creamier texture and more intense flavors. The condensed milk creates a smooth consistency that feels luxurious on the tongue.
Jump To
Essential Ingredients for No Churn Ice Cream
The beauty of no churn ice cream lies in its simplicity. With just a handful of basic ingredients, you can create a frozen treat that rivals premium ice cream shop offerings. Each component plays a specific role in achieving that perfect texture and taste we all crave.Main Ingredients:
- 2 cups heavy whipping cream – provides the creamy base and whips into light texture
- 1 can (14 oz) sweetened condensed milk – adds sweetness and helps with no-churn texture
- 1 tsp vanilla extract – enhances flavor
Optional add-ins:
- Chocolate chips or chunks
- Fruit puree or chopped fresh fruit
- Crushed cookies or nuts
- Caramel or chocolate sauce
- Extracts like mint, almond, or coffee
The quality of your ingredients directly impacts the final result. Using high-quality heavy cream and pure vanilla extract makes a noticeable difference in the taste and texture of your homemade ice cream.
Step-by-Step Instructions
Creating perfect no churn ice cream is a straightforward process that anyone can master. Follow these detailed steps to ensure success every time you make this delicious treat.Preparation and Mixing
- Chill your equipment: Before starting, place your mixing bowl and beaters in the freezer for 10-15 minutes. Cold equipment helps the heavy cream whip faster and maintain its structure. This simple step can make the difference between perfectly whipped cream and a disappointing result.
- Whip the cream: Pour 2 cups of heavy whipping cream into your chilled bowl. Using a hand mixer or stand mixer with the whisk attachment, beat on medium-high speed until stiff peaks form. This typically takes 3-5 minutes. Stiff peaks mean that when you lift the beaters, the cream stands up straight without curling over at the tip. Be careful not to overwhip, as the cream can separate and become grainy.
- Prepare the sweetened milk mixture: In a separate bowl, combine the 14-ounce can of sweetened condensed milk with 1 teaspoon of vanilla extract. Stir until well combined. This is your base mixture that will provide sweetness and structure to the ice cream. For added depth of flavor, consider adding a pinch of salt at this stage.
- Fold in the whipped cream: Add about one-third of the whipped cream to the condensed milk mixture. Using a rubber spatula, gently fold the cream into the milk. Folding rather than stirring helps maintain the air bubbles incorporated during whipping, which gives the ice cream its light texture. Continue adding the remaining whipped cream in two more batches, folding gently until just combined. A few white streaks are okay you want to preserve as much volume as possible.
- Add any mix-ins: If you’re incorporating add-ins like chocolate chips, crushed cookies, or fruit, this is the time to add them. Gently fold them in with just a few turns of the spatula to distribute evenly without deflating the mixture. For ribboned ice creams like fudge or caramel, pour the sauce over the mixture and swirl with a spoon without fully incorporating it.
- Transfer to a container: Pour the ice cream mixture into a freezer-safe container, such as a 9×5 inch loaf pan or a dedicated ice cream container. Use your spatula to smooth the top. If you’d like to add a ribbon effect, drizzle additional sauce over the top and swirl with a knife.
- Cover properly: To prevent ice crystals from forming, press a piece of plastic wrap directly onto the surface of the ice cream. This creates a barrier against air and moisture. Then cover the container with a lid or additional plastic wrap.
- Freeze until set: Place the container in the freezer for at least 6 hours, though overnight freezing yields the best results. The ice cream will be scoopable but firm. If it becomes too hard, let it sit at room temperature for 5-10 minutes before scooping.
Expectations During the Process
As you make this recipe, remember that the whipped cream should be stiff but still smooth not grainy or butter-like. When folding, work gently and efficiently to maintain the airy texture. The final mixture should look fluffy and somewhat lighter in color than the individual ingredients. During freezing, the mixture will firm up but shouldn’t become rock-hard if properly stored with the plastic wrap directly on the surface.Pro Tips for Perfect Results
Even with a simple recipe like this, a few expert tips can take your no churn ice cream from good to exceptional. Keep these pointers in mind as you create your homemade frozen treats.- Temperature matters: Keep your heavy cream very cold throughout the whipping process. Warm cream won’t whip properly, so work quickly and consider placing your mixing bowl in the freezer beforehand. If your kitchen is particularly warm, you might even want to chill your beaters or whisk attachment.
- Don’t overwhip: Watch your cream closely as it approaches the stiff peak stage. The difference between perfectly whipped cream and overwhipped cream (which begins to turn into butter) can happen in just seconds. Stop beating when the cream holds firm peaks that stand straight up when you lift the beaters.
- Gentle folding is key: The most common mistake beginners make is deflating the whipped cream by mixing too vigorously. Use a gentle folding motion cut through the mixture with the edge of your spatula, then slide along the bottom of the bowl and lift the mixture over the top. Rotate the bowl as you fold to incorporate everything evenly.
- Room temperature serving: For the best scooping experience, let your ice cream sit at room temperature for 5-10 minutes before serving. This softens it slightly without melting, making it easier to scoop and enhancing the flavor perception.
- Prevent ice crystals: Always press plastic wrap directly against the surface of the ice cream before freezing. This simple step prevents ice crystals from forming on the top, which can ruin the texture of your finished dessert.
- Quality ingredients: Since this recipe has so few components, each one matters. Use real vanilla extract rather than imitation, and choose a high-quality heavy cream with at least 36% fat content. These small investments in quality make a noticeable difference in the final product.
Delicious Variations
Once you’ve mastered the basic no churn vanilla ice cream, the flavor possibilities are virtually endless. These variations show how versatile this simple recipe can be while maintaining the creamy texture we love.Chocolate Lovers’ Dream
For a rich chocolate version, add ½ cup of unsweetened cocoa powder to the condensed milk before mixing in the whipped cream. For an even more intense chocolate experience, fold in 1 cup of chocolate chunks or chips after combining the base mixture. Consider using dark chocolate for a sophisticated flavor profile or milk chocolate for a sweeter treat. For a marbled effect, drizzle melted chocolate over the base before freezing.Fresh Strawberry Delight
Create a fruity variation by macerating 2 cups of sliced strawberries with 2 tablespoons of sugar for 30 minutes. Mash half the strawberries to create a sauce and fold both the sauce and remaining sliced fruit into the base mixture. The natural pectin in the strawberries helps create a wonderful texture while the fruit adds refreshing flavor and beautiful pink color. Check out our dedicated strawberry ice cream recipe for more tips on achieving the perfect fruity balance.Mint Chocolate Chip Classic
Transform the base by adding 1 teaspoon of peppermint extract (or to taste) instead of vanilla. For color, add a few drops of green food coloring to the condensed milk mixture. Fold in 1 cup of miniature chocolate chips after combining the mixtures. The cooling mint combined with rich chocolate creates a nostalgic favorite that many people consider the ultimate ice cream flavor. For a more sophisticated take, try adding chopped dark chocolate instead of chips.Cookies and Cream Indulgence
Crush 2 cups of chocolate sandwich cookies into bite-sized pieces, reserving about ½ cup for topping. Gently fold the crushed cookies into your ice cream base, being careful not to overmix. Sprinkle the remaining cookie crumbs on top before covering and freezing. The cookies will soften slightly in the freezer but still provide delightful crunch and bursts of chocolate flavor. For a twist, try using different flavored sandwich cookies like golden vanilla or mint.Coffee Caramel Swirl
Add 2 tablespoons of instant coffee dissolved in 1 tablespoon of warm water to the condensed milk mixture. After combining the base ingredients, drizzle ½ cup of salted caramel sauce over the ice cream and use a knife to create swirls. The bold coffee flavor pairs beautifully with the sweet, salty caramel for a sophisticated dessert that coffee lovers will adore. For even more coffee flavor, consider adding crushed chocolate-covered espresso beans as a mix-in.Nutrition Information & Storage
Understanding the nutritional content and proper storage of your homemade no churn ice cream helps you enjoy this treat as part of a balanced diet.Nutrition Facts Per Serving
| Nutrient | Amount |
|---|---|
| Calories | 250 |
| Total Fat | 16g |
| Saturated Fat | 10g |
| Cholesterol | 60mg |
| Sodium | 70mg |
| Total Carbohydrates | 24g |
| Sugars | 22g |
| Protein | 3g |
Storage Guidelines
No churn ice cream maintains its best quality when stored properly in the freezer. Keep it in an airtight container with plastic wrap pressed directly against the surface to prevent ice crystals. Your homemade creation will stay fresh for 1-2 weeks when stored correctly at 0°F (-18°C). For the best texture and flavor, consume within the first week, as prolonged freezing can lead to some deterioration in quality. If you plan to keep the ice cream for more than a few days, consider portioning it into individual servings before freezing. This prevents repeated thawing and refreezing, which can cause ice crystals to form and degrade the texture. Always use a clean scoop when serving to avoid introducing contaminants that could affect flavor and preservation.Pro tip: If your ice cream becomes too hard in the freezer, transfer it to the refrigerator for 20-30 minutes before serving to soften it slightly without melting. This makes scooping easier and enhances the creamy texture.
Frequently Asked Questions
What is no churn ice cream?
No churn ice cream is a simple homemade ice cream made without an ice cream maker. It relies on whipped cream for airiness and sweetened condensed milk for creaminess and sweetness, creating a soft-serve texture that firms up in the freezer. This method skips churning, making it beginner-friendly and quick—ready in under 10 minutes of active time. Popular flavors include vanilla, chocolate, and strawberry. Store it in a loaf pan covered with plastic wrap to prevent ice crystals. It’s perfect for summer treats or last-minute desserts, yielding about 1-2 quarts per batch. Compared to traditional ice cream, it has a lighter texture but holds up well for scooping after 4-6 hours of freezing.
How do you make no churn ice cream at home?
To make no churn ice cream, whip 2 cups of heavy whipping cream to stiff peaks. In another bowl, mix 1 can (14 oz) sweetened condensed milk with 1-2 teaspoons vanilla extract and any add-ins like chocolate chips. Gently fold the whipped cream into the milk mixture until combined, avoiding deflation. Pour into a lined loaf pan, cover with plastic wrap pressed directly on the surface, and freeze for 6 hours or overnight. For best results, chill bowls and beaters beforehand. This yields creamy results every time. Scoop and serve straight from the freezer—let it soften 5-10 minutes if needed. Customize with mix-ins like Oreo crumbs or fruit purees added at the folding stage.
What’s a basic no churn vanilla ice cream recipe?
For basic no churn vanilla ice cream, you’ll need: 2 cups heavy whipping cream, 1 can (14 oz) sweetened condensed milk, 2 tsp vanilla extract, and a pinch of salt. Whip cream to stiff peaks (about 3-4 minutes with a mixer). Mix condensed milk, vanilla, and salt separately. Fold whipped cream into the mixture gently until no streaks remain. Transfer to a 9×5-inch loaf pan lined with parchment. Smooth the top, cover with plastic wrap touching the surface, and freeze 6-8 hours. Makes 8-10 servings. Each 1/2 cup serving has around 250 calories. Pro tip: Add vanilla bean paste for deeper flavor. It’s scoopable and rivals store-bought.
Can you make no churn ice cream without sweetened condensed milk?
Yes, you can make no churn ice cream without sweetened condensed milk using alternatives like evaporated milk thickened with cornstarch, or a mix of powdered sugar and cream cheese for sweetness and stability. For a 2-cup cream base, beat 1 cup powdered sugar with 8 oz softened cream cheese, then fold in whipped cream and flavorings. Another option: simmer 1 can evaporated milk with 1/2 cup sugar and 1 tbsp cornstarch until thickened, cool, then fold into whipped cream. These yield similar creaminess but may be less sweet—adjust sugar to taste. Freeze as usual for 6 hours. This works for dietary tweaks, like lower sugar versions, and prevents separation better in humid climates.
How long does no churn ice cream last in the freezer?
No churn ice cream lasts 1-2 weeks in the freezer when stored properly in an airtight container or loaf pan wrapped tightly with plastic and foil. For best texture, eat within the first week, as it can develop ice crystals over time. To extend freshness, portion into individual servings before freezing. If it hardens too much, let it sit at room temperature for 10 minutes before scooping. Avoid refreezing thawed ice cream to prevent graininess. Label with dates for tracking. In optimal conditions (consistent 0°F freezer temp), some batches stay creamy up to a month, but quality peaks early. Always check for off smells or discoloration before serving.
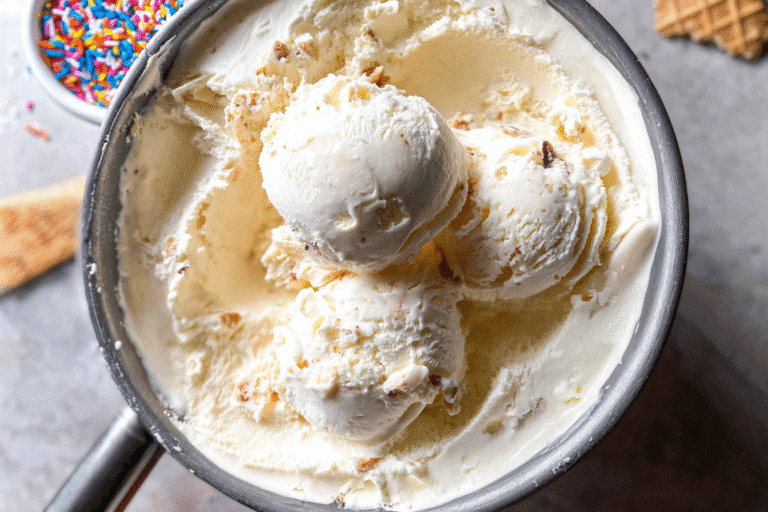
No Churn Ice Cream
🍨🍦 Velvety no-churn ice cream delivers restaurant-quality creamy homemade frozen delight without ice cream maker – pure convenience magic!
😋 Endless flavor customizations using pantry staples for instant summer treats, parties, or midnight cravings.
- Total Time: 6 hours 10 minutes
- Yield: 8 servings
Ingredients
– 2 cups heavy whipping cream for creamy base and light texture
– 1 can (14 oz) sweetened condensed milk for sweetness and no-churn texture
– 1 tsp vanilla extract for flavor
– Chocolate chips or chunks
– Fruit puree or chopped fresh fruit
– Crushed cookies or nuts
– Caramel or chocolate sauce
– Extracts like mint, almond, or coffee
Notes
🥄 Chill bowl ensures cream whips faster to perfect stiff peaks.
❄️ Press plastic directly on surface prevents freezer burn and crystals.
🍫 Add mix-ins last preserves texture; freeze extras separately.
- Prep Time: 10 minutes
- Freeze: 6 hours
- Category: Dessert
- Method: No Churn
- Cuisine: American
- Diet: Vegetarian
Nutrition
- Serving Size: ½ cup
- Calories: 320 kcal
- Sugar: 28g
- Sodium: 80mg
- Fat: 22g
- Saturated Fat: 14g
- Unsaturated Fat: 7g
- Trans Fat: 0g
- Carbohydrates: 28g
- Fiber: 0g
- Protein: 4g
- Cholesterol: 70mg