

Why You’ll Love This Lemon Tart
If you’re looking for a dessert that balances sweet and tangy flavors with an impressive presentation, this lemon tart recipe is exactly what you need. Here’s why this classic French dessert deserves a spot in your baking repertoire:- Ease of preparation: Despite its elegant appearance, this lemon tart is surprisingly straightforward to make. The crisp tart crust comes together quickly, and the creamy lemon filling requires only basic cooking techniques. Even novice bakers can achieve professional-looking results with this easy lemon tart recipe. The active prep time is just about one hour, with the remaining time mostly for chilling.
- Health benefits: Lemons are packed with vitamin C and antioxidants that support immune health and digestion. This citrus dessert uses fresh lemon juice and zest to maximize both flavor and nutritional benefits. Compared to many heavy desserts, a slice of lemon tart provides refreshing brightness without excessive richness, making it a lighter option after a hearty meal.
- Versatility: This homemade lemon tart adapts beautifully to different dietary needs without compromising texture or taste. Whether you need to accommodate gluten sensitivity, dairy intolerance, or other preferences, simple substitutions maintain the signature crisp shortbread crust and silky lemon filling. It’s equally delightful served for summer gatherings, afternoon tea, or as a sophisticated ending to a dinner party.
- Distinctive flavor: What sets this lemon tart apart is the perfect balance of sweet and tart notes that creates a truly memorable taste experience. The buttery, crisp crust provides the ideal textural contrast to the smooth, creamy lemon curd filling. Each bite delivers an explosion of bright citrus flavor that cleanses the palate and leaves guests asking for seconds.
Jump To
- 1. Why You’ll Love This Lemon Tart
- 2. Essential Ingredients for Lemon Tart
- 3. How to Prepare the Perfect Lemon Tart: Step-by-Step Guide
- 4. Dietary Substitutions to Customize Your Lemon Tart
- 5. Mastering Lemon Tart: Advanced Tips and Variations
- 6. How to Store Lemon Tart: Best Practices
- 7. FAQs: Frequently Asked Questions About Lemon Tart
- 8. Lemon Tart
Essential Ingredients for Lemon Tart
Creating the perfect lemon tart requires just a few simple ingredients that come together to create something extraordinary. Here’s everything you’ll need for both the crisp shortbread crust and the luscious lemon filling:Main Ingredients:
For the Crust:
- 1 1/2 cups all-purpose flour – Forms the base structure of the shortcrust pastry
- 1/2 cup cold unsalted butter (cubed) – Creates flaky layers and rich flavor
- 1/4 cup powdered sugar – Adds subtle sweetness without graininess
- 1 egg yolk – Binds the dough and contributes richness
- 2 tbsp cold water – Helps bring the dough together
For the Lemon Filling:
- 1 cup fresh lemon juice (about 4-5 lemons) – Provides the bright, tangy flavor
- zest of 3 lemons – Enhances the citrus intensity with natural oils
- 1 cup granulated sugar – Balances the acidity of the lemons
- 3 large eggs + 1 yolk – Creates structure and richness in the lemon curd
- 1/2 cup unsalted butter (cubed) – Adds silkiness and helps the curd set
- Optional: 1 tsp vanilla extract – Rounds out the flavor profile
Using room-temperature ingredients for the curd helps prevent lumps and ensures a smooth, creamy texture. Fresh lemons provide the brightest flavor avoid bottled lemon juice for the best results.
Special Dietary Options:
Vegan:
- Replace butter with vegan butter or coconut oil in both crust and filling
- Substitute eggs with 3/4 cup aquafaba (whipped to stiff peaks) + 1/4 cup cornstarch slurry for curd structure
- Use powdered sugar labeled vegan
Gluten-free:
- Swap all-purpose flour with a 1:1 gluten-free flour blend (like Bob’s Red Mill)
- Add 1/4 tsp xanthan gum if not included in your flour blend
- Chill the dough longer to prevent crumbling
Low-calorie:
- Reduce butter in the crust slightly (though this may affect texture)
- Use a sugar substitute like erythritol in the filling
- Serve with fresh berries instead of whipped cream
How to Prepare the Perfect Lemon Tart: Step-by-Step Guide
This classic French lemon tart may look elegant, but the process is quite straightforward. Follow these detailed steps to create a stunning dessert with a crisp shortbread crust and perfectly creamy lemon filling:Preparing the Shortcrust Pastry
First Step: Start by making the tart crust. In a food processor, pulse together 1 1/2 cups all-purpose flour, 1/4 cup powdered sugar, and 1/2 cup cold unsalted butter (cubed) until the mixture resembles coarse crumbs. This should only take about 30 seconds of pulsing. If you don’t have a food processor, you can use a pastry cutter or your fingers to work the butter into the flour until it looks like breadcrumbs.
Second Step: Add 1 egg yolk and 2 tablespoons cold water to the flour mixture. Pulse again just until the dough begins to clump together. Be careful not to overmix, as this can make the crust tough. The dough should hold together when pinched between your fingers. If it’s still too crumbly, add another teaspoon of cold water and pulse again briefly.
Third Step: Turn the dough out onto a lightly floured surface and gently knead it just until it comes together in a ball. Flatten into a disk, wrap in plastic wrap, and refrigerate for at least 30 minutes. This resting period is crucial as it allows the gluten to relax, preventing shrinkage during baking. For best results, chill the dough overnight if time permits.
Fourth Step: On a lightly floured surface, roll out the chilled dough to a 11-inch circle, about 1/8-inch thick. Carefully transfer the dough to a 9-inch tart pan with a removable bottom. Gently press the dough into the bottom and up the sides of the pan, being careful not to stretch it. Trim any excess dough by rolling your rolling pin over the top of the pan. Freeze the lined tart pan for 15 minutes to firm up the dough again.
Blind Baking the Crust
Fifth Step: Preheat your oven to 375°F (190°C). Line the chilled crust with parchment paper or aluminum foil, then fill it with pie weights, dried beans, or rice. This technique, called blind baking, prevents the crust from puffing up or shrinking. Bake for 15-20 minutes until the edges are golden. Remove the weights and paper, then bake for an additional 8-10 minutes until the bottom is fully cooked and golden. Let the crust cool completely before adding the filling. This step ensures your crisp shortbread crust won’t become soggy when filled.
Creating the Creamy Lemon Filling
Sixth Step: While the crust cools, prepare the lemon curd filling. In a medium saucepan, whisk together 1 cup fresh lemon juice, zest of 3 lemons, 1 cup granulated sugar, 3 large eggs, and 1 additional egg yolk. Place the saucepan over medium heat and stir constantly with a heatproof spatula or wooden spoon. For a silky smooth texture, make sure all ingredients are at room temperature before beginning.
Seventh Step: Continue cooking the mixture, stirring constantly, until it thickens enough to coat the back of a spoon and reaches 160°F (71°C). This usually takes about 8-10 minutes. The mixture should bubble gently around the edges but not boil vigorously. This cooking time is essential to properly cook the eggs and activate the thickening properties. If you’re concerned about curdling, you can temper the eggs by whisking a small amount of the warm lemon juice into them before combining all ingredients.
Eighth Step: Remove the saucepan from heat and immediately add 1/2 cup unsalted butter (cubed), one piece at a time. Stir until each piece melts before adding the next. If using, add 1 teaspoon vanilla extract at this stage. For an ultra-smooth filling, strain the mixture through a fine-mesh sieve into a clean bowl to remove any bits of cooked egg. This ensures your lemon curd will be perfectly silky.
Assembling and Chilling the Tart
Ninth Step: Pour the warm lemon curd into the cooled tart crust. Use an offset spatula to spread it evenly and smooth the top. Place the tart in the refrigerator and chill for at least 4 hours, or until completely set. For the best results, chill overnight to allow the flavors to meld properly. The lemon filling will firm up as it cools, making it easier to slice cleanly.
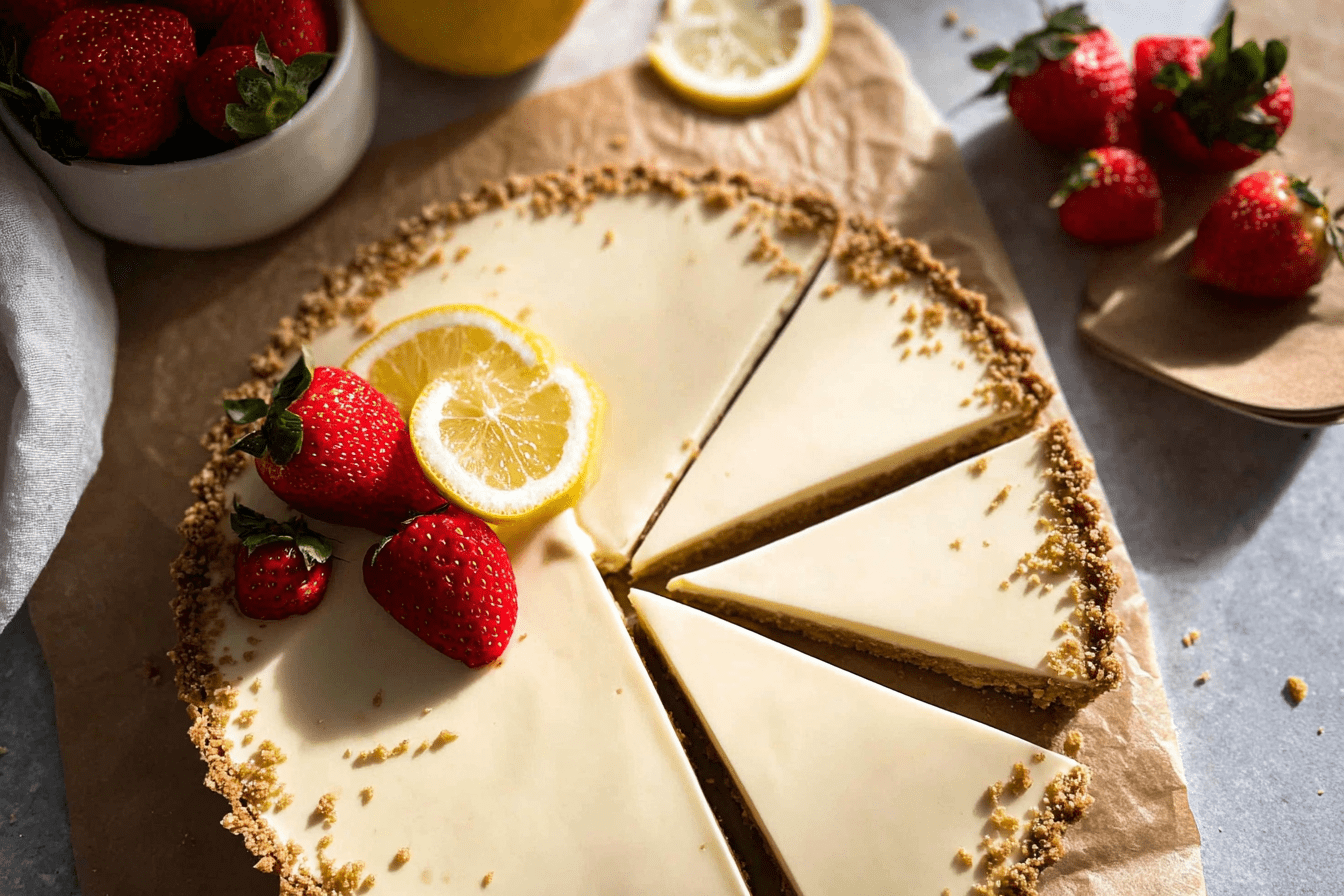
Final Step: Once fully chilled, remove the tart from the refrigerator. If desired, garnish with fresh berries, a dusting of powdered sugar, or a dollop of whipped cream just before serving. To slice, run a thin knife between the crust and the pan side to loosen, then remove the pan rim. Slice with a sharp knife, wiping the blade clean between cuts for picture-perfect slices. Serve chilled and enjoy the perfect balance of crisp crust and creamy lemon filling!
Dietary Substitutions to Customize Your Lemon Tart
Protein and Main Component Alternatives
For those who need egg alternatives in their lemon tart, several options work well to maintain the structure of the filling. Silken tofu can be blended with lemon juice, sugar, and cornstarch to create a creamy filling similar to traditional lemon curd. Another option is using commercial egg replacers combined with extra cornstarch or tapioca starch to help the filling set properly. For vegans, the aquafaba and cornstarch combination mentioned earlier creates a surprisingly authentic texture when whipped to stiff peaks before being folded into the heated lemon mixture.
When modifying the protein components, it’s important to remember that eggs provide specific thickening properties. Your alternative may require additional setting time in the refrigerator or slightly more thickener than the original recipe calls for. Taste as you go and adjust the sweetness accordingly, as some substitutes can alter the flavor profile of the finished tart.
Vegetable, Sauce, and Seasoning Modifications
While traditional lemon tart relies solely on citrus for its flavor profile, there are many variations you can explore based on seasonal availability or personal preference. For a unique twist, try incorporating herbs like lavender, thyme, or basil into the crust or infusing them into the cream before making the filling. These aromatic additions create sophisticated flavor combinations that surprise and delight guests.
For a different citrus experience, you can replace some or all of the lemon juice with other varieties. Meyer lemons offer a sweeter, more floral profile, while limes add a more tart, tropical note. Blood lemons or pink lemons create a stunning color variation perfect for special occasions. You can also experiment with additions like ginger, cardamom, or white pepper for warmth and complexity. Just remember that these flavor modifications work best when used in moderation to complement rather than overpower the bright citrus base.
If you’re looking to reduce sugar, natural sweeteners like honey, maple syrup, or agave nectar can be used, though they will slightly alter the color and flavor profile. Stevia or monk fruit sweeteners work well for a lower-calorie option without changing the taste significantly. These substitutes may require adjustment to the cornstarch content as natural sweeteners sometimes affect the setting process differently than traditional granulated sugar.
Mastering Lemon Tart: Advanced Tips and Variations
Pro Cooking Techniques
For the crispest shortbread crust, keep your ingredients as cold as possible throughout the preparation process. Work quickly when rolling out the dough, and if it becomes too soft, return it to the refrigerator to firm up again. This attention to temperature creates those desirable flaky layers that contrast beautifully with the smooth lemon filling.
When making the lemon curd, use a double boiler or a very gentle heat to prevent the eggs from scrambling. If you notice any curdling in your filling, immediately remove it from the heat and whisk vigorously. In most cases, the curd can be saved by straining it through a fine-mesh sieve. For an extra smooth texture, consider making the filling in a blender or using an immersion blender after straining.
Flavor Variations
While the classic lemon tart is delightful on its own, these creative variations offer exciting new taste experiences:
- Lemon Basil: Add finely chopped fresh basil to the crust or infuse it into the cream before mixing the filling
- Lemon Ginger: Incorporate crystallized ginger into the crust or add fresh ginger juice to the filling
- Lemon Lavender: Infuse cream with dried lavender flowers before making the filling for a floral twist
- Meyer Lemon: Use Meyer lemons for a sweeter, more complex citrus flavor
- Lemon Meringue: Top the chilled tart with a layer of meringue and briefly torch for a classic lemon meringue pie variation
Presentation Tips
For an elegant presentation, use a torch to lightly caramelize the top of the tart just before serving. This creates a beautiful golden hue and adds depth to the flavor. Alternatively, arrange fresh berries in concentric circles on top of the tart, or create a beautiful pattern using thinly sliced lemon rounds. For dinner parties, consider serving individual mini tarts for a more refined presentation.
Make-Ahead Options
This lemon tart is an excellent make-ahead dessert. The dough can be prepared up to 3 days in advance and kept refrigerated, or frozen for up to 3 months. The fully assembled tart keeps beautifully in the refrigerator for 3-5 days, with the flavors actually improving after 24 hours. For longer storage, individual slices can be wrapped tightly and frozen for up to 2 months. Simply thaw them in the refrigerator overnight before serving. This makes the tart perfect for entertaining, as you can prepare it entirely ahead of time and focus on other dishes when guests arrive.
How to Store Lemon Tart: Best Practices
Refrigeration
Freshly made lemon tart should be stored in the refrigerator in an airtight container or covered with plastic wrap. This helps prevent the butter in the crust from absorbing other odors and keeps the lemon filling fresh. When properly refrigerated, your tart will maintain its quality for 3-5 days. It’s important not to leave the tart at room temperature for more than 2 hours, as the egg-based curd filling is perishable and could spoil. For the best flavor and texture, serve chilled directly from the refrigerator.
Freezing
For longer storage, lemon tart freezes remarkably well. Whole tarts can be frozen for up to 2 months if wrapped carefully with multiple layers of plastic and foil. However, for convenience, I recommend slicing the tart before freezing. Wrap individual slices tightly in plastic wrap, then place them in an airtight container or freezer bag. This allows you to thaw only what you need, reducing waste. To serve, thaw slices overnight in the refrigerator. Avoid refreezing previously frozen lemon tart, as this can compromise the texture of both crust and filling.
Reheating
While lemon tart is typically served chilled, some prefer it at room temperature to allow the buttery crust to soften slightly. If you’d like to serve it this way, simply remove the tart from the refrigerator 30-60 minutes before serving. Do not heat the tart in the microwave or oven, as this will cause the filling to weep and the crust to lose its crispness. For any frozen portions, always thaw them in the refrigerator rather than at room temperature to maintain food safety.
Meal Prep Considerations
This lemon tart is an excellent candidate for batch cooking and meal prep. The components can be prepared separately and assembled when needed. The dough can be made in advance and frozen in disks, ready to roll out whenever you need them. The lemon curd can be prepared up to a week ahead and stored in the refrigerator. When you’re ready to serve, simply blind bake the crust, fill it with the pre-made curd, and chill until set. This flexibility makes it perfect for busy cooks who want to prepare components ahead of time without sacrificing freshness or quality.

FAQs: Frequently Asked Questions About Lemon Tart
What is a lemon tart?
A lemon tart is a classic French dessert featuring a crisp, buttery shortcrust pastry base filled with a smooth, tangy lemon curd. The curd is made from fresh lemon juice, zest, eggs, sugar, and butter, creating a vibrant yellow filling that balances sweet and sour flavors. It’s often topped with whipped cream, meringue, or fresh berries for extra appeal. This no-bake filling sets in the fridge, making it simpler than pies with cooked fruit. Popular in patisseries worldwide, lemon tarts shine at summer gatherings or afternoon tea. A standard 9-inch tart serves 8-10 people and takes about 1 hour to prepare plus chilling time. For best results, use Meyer lemons if available for milder acidity.
What ingredients do I need for a classic lemon tart?
For a 9-inch lemon tart, you’ll need: Crust – 1 1/2 cups all-purpose flour, 1/2 cup cold unsalted butter (cubed), 1/4 cup powdered sugar, 1 egg yolk, 2 tbsp cold water. Filling – 1 cup fresh lemon juice (about 4-5 lemons), zest of 3 lemons, 1 cup granulated sugar, 3 large eggs + 1 yolk, 1/2 cup unsalted butter (cubed). Optional: 1 tsp vanilla extract. Use room-temperature ingredients for curd to avoid lumps. Fresh lemons provide the brightest flavor—avoid bottled juice. This recipe yields a creamy, glossy filling that holds its shape. Prep tip: Blind-bake the crust at 375°F for 15-20 minutes to prevent sogginess.
How do you make lemon tart step by step?
1. Make crust: Pulse flour, sugar, and butter in a food processor until crumbly. Add yolk and water; form dough. Chill 30 minutes. Roll out, fit into 9-inch tart pan, chill again. Blind-bake with weights at 375°F for 15 minutes, then 10 more without. Cool.
2. Lemon curd: Whisk juice, zest, sugar, eggs, and yolk in a saucepan over medium heat. Stir constantly until thickened (160°F, about 8-10 minutes). Remove from heat; stir in butter until melted. Strain for smoothness.
3. Assemble: Pour curd into crust; chill 4+ hours. Serves 8. Total time: 1 hour active + chilling. Pro tip: Temper eggs by whisking with warm juice first to prevent curdling. Garnish with powdered sugar or whipped cream.
How long does lemon tart last in the fridge?
Freshly made lemon tart lasts 3-5 days in the fridge when stored properly in an airtight container or covered with plastic wrap. The egg-based curd filling is perishable, so don’t leave it at room temperature over 2 hours. For longer storage, freeze slices wrapped tightly in plastic and foil for up to 2 months—thaw overnight in the fridge. Avoid refreezing. Signs it’s gone bad: watery texture, off smell, or mold. Always use pasteurized eggs if concerned about raw egg risks in curd. This makes it ideal for make-ahead desserts; flavor even improves after 24 hours as tastes meld. Serve chilled for best texture.
Can I make lemon tart gluten-free or dairy-free?
Yes! For gluten-free: Swap all-purpose flour with a 1:1 gluten-free blend (like Bob’s Red Mill) and add 1/4 tsp xanthan gum if not included. Chill dough longer to prevent crumbling. For dairy-free: Use vegan butter or coconut oil in crust and filling; replace eggs with 3/4 cup aquafaba (whipped to stiff peaks) + 1/4 cup cornstarch slurry for curd structure. Sweeten with coconut sugar if desired. Baking time stays the same. Taste-test curd before filling as dairy-free versions are tangier. These swaps keep the tart crisp and creamy. Link to full gluten-free recipe variations for more ideas. Perfect for dietary needs without sacrificing flavor.

Lemon Tart
🍋🥧 Creamy lemon filling pours into crisp buttery crust for silky smooth zesty perfection – classic French elegance at home!
😋 Refreshing tart impresses guests for dinners, showers, or tea with glossy shine and perfect tangy-sweet balance.
- Total Time: 3 hours 10 minutes
- Yield: 8 servings
Ingredients
– 1 1/2 cups all-purpose flour Forms the base structure of the shortcrust pastry
– 1/2 cup cold unsalted butter (cubed) Creates flaky layers and rich flavor
– 1/4 cup powdered sugar Adds subtle sweetness without graininess
– 1 egg yolk Binds the dough and contributes richness
– 2 tbsp cold water Helps bring the dough together
– 1 cup fresh lemon juice (about 4-5 lemons) Provides the bright, tangy flavor
– zest of 3 lemons Enhances the citrus intensity with natural oils
– 1 cup granulated sugar Balances the acidity of the lemons
– 3 large eggs + 1 yolk Creates structure and richness in the lemon curd
– 1/2 cup unsalted butter (cubed) Adds silkiness and helps the curd set
– 1 tsp vanilla extract Rounds out the flavor profile
Instructions
1-First Step: Start by making the tart crust. In a food processor, pulse together 1 1/2 cups all-purpose flour, 1/4 cup powdered sugar, and 1/2 cup cold unsalted butter (cubed) until the mixture resembles coarse crumbs. This should only take about 30 seconds of pulsing. If you don’t have a food processor, you can use a pastry cutter or your fingers to work the butter into the flour until it looks like breadcrumbs.
2-Second Step: Add 1 egg yolk and 2 tablespoons cold water to the flour mixture. Pulse again just until the dough begins to clump together. Be careful not to overmix, as this can make the crust tough. The dough should hold together when pinched between your fingers. If it’s still too crumbly, add another teaspoon of cold water and pulse again briefly.
3-Third Step: Turn the dough out onto a lightly floured surface and gently knead it just until it comes together in a ball. Flatten into a disk, wrap in plastic wrap, and refrigerate for at least 30 minutes. This resting period is crucial as it allows the gluten to relax, preventing shrinkage during baking. For best results, chill the dough overnight if time permits.
4-Fourth Step: On a lightly floured surface, roll out the chilled dough to a 11-inch circle, about 1/8-inch thick. Carefully transfer the dough to a 9-inch tart pan with a removable bottom. Gently press the dough into the bottom and up the sides of the pan, being careful not to stretch it. Trim any excess dough by rolling your rolling pin over the top of the pan. Freeze the lined tart pan for 15 minutes to firm up the dough again.
5-Fifth Step: Preheat your oven to 375°F (190°C). Line the chilled crust with parchment paper or aluminum foil, then fill it with pie weights, dried beans, or rice. This technique, called blind baking, prevents the crust from puffing up or shrinking. Bake for 15-20 minutes until the edges are golden. Remove the weights and paper, then bake for an additional 8-10 minutes until the bottom is fully cooked and golden. Let the crust cool completely before adding the filling. This step ensures your crisp shortbread crust won’t become soggy when filled.
6-Sixth Step: While the crust cools, prepare the lemon curd filling. In a medium saucepan, whisk together 1 cup fresh lemon juice, zest of 3 lemons, 1 cup granulated sugar, 3 large eggs, and 1 additional egg yolk. Place the saucepan over medium heat and stir constantly with a heatproof spatula or wooden spoon. For a silky smooth texture, make sure all ingredients are at room temperature before beginning.
7-Seventh Step: Continue cooking the mixture, stirring constantly, until it thickens enough to coat the back of a spoon and reaches 160°F (71°C). This usually takes about 8-10 minutes. The mixture should bubble gently around the edges but not boil vigorously. This cooking time is essential to properly cook the eggs and activate the thickening properties. If you’re concerned about curdling, you can temper the eggs by whisking a small amount of the warm lemon juice into them before combining all ingredients.
8-Eighth Step: Remove the saucepan from heat and immediately add 1/2 cup unsalted butter (cubed), one piece at a time. Stir until each piece melts before adding the next. If using, add 1 teaspoon vanilla extract at this stage. For an ultra-smooth filling, strain the mixture through a fine-mesh sieve into a clean bowl to remove any bits of cooked egg. This ensures your lemon curd will be perfectly silky.
9-Ninth Step: Pour the warm lemon curd into the cooled tart crust. Use an offset spatula to spread it evenly and smooth the top. Place the tart in the refrigerator and chill for at least 4 hours, or until completely set. For the best results, chill overnight to allow the flavors to meld properly. The lemon filling will firm up as it cools, making it easier to slice cleanly.
10-Final Step: Once fully chilled, remove the tart from the refrigerator. If desired, garnish with fresh berries, a dusting of powdered sugar, or a dollop of whipped cream just before serving. To slice, run a thin knife between the crust and the pan side to loosen, then remove the pan rim. Slice with a sharp knife, wiping the blade clean between cuts for picture-perfect slices. Serve chilled and enjoy the perfect balance of crisp crust and creamy lemon filling!
Last Step:
Please leave a rating and comment letting us know how you liked this recipe! This helps our business to thrive and continue providing free, high-quality recipes for you.Notes
🍋 Strain curd removes any lumps for ultra-smooth creamy texture.
🥄 Use room temp butter cubes melt evenly into warm curd.
❄️ Chill fully before slicing prevents filling ooze.
- Prep Time: 25 minutes
- Chill: 2 hours
- Cook Time: 45 minutes
- Category: Dessert
- Method: Bake
- Cuisine: French
- Diet: Vegetarian
Nutrition
- Serving Size: 1 slice
- Calories: 380 kcal
- Sugar: 30g
- Sodium: 150mg
- Fat: 24g
- Saturated Fat: 14g
- Unsaturated Fat: 9g
- Trans Fat: 0g
- Carbohydrates: 38g
- Fiber: 1g
- Protein: 5g
- Cholesterol: 210mg


