Ingredients
– 2 cups whole milk Creates the rich, creamy base for your pudding
– 1/2 cup granulated sugar Sweetens the pudding and balances the lemon’s acidity
– 1/4 cup cornstarch Thickens the pudding to the perfect consistency
– 1/4 teaspoon salt Enhances all flavors and prevents sweetness from becoming overpowering
– 2 large egg yolks Adds richness and helps create a smooth, velvety texture
– 1/3 cup fresh lemon juice Provides the signature tangy flavor and bright acidity
– 2 tablespoons unsalted butter Contributes to the luxurious mouthfeel
– 1 tablespoon lemon zest Intensifies the lemon flavor with aromatic oils
Instructions
1-First Step: Preparation and Mise en Place Before you begin cooking, gather all your ingredients and equipment. You’ll need a medium saucepan, a whisk, measuring cups and spoons, and four individual serving dishes. Having everything ready before you start will make the process smoother and more enjoyable. Measure out each ingredient exactly as specified in the list above. Separate your egg yolks from the whites if you haven’t already done so. Grate your lemon zest carefully, avoiding the bitter white pith beneath the yellow rind. Squeeze your lemons to extract the fresh juice, removing any seeds that might fall in. This preparation step takes about 5-10 minutes but saves time and prevents mistakes during cooking.
2-Second Step: Creating the Base Mixture In your medium saucepan, whisk together 2 cups of milk, 1/2 cup of sugar, 1/4 cup of cornstarch, and 1/4 teaspoon of salt. It’s crucial to whisk thoroughly until the cornstarch is completely dissolved and no lumps remain. Any remaining lumps will be difficult to remove later and will affect the smooth texture of your finished lemon pudding. Place the saucepan over medium heat and begin stirring constantly with your whisk. Continuous stirring prevents scorching on the bottom of the pan and ensures even heating throughout the mixture.
3-Third Step: Cooking and Thickening Continue cooking and whisking the mixture over medium heat. After about 5-7 minutes, you’ll notice it beginning to thicken. The mixture will start to bubble gently around the edges. At this point, lower the heat slightly but continue stirring. The pudding is ready when it has thickened enough to coat the back of a spoon. This technique, called nappé, is used by pastry chefs to determine the proper consistency for custards and puddings. The mixture should be glossy and smooth, with no visible starch granules. If you have an instant-read thermometer, the mixture should reach about 170°F (77°C). If you’re making a vegan version using additional cornstarch instead of eggs, you may need to cook it for 1-2 minutes longer to fully activate the thickening properties.
4-Fourth Step: Tempering the Egg Yolks Remove the saucepan from the heat. Place your 2 egg yolks in a small bowl and whisk them briefly to break them up. This is a crucial step in preparing lemon pudding from scratch. You need to temper the yolks by gradually adding about 1/2 cup of the hot milk mixture to the yolks while whisking constantly. This gentle warming prevents the eggs from scrambling when you add them to the hot pudding base. Once the yolks are warm, pour the mixture back into the saucepan with the remaining hot milk mixture.
5-Fifth Step: Adding Lemon Flavor and Finishing Return the saucepan to low heat and cook the citrus pudding for another 2 minutes, whisking constantly. This ensures the egg yolks are fully cooked and safe to eat. Remove from heat again and immediately whisk in 1/3 cup of fresh lemon juice, 2 tablespoons of butter, and 1 tablespoon of lemon zest. The butter will melt into the hot pudding, adding richness, while the lemon juice and zest infuse the dessert with that signature bright flavor. Whisk until the butter is completely incorporated and the mixture is smooth.
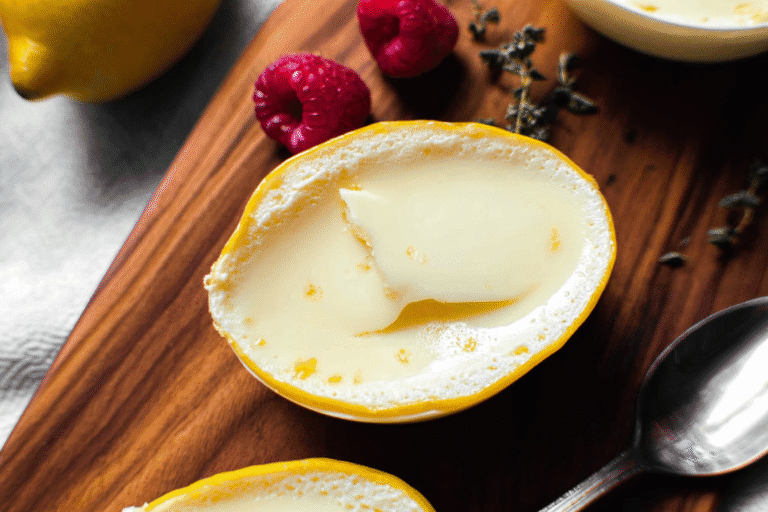
6-Final Step: Cooling and Serving Pour your homemade lemon pudding into individual serving dishes. To prevent a skin from forming on the surface, press a piece of plastic wrap directly onto the top of the pudding. Refrigerate for at least 2 hours, though 3-4 hours is even better for the pudding to set completely. When ready to serve, you can garnish with fresh berries, a dollop of whipped cream, or additional lemon zest for a beautiful presentation. This no bake lemon pudding is perfect for making ahead of time for dinner parties or meal prep.
Last Step:
Please leave a rating and comment letting us know how you liked this recipe! This helps our business to thrive and continue providing free, high-quality recipes for you.Notes
🍋 Zest lemons first, then juice for maximum fresh flavor.
🥄 Stir constantly while cooking to prevent lumps or scorching.
❄️ Plastic wrap on surface stops skin formation during chill.
- Prep Time: 10 minutes
- Chill: 2 hours
- Cook Time: 10 minutes
- Category: Dessert
- Method: Stovetop
- Cuisine: American
- Diet: Vegetarian
Nutrition
- Serving Size: ½ cup
- Calories: 260 kcal
- Sugar: 32g
- Sodium: 150mg
- Fat: 10g
- Saturated Fat: 5g
- Unsaturated Fat: 4g
- Trans Fat: 0g
- Carbohydrates: 38g
- Fiber: 0g
- Protein: 5g
- Cholesterol: 170mg