Why You’ll Love This Lemon Cookie Bars
Lemon Cookie Bars are a delightful dessert that combines the best of both worlds: the buttery texture of a cookie with the refreshing zing of citrus. These bars are not only delicious but also incredibly easy to make, even for novice bakers. With their bright flavor and simple preparation, they’re sure to become a favorite in your household. If you enjoy this recipe, you might also love cherry almond bars for another delicious dessert option. Ease of preparation: Unlike traditional lemon bars that require multiple steps or complex techniques, these Lemon Cookie Bars are straightforward to prepare. There’s no need to roll out dough or worry about creating a perfect lattice top. Simply mix, press, pour, and bake. The entire process takes about an hour from start to finish, with active prep time of just 15 minutes. This makes them perfect for busy weeknights when you want a homemade treat without spending hours in the kitchen. Health benefits: While these bars are certainly a treat, they do offer some nutritional advantages. Lemons are packed with vitamin C and antioxidants that support immune health and help fight inflammation. By using fresh lemon juice and zest, you’re incorporating natural flavors without relying on artificial additives or preservatives found in many store-bought desserts. For more information on the benefits of lemons, check out these health benefits of lemons. Versatility: This recipe adapts well to various dietary needs and preferences. Whether you’re serving a crowd with different restrictions or just want to experiment with flavors, Lemon Cookie Bars provide a versatile base that can be customized without compromising the final result. You can easily modify the recipe to be vegan, gluten-free, or lower in sugar while still maintaining the delicious taste and texture that make these bars so special. Distinctive flavor: What sets these bars apart is the perfect balance between the sweet, buttery shortbread crust and the tart, bright lemon filling. The contrast in textures the crisp crust with the slightly soft, custard-like filling creates a delightful eating experience that satisfies sweet cravings without being overly sugary. The fresh lemon flavor shines through without being overwhelming, making these bars refreshing and enjoyable even after a heavy meal.Jump To
- 1. Why You’ll Love This Lemon Cookie Bars
- 2. Essential Ingredients for Lemon Cookie Bars
- 3. How to Prepare the Perfect Lemon Cookie Bars: Step-by-Step Guide
- 4. Dietary Substitutions to Customize Your Lemon Cookie Bars
- 5. Mastering Lemon Cookie Bars: Advanced Tips and Variations
- 6. How to Store Lemon Cookie Bars: Best Practices
- 7. FAQs: Frequently Asked Questions About Lemon Cookie Bars
- 8. Lemon Cookie Bars
Essential Ingredients for Lemon Cookie Bars
To create the perfect Lemon Cookie Bars, you’ll need these ingredients: Main Ingredients:- 2 cups all-purpose flour – The foundation for the crust, providing structure and texture.
- ½ cup powdered sugar – Adds sweetness to the crust and helps create a tender crumb.
- 1 cup unsalted butter (softened) – Provides richness and the buttery flavor that makes the crust irresistible.
- A pinch of salt – Enhances the flavors and balances the sweetness.
- 4 large eggs – Create structure for the filling and help it set properly during baking.
- 2 cups granulated sugar – Sweetens the lemon filling while balancing the tartness.
- ¼ cup all-purpose flour – Helps stabilize the filling and gives it a slight body.
- ½ cup fresh lemon juice (about 3 lemons) – Provides the signature tangy flavor and acidity.
- 1 tbsp lemon zest – Intensifies the lemon flavor with natural oils from the peel.
- Optional yellow food coloring – Gives the filling a bright, sunny appearance.
- Powdered sugar for topping – Adds a finishing touch and a bit of extra sweetness.
- Vegan: Replace the butter with vegan butter or coconut oil, use a flax egg or commercial egg replacer for the eggs, and ensure your sugar is vegan-friendly.
- Gluten-free: Substitute regular flour with a 1:1 gluten-free flour blend that contains xanthan gum for best results.
- Low-calorie: Use a sugar substitute like stevia or erythritol, reduce the amount of butter slightly, and use egg whites in place of whole eggs.
How to Prepare the Perfect Lemon Cookie Bars: Step-by-Step Guide
Creating delicious Lemon Cookie Bars is a straightforward process that yields impressive results. Follow these detailed steps to ensure your bars turn out perfectly every time.First Step: Preparation and mise en place
Before you begin baking, it’s essential to have all your ingredients measured and ready. Start by preheating your oven to 350°F (175°C). For the crust, you’ll need 2 cups of all-purpose flour, ½ cup of powdered sugar, and 1 cup of softened unsalted butter. For the filling, gather 4 large eggs, 2 cups of granulated sugar, ¼ cup of flour, ½ cup of fresh lemon juice (about 3 lemons), and 1 tablespoon of lemon zest. Prepare a 9×13-inch baking pan by greasing it thoroughly with butter or cooking spray. For easier removal, you can also line the pan with parchment paper, leaving some overhang to use as handles when lifting the bars out later. If you’re not using fresh lemons, now is the time to do so. Zest the lemons before juicing them to get the most flavor from the peel. Measure out all your ingredients precisely, as baking requires accuracy for consistent results.Second Step: Making the crust
In a medium bowl, combine 2 cups of all-purpose flour and ½ cup of powdered sugar. Add a pinch of salt to enhance the flavors. Cut in 1 cup of softened butter using a pastry blender or two forks until the mixture resembles coarse crumbs. Alternatively, you can use a stand mixer with the paddle attachment to combine the ingredients until they form a crumbly mixture. The mixture should hold together when pressed but remain crumbly in texture. This creates the shortbread-like crust that will provide a sturdy base for your lemon filling.Third Step: Baking the crust
Press the crumbly mixture firmly and evenly into the bottom of your prepared 9×13-inch pan. Using the back of a measuring cup or your hands, ensure the crust is evenly distributed and compacted. This step is crucial as it prevents the filling from seeping underneath the crust during baking. Place the pan in the preheated oven and bake for 15-18 minutes, or until the crust is lightly golden around the edges. While the crust is baking, you can prepare the lemon filling, which you’ll pour over the hot crust.Fourth Step: Preparing the filling
In a large bowl, whisk together 4 large eggs and 2 cups of granulated sugar until well combined. The mixture will become slightly lighter in color as you whisk. Add ¼ cup of all-purpose flour and whisk until smooth. Stir in ½ cup of fresh lemon juice and 1 tablespoon of lemon zest. If you prefer a brighter yellow color for your filling, add a few drops of yellow food coloring at this stage. Whisk the mixture until all ingredients are thoroughly incorporated. The filling should be smooth and free of lumps. The flour helps stabilize the eggs and sugar, creating a texture that sets beautifully while remaining slightly soft and custard-like.Fifth Step: Adding the filling to the crust
Once the crust is lightly golden, remove it from the oven but keep the oven on. Immediately pour the lemon filling over the hot crust. This immediate transfer is important as it helps create a seal between the crust and filling, preventing the filling from making the crust soggy. Gently tap the pan on the counter a few times to release any air bubbles in the filling. Return the pan to the oven and bake for an additional 20-25 minutes, or until the filling is set but still slightly jiggly in the center, similar to a pumpkin pie. The edges should be firm, but the center may still have a slight wobble. This residual heat will continue to cook the filling as it cools, resulting in the perfect consistency.Tip: For the most accurate result, check the doneness by gently shaking the pan. If the edges are set but the center still has a slight wobble, the bars are perfectly baked.
Sixth Step: Cooling, chilling, and serving
Allow the bars to cool completely in the pan on a wire rack, which will take about 1-2 hours. Once cooled, refrigerate the pan for at least 2 hours or overnight to allow the filling to set completely. This chilling step is essential for achieving clean cuts when slicing. When ready to serve, lift the bars out of the pan using the parchment paper handles (if used) or cut directly in the pan. Use a sharp knife to cut into squares, wiping the knife clean between cuts for neat edges. Dust the tops generously with powdered sugar just before serving for a beautiful finishing touch. The contrast between the bright yellow filling and the white sugar creates an attractive presentation that’s perfect for gatherings.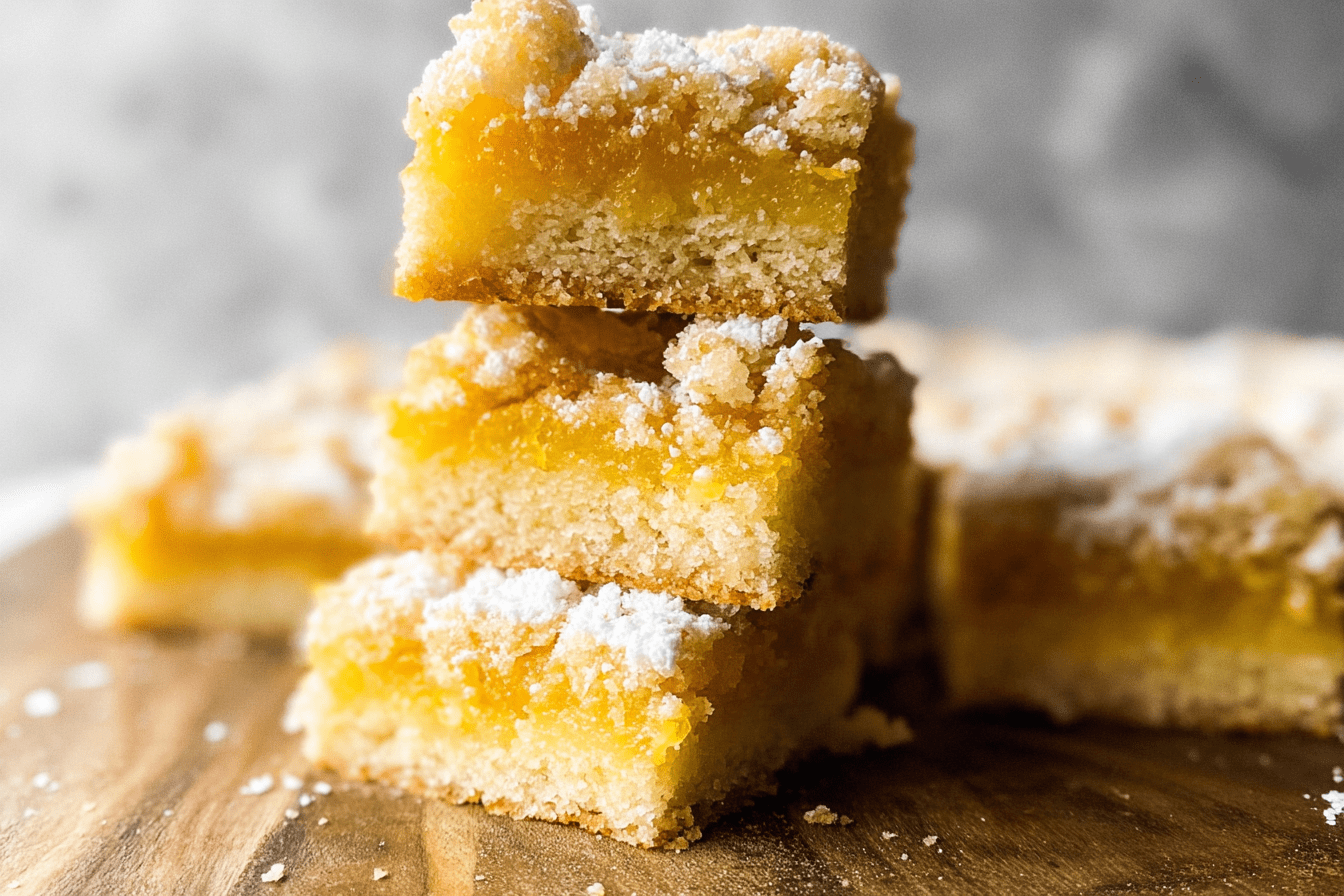
Dietary Substitutions to Customize Your Lemon Cookie Bars
Protein and Main Component Alternatives
For those with dietary restrictions or preferences, there are several substitutions you can make to customize your Lemon Cookie Bars without sacrificing taste or texture. If you need to avoid dairy, replace the butter in the crust with coconut oil or a high-quality vegan butter substitute. Coconut oil will add a subtle coconut flavor, while vegan butter provides a more neutral taste similar to traditional butter. Keep in mind that coconut oil solidifies at cooler temperatures, which may make the crust slightly harder when chilled. For the eggs in the filling, you can use a commercial egg replacer or make a flax egg by mixing 1 tablespoon of ground flaxseed with 3 tablespoons of water for each egg. Let the mixture sit for a few minutes until it thickens before adding it to the other ingredients. This substitution may slightly alter the texture, making it a bit more gelatinous, but it will still be delicious. If you’re looking for other dessert options that can be easily customized, you might enjoy no-bake Oreo cheesecake, which can be adapted to various dietary preferences as well.Vegetable, Sauce, and Seasoning Modifications
While Lemon Cookie Bars traditionally rely on simple ingredients, you can incorporate various modifications to suit different tastes or seasonal preferences. For a more complex citrus flavor, consider combining lemon juice with a small amount of orange or lime juice. This blend creates a multi-dimensional citrus profile that adds depth to the bars. Similarly, you can mix lemon zest with orange zest for a citrus medley. If you prefer a less acidic filling, reduce the lemon juice slightly and add a tablespoon of lemon extract along with some water to maintain the liquid ratio. This adjustment preserves the lemon flavor while softening the tartness. For those who enjoy herbs in their desserts, adding a tablespoon of finely chopped fresh herbs like lavender, thyme, or rosemary to the filling can create a sophisticated flavor profile. These herbs complement citrus beautifully and add a unique twist to the traditional recipe. If you’re looking to add a bit of texture, consider stirring in a handful of white chocolate chips or chopped nuts like pistachios or almonds after you’ve poured the filling over the crust. These additions provide delightful contrasts to the smooth filling and buttery crust.Mastering Lemon Cookie Bars: Advanced Tips and Variations
Once you’ve mastered the basic recipe, there are numerous ways to enhance your Lemon Cookie Bars and create variations that suit your personal taste or impress your guests.Pro cooking techniques
For a perfectly smooth filling without any curdling, whisk your eggs and sugar thoroughly before adding the lemon juice. This technique helps create a stable emulsion that resists separating during baking. Additionally, room-temperature eggs incorporate more easily into the mixture, resulting in a smoother texture. To prevent a soggy crust, ensure the crust is fully baked and golden before adding the filling. The hot crust creates a barrier that helps seal the bottom, keeping it crisp even after the filling is added. If you notice the edges of your crust browning too quickly, you can create a foil shield to protect them while the filling continues to bake. For an extra crisp crust, try adding a layer of finely chopped nuts to the bottom of the pan before pressing in the dough mixture. This creates a nutty, crunchy layer that adds both flavor and texture to the final bars.Flavor variations
While classic Lemon Cookie Bars are delicious on their own, you can experiment with different flavor profiles to create unique desserts. For a tropical twist, replace some of the lemon juice with lime juice and add coconut flakes to the crust. This variation is perfect for summer gatherings and potlucks. For a richer dessert, consider adding a layer of cream cheese filling between the crust and lemon layer. Simply beat 8 ounces of softened cream cheese with 1/2 cup of sugar and 1 egg until smooth, spread it over the baked crust, and then pour the lemon filling on top. Another delicious variation is to add a layer of berries. After the crust has baked and cooled slightly, arrange fresh blueberries or raspberries over the crust before pouring the lemon filling. The berries add a burst of color and a complementary tartness that pairs perfectly with the lemon. For those who enjoy a bit of heat, adding a pinch of cayenne pepper or some freshly grated ginger to the filling can create a surprisingly delicious contrast that enhances the lemon flavor.| Variation | Ingredients to Add | Instructions |
|---|---|---|
| Tropical Lemon Bars | 1/4 cup lime juice, 1/2 cup coconut flakes | Replace half the lemon juice with lime juice, add coconut to crust |
| Cream Cheese Layer | 8 oz cream cheese, 1/2 cup sugar, 1 egg | Beat ingredients until smooth, spread over baked crust |
| Berry Lemon Bars | 1 cup fresh blueberries or raspberries | Arrange berries over crust before pouring filling |
| Spiced Lemon Bars | 1/8 tsp cayenne or 1 tsp fresh ginger | Add spices to the filling mixture |
Presentation tips
For an elegant presentation, use a stencil to create patterns with powdered sugar on top of the bars. Simple shapes like hearts, stars, or even the first letter of the recipient’s name can transform these simple bars into a personalized dessert. When serving at a party or gathering, cut the bars into smaller squares (about 1-inch) and place them in decorative paper cups. This approach makes them easy to grab and eat without creating a mess, and the presentation looks professional and thoughtful. For a more sophisticated look, garnish each bar with a thin slice of fresh lemon, a small sprig of mint, or a few edible flowers. These simple additions elevate the appearance and show extra attention to detail.Make-ahead options
Lemon Cookie Bars are an excellent choice for advance preparation. You can make the entire recipe up to three days before serving. Store them in the refrigerator, covered tightly, and dust with powdered sugar just before serving to keep them looking fresh. For even longer storage, you can freeze the baked and cooled bars. Wrap the entire pan tightly with plastic wrap and aluminum foil, or cut the bars and store them in an airtight container with layers of parchment paper between the pieces. They can be frozen for up to three months and thawed in the refrigerator overnight. If you’re planning to serve these bars at an event, consider preparing the crust and filling separately a day in advance. Keep the crust at room temperature and the filling in the refrigerator. When ready to bake, simply pour the filling over the crust and bake as directed.How to Store Lemon Cookie Bars: Best Practices
Proper storage of your Lemon Cookie Bars ensures they maintain their delicious flavor and texture for as long as possible. Whether you’re saving leftovers or planning ahead for a future event, these storage tips will help keep your bars fresh.Refrigeration
For short-term storage, Lemon Cookie Bars should be kept in the refrigerator. Place the bars in an airtight container, separating layers with parchment paper to prevent sticking. When stored this way, they will maintain their quality for 5-7 days. The cooler temperature helps the filling set firmly and prevents the crust from becoming too soft. Before serving refrigerated bars, allow them to sit at room temperature for about 15-20 minutes. This slight warming enhances the flavor and makes the bars more enjoyable to eat, as the butter in the crust will soften slightly for a better texture. For those who prefer a variety of desserts in their repertoire, peach crisp is another excellent option that stores well in the refrigerator.Freezing
For longer storage, Lemon Cookie Bars freeze exceptionally well. To freeze, first ensure the bars are completely cool. You can either freeze the entire uncut slab or cut the bars into individual portions. If freezing individual pieces, arrange them in a single layer on a baking sheet and place them in the freezer until firm (about 2 hours). Once frozen, transfer the bars to a freezer-safe container or bag, removing as much air as possible to prevent freezer burn. Lemon Cookie Bars can be frozen for up to 3 months without significant loss of quality. When you’re ready to enjoy them, thaw the bars overnight in the refrigerator or let them sit at room temperature for about an hour. After thawing, you may want to dust them with fresh powdered sugar to restore their appearance.Reheating
While Lemon Cookie Bars are delicious served chilled, you might prefer them slightly warmed. To reheat individual bars, place them in a microwave for 10-15 seconds. Be careful not to overheat, as the filling can become too soft and the crust may lose its crispness. Alternatively, you can warm them in a preheated 300°F (150°C) oven for 5-10 minutes. This method helps preserve the texture of the crust while gently warming the filling. Avoid using a toaster oven as it can create uneven heating that may compromise the quality of the bars.Meal prep considerations
Lemon Cookie Bars are an excellent option for meal prep due to their durability and the ease of batch cooking. You can prepare a large batch on the weekend and enjoy them throughout the week as a sweet treat or dessert. When prepping for the week, consider cutting the bars into uniform portions and storing them in individual containers. This approach makes it easy to grab a single serving for lunchboxes or after-dinner treats without having to handle the entire batch each time. If you’re planning to bring these bars to a potluck or gathering, prepare them a day or two in advance. The flavors often improve after a day of resting in the refrigerator, as the lemon has time to meld with the other ingredients, creating a more complex and balanced taste.
FAQs: Frequently Asked Questions About Lemon Cookie Bars
What are lemon cookie bars?
Lemon cookie bars are a dessert combining a buttery shortbread crust with a tangy lemon filling, baked in a single pan for easy slicing. The crust provides a crisp base, while the top layer offers bright citrus flavor from fresh lemon juice and zest. They’re popular for their simple preparation—no rolling dough required—and balance of sweet and tart tastes. Perfect for potlucks, picnics, or afternoon treats, one 9×13-inch pan yields 24 bars. Dust with powdered sugar for a finishing touch. Prep time is about 15 minutes, bake time 30-35 minutes at 350°F. Store in the fridge for up to 5 days.
How do you make lemon cookie bars from scratch?
Start with the crust: mix 2 cups flour, ½ cup powdered sugar, and 1 cup softened butter until crumbly. Press into a greased 9×13-inch pan and bake at 350°F for 15-18 minutes until lightly golden. For the filling, whisk 4 eggs, 2 cups sugar, ¼ cup flour, ½ cup lemon juice, and 1 tbsp zest. Pour over hot crust and bake 20-25 minutes until set but jiggly in the center. Cool completely, then chill 2 hours before cutting. This yields chewy, zesty bars. Pro tip: use room-temperature eggs for smooth filling. Total time: 1 hour active, plus chilling.
What ingredients are in lemon cookie bars?
For the crust: 2 cups all-purpose flour, ½ cup powdered sugar, 1 cup unsalted butter (softened), and a pinch of salt. Lemon filling needs 4 large eggs, 2 cups granulated sugar, ¼ cup all-purpose flour, ½ cup fresh lemon juice (about 3 lemons), 1 tbsp lemon zest, and optional yellow food coloring. Powdered sugar for topping. These simple pantry staples create 24 servings. Fresh lemons give the best flavor—avoid bottled juice for authentic tang. Measure flour by spooning into the cup to avoid dense crust. Gluten-free? Swap with 1:1 GF flour blend.
How long do lemon cookie bars last?
Freshly baked lemon cookie bars stay good at room temperature for 1-2 days in an airtight container. Refrigerate for up to 5-7 days—they firm up nicely in the cold, enhancing the crust texture. For longer storage, freeze in a single layer on a tray, then transfer to freezer bags for up to 3 months. Thaw overnight in the fridge or at room temp for 1 hour. Avoid microwaving to prevent sogginess. Signs they’re bad: mold, off smell, or overly dry texture. Always cover tightly to retain moisture and lemon brightness.
Can you freeze lemon cookie bars?
Yes, lemon cookie bars freeze well for make-ahead convenience. Bake and cool completely, then cut into squares. Place on a parchment-lined tray to freeze individually for 2 hours (prevents sticking). Transfer to freezer-safe bags or containers, removing air. They keep quality for 2-3 months. Thaw in the fridge overnight or on the counter for 30-60 minutes—dust with powdered sugar after thawing for freshness. Freezing mutes the lemon tang slightly, but texture holds up. Don’t freeze uncut pan to avoid messy slicing later. Label bags with date for easy tracking.
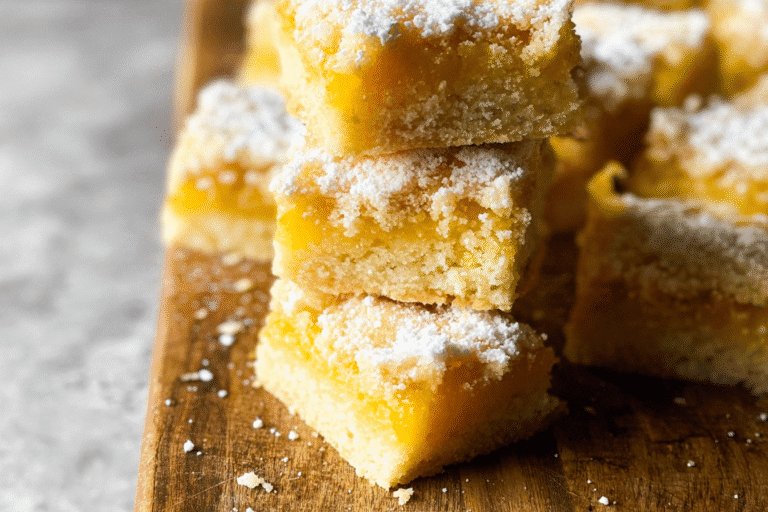
Lemon Cookie Bars
🍋🍪 Zesty lemon sugar cookie bars deliver buttery soft cookie base under glossy tangy lemon glaze – bright sunshine in every bite!
☀️ Easy homemade crowd-pleaser perfect for parties, picnics, or afternoon tea with refreshing citrus punch minus fuss.
- Total Time: 2 hours
- Yield: 24 bars
Ingredients
– 2 cups all-purpose flour for the crust
– ½ cup powdered sugar for the crust
– 1 cup unsalted butter (softened) for the crust
– A pinch of salt to enhance flavors
– 4 large eggs for the filling
– 2 cups granulated sugar for the lemon filling
– ¼ cup all-purpose flour for the filling
– ½ cup fresh lemon juice (about 3 lemons) for tangy flavor
– 1 tbsp lemon zest to intensify the lemon flavor
– Optional yellow food coloring for bright appearance
– Powdered sugar for topping
Instructions
1-First Step: Preparation and mise en place Before you begin baking, it’s essential to have all your ingredients measured and ready. Start by preheating your oven to 350°F (175°C). For the crust, you’ll need 2 cups of all-purpose flour, ½ cup of powdered sugar, and 1 cup of softened unsalted butter. For the filling, gather 4 large eggs, 2 cups of granulated sugar, ¼ cup of flour, ½ cup of fresh lemon juice (about 3 lemons), and 1 tablespoon of lemon zest. Prepare a 9×13-inch baking pan by greasing it thoroughly with butter or cooking spray. For easier removal, you can also line the pan with parchment paper, leaving some overhang to use as handles when lifting the bars out later. If you’re not using fresh lemons, now is the time to do so. Zest the lemons before juicing them to get the most flavor from the peel. Measure out all your ingredients precisely, as baking requires accuracy for consistent results.
2-Second Step: Making the crust In a medium bowl, combine 2 cups of all-purpose flour and ½ cup of powdered sugar. Add a pinch of salt to enhance the flavors. Cut in 1 cup of softened butter using a pastry blender or two forks until the mixture resembles coarse crumbs. Alternatively, you can use a stand mixer with the paddle attachment to combine the ingredients until they form a crumbly mixture. The mixture should hold together when pressed but remain crumbly in texture. This creates the shortbread-like crust that will provide a sturdy base for your lemon filling.
3-Third Step: Baking the crust Press the crumbly mixture firmly and evenly into the bottom of your prepared 9×13-inch pan. Using the back of a measuring cup or your hands, ensure the crust is evenly distributed and compacted. This step is crucial as it prevents the filling from seeping underneath the crust during baking. Place the pan in the preheated oven and bake for 15-18 minutes, or until the crust is lightly golden around the edges. While the crust is baking, you can prepare the lemon filling, which you’ll pour over the hot crust.
4-Fourth Step: Preparing the filling In a large bowl, whisk together 4 large eggs and 2 cups of granulated sugar until well combined. The mixture will become slightly lighter in color as you whisk. Add ¼ cup of all-purpose flour and whisk until smooth. Stir in ½ cup of fresh lemon juice and 1 tablespoon of lemon zest. If you prefer a brighter yellow color for your filling, add a few drops of yellow food coloring at this stage. Whisk the mixture until all ingredients are thoroughly incorporated. The filling should be smooth and free of lumps. The flour helps stabilize the eggs and sugar, creating a texture that sets beautifully while remaining slightly soft and custard-like.
5-Fifth Step: Adding the filling to the crust Once the crust is lightly golden, remove it from the oven but keep the oven on. Immediately pour the lemon filling over the hot crust. This immediate transfer is important as it helps create a seal between the crust and filling, preventing the filling from making the crust soggy. Gently tap the pan on the counter a few times to release any air bubbles in the filling. Return the pan to the oven and bake for an additional 20-25 minutes, or until the filling is set but still slightly jiggly in the center, similar to a pumpkin pie. The edges should be firm, but the center may still have a slight wobble. This residual heat will continue to cook the filling as it cools, resulting in the perfect consistency.
6-Sixth Step: Cooling, chilling, and serving Allow the bars to cool completely in the pan on a wire rack, which will take about 1-2 hours. Once cooled, refrigerate the pan for at least 2 hours or overnight to allow the filling to set completely. This chilling step is essential for achieving clean cuts when slicing. When ready to serve, lift the bars out of the pan using the parchment paper handles (if used) or cut directly in the pan. Use a sharp knife to cut into squares, wiping the knife clean between cuts for neat edges. Dust the tops generously with powdered sugar just before serving for a beautiful finishing touch. The contrast between the bright yellow filling and the white sugar creates an attractive presentation that’s perfect for gatherings.
Last Step:
Please leave a rating and comment letting us know how you liked this recipe! This helps our business to thrive and continue providing free, high-quality recipes for you.Notes
🍋 Room temperature eggs ensure smooth filling without lumps.
❄️ Chill bars 30 minutes before glazing for neat drizzle lines.
🔪 Use sharp knife dipped in hot water for clean cuts.
- Prep Time: 15 minutes
- Cool: 1 hour
- Cook Time: 45 minutes
- Category: Dessert
- Method: Bake
- Cuisine: American
- Diet: Vegetarian
Nutrition
- Serving Size: 1 bar
- Calories: 220 kcal
- Sugar: 24g
- Sodium: 60mg
- Fat: 9g
- Saturated Fat: 5g
- Unsaturated Fat: 3g
- Trans Fat: 0g
- Carbohydrates: 34g
- Fiber: 0.5g
- Protein: 2g
- Cholesterol: 50mg