

Easter Poke Cake
Every spring my kitchen fills with pastel sprinkles and the warm smell of vanilla cake, and this Easter Poke Cake is the dessert my family reaches for first. It looks like it took hours of careful decorating, yet it begins with a box of white cake mix and a package of instant white chocolate pudding.
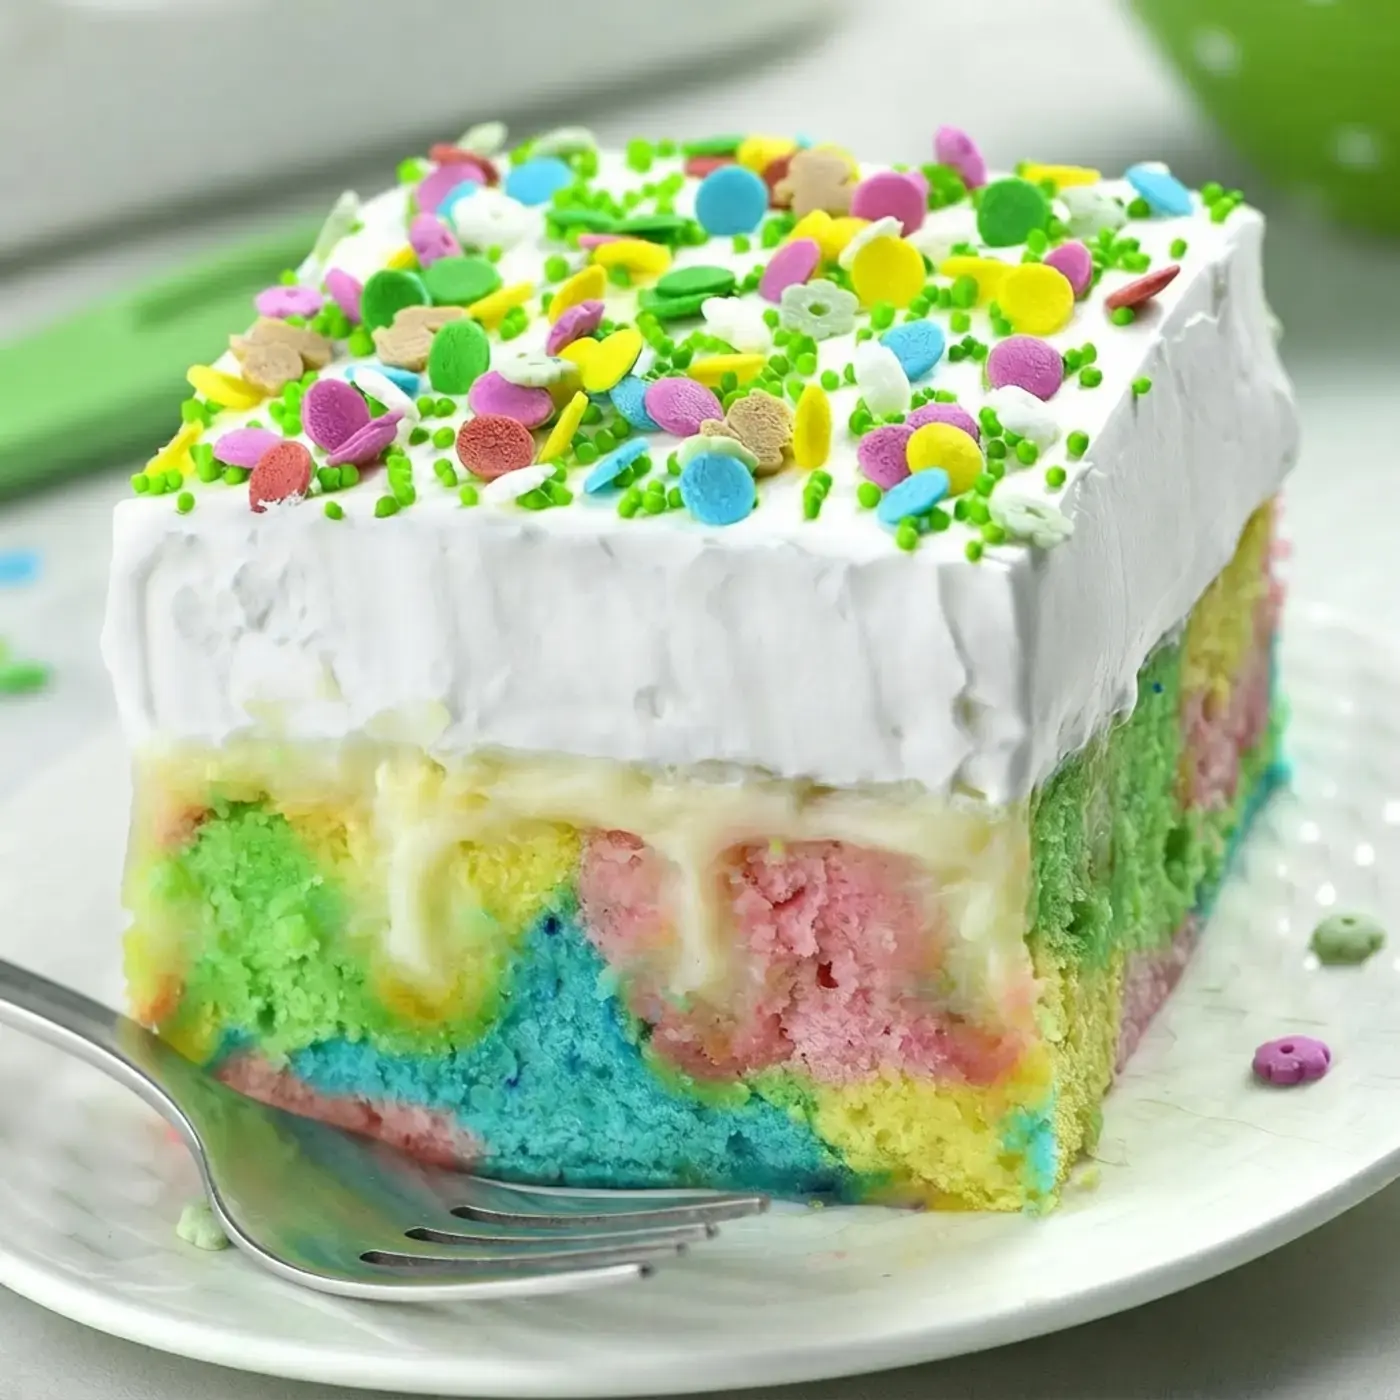
The color comes from regular liquid food coloring stirred right into the batter. You divide the batter into four bowls, tint each one a different shade, then spoon the colors into the pan so they bake into soft swirled pastel layers.
A creamy pudding filling soaks down into the poked holes, and a thick layer of whipped cream covers the top.
That same technique is wonderfully flexible. Trade the blue, green, pink, and yellow for a full spread of rainbow shades and the cake becomes a Rainbow Cake. Change the colors again and it turns into a Unicorn Cake for a birthday party. One method, many celebrations.
Because the cake gets better as it chills, it is a smart make ahead dessert. It serves a crowd, travels well to a potluck, and holds its place on a holiday table while you finish the rest of the meal.
For Easter gatherings, family celebrations, and spring birthdays, this is the kind of cake that disappears quickly, and that is exactly what I want from a holiday dessert.
I usually bake it the day before and let it chill overnight, which means the holiday morning is calm and the cake is already waiting. Slices come out clean, the layers stay distinct, and the pastel colors look just as bright as they did the day they were spooned into the pan.
Jump To
White Chocolate Poke Cake
At its heart this is a White Chocolate Poke Cake. The base is a box of white cake mix, the filling is instant white chocolate pudding, and the topping is homemade whipped cream. Each layer stays soft and creamy, and the pudding settles into every hole so no bite is dry.
Poke cakes are forgiving by nature, which is exactly why I keep coming back to them. You can mix and match cake and pudding flavors without changing the method at all. Vanilla, cheesecake, or lemon pudding all work beautifully in place of the white chocolate pudding.

For the cake base, white cake mix is the one I reach for because the pale batter takes color so evenly and never muddies the pastel shades. Vanilla cake mix or lemon cake mix can also be used if that is what you have in the pantry.
| Layer | Options |
|---|---|
| Cake base | White cake mix, vanilla cake mix, or lemon cake mix |
| Pudding filling | Instant white chocolate pudding, vanilla, cheesecake, or lemon pudding |
| Topping | Homemade whipped cream or store bought whipped topping |
That short swap list means one recipe can taste completely different from one holiday to the next, and the method never changes.
How to make Poke Cake?
The whole process is easier than the finished cake suggests. You build the batter, color it, bake it, poke it, fill it, and top it. Here is the flow before we get to the exact amounts.
Prepare the cake mix according to the directions on the box. Divide the batter into four equal portions and add a few drops of food coloring to each one, then stir so the color is even.
Using a spoon, drop small spoonfuls of each colored batter into a greased 9×13 inch baking dish. The drops spread as they land, so work quickly.
Add one color at a time, leaving a few inches between the drops, then repeat with the second, third, and fourth colors until the bottom of the pan is covered. Add another layer of drops on top until all the batter is used.
Tap the dish on the counter to flatten the surface instead of spreading with a spatula, which would mix the colors together. Swirl the colors just a little with a toothpick. Stop before they blend into one shade. Then bake as directed on the box.

A greased dish matters more than you might think. The batter slides and spreads against the greased surface, which is what creates those soft edges and the marbled look once the cake is sliced.
After baking, let the cake sit at room temperature for about 10 minutes, then poke holes all over the top with the handle end of a wooden spoon or a similar object, about an inch apart. Let the cake cool completely before you go any further.
For the filling, whisk the white chocolate pudding and milk until the pudding dissolves. Before it sets, pour it over the cooled cake and fill all the holes as much as you can, then spread the rest on top and refrigerate until fully set.
Once the pudding is set and the cake is completely cool, top it with whipped cream. Homemade whipped cream is my preference, but store bought whipped topping works if you are short on time.
Can I Make this Poke Cake Ahead of Time?
Yes, and this is one of the best reasons to make it. Poke cakes get better as they sit, because the pudding keeps soaking into the cake and the flavors settle together. The filled and frosted cake can be stored in the fridge for up to 3 days before you serve it.
There is one detail worth remembering. Do not add the sprinkles ahead of time, because the colors can bleed and tint the whipped cream. Wait until just before serving so the top stays clean and bright.
If you plan to travel with the cake, keep it chilled until you arrive and add the sprinkles once you get there.
If you want a garnish that can sit overnight, Easter egg candies or Peeps hold their shape and color better than sprinkles.
Ingredients
You will need the following for the cake, the filling, and the topping. A boxed mix keeps this simple, and the pudding and cream do the heavy lifting for flavor and texture.
- 1 box white cake mix
- The eggs, water, and oil listed on the box
- 2 boxes instant white chocolate pudding, 3.3 oz. each
- 3 1/2 cups milk
- 2 cups heavy cream
- 1/4 cup powdered sugar, or more to taste
- 1 teaspoon vanilla extract
- Food coloring in blue, green, pink, and yellow
Instructions
These steps follow the box for the cake itself, then a simple whisk and chill method for the filling and the topping. Read through once before you start so the timing feels easy.
- Preheat the oven to the temperature specified on the box. Grease a 9×13 inch baking dish with baking spray and set it aside.
- Prepare the cake mix according to the directions listed on the box.
- Divide the batter into 4 equal portions and add a few drops of food coloring to each bowl, stirring well so the color is even.
- Using a spoon, drop small spoonfuls of each colored batter over the bottom of the greased dish. The drops spread quickly in a greased pan, so work fast. Add one color at a time, leaving a few inches between the drops, then add the second color, then the third, then the fourth, until the bottom of the pan is covered. Add another layer of drops on top until all the batter is used.
- Tap the baking dish on the counter to flatten the surface. Do not spread the batter with a spatula, because that mixes the colors together. Use a toothpick to swirl the colors just a little, and stop before they blend.
- Bake as directed on the box.
- When the cake is baked, let it sit at room temperature for about 10 minutes. Poke holes all over the top with the handle end of a wooden spoon, almost an inch apart, then let the cake cool completely.
- In a bowl, combine the white chocolate pudding and the milk, whisking until the pudding dissolves.
- Before the pudding sets completely, pour it over the cooled cake and try to fill all the holes as fully as possible. Spread the remaining pudding on top and place the cake in the fridge to set completely.
- When the pudding is set and the cake is completely cooled, top it with whipped cream. Mix the chilled heavy cream and vanilla extract until soft peaks form, then add the powdered sugar and mix until stiff peaks form. Spread the cream over the pudding layer.
- Garnish with sprinkles just before serving.
- Store the cake in the fridge.
If you are short on time, a store bought whipped topping can stand in for the homemade whipped cream. Everything else stays exactly the same.
Two small habits make the biggest difference here. First, work quickly when you drop the colored batter, because the drops keep spreading while they wait. Second, resist the urge to stir the colors together with the toothpick. A light swirl gives you pastel ribbons, while heavy mixing turns everything gray.
Recipe details
Prep time is 20 minutes, cook time is 30 minutes, and the total time comes to 1 hour and 30 minutes.
| Detail | Time |
|---|---|
| Prep time | 20 minutes |
| Cook time | 30 minutes |
| Total time | 1 hour and 30 minutes |
Plan for extra chilling time in the fridge so the pudding can set fully before you slice the cake.
FAQs
How do you make an Easter poke cake with a rainbow pattern inside?
To make a rainbow Easter poke cake, prepare a white cake mix according to the box directions. Divide the batter into four equal portions and color each with a few drops of blue, green, pink, and yellow food coloring. Drop small dollops of each color into a greased 9×13 inch pan, alternating colors, then lightly swirl with a toothpick before baking.
Can you make an Easter poke cake ahead of time?
Yes, you can make an Easter poke cake ahead of time. Once the cake is filled with pudding and topped with whipped cream, it can be stored covered in the refrigerator for up to 3 days before serving. However, do not add sprinkles or candy decorations until just before serving, as they can bleed color into the whipped cream.
What type of pudding is best for an Easter poke cake?
Instant white chocolate pudding is the recommended choice for an Easter poke cake, as its creamy custard-like texture perfectly complements the cake. Two boxes of 3.3 oz instant white chocolate pudding are whisked with 3 1/2 cups of milk. Vanilla, cheesecake, or lemon instant pudding are also excellent alternatives.
How do you keep the colored cake batter from turning muddy when making a rainbow poke cake?
To keep the colors vibrant and prevent them from turning muddy, work quickly by dropping one color at a time into the greased pan, leaving a few inches between drops. After adding all colors, tap the pan on the counter to flatten the batter without spreading it. Use a toothpick to gently swirl the colors only at their points of contact, avoiding overmixing.

Easter Poke Cake
Easter Poke Cake Every spring my kitchen fills with pastel sprinkles and the warm smell of vanilla cake, and this Easter Poke Cake is the dessert my family reaches for first. It looks like it took hours of careful decorating, yet it begins with a box of white cake mix and a package of instant white chocolate pudding.
- Total Time: 90 min
Ingredients
1 box white cake mix
ingredients listed on the box, eggs, water, oil
2 boxes instant white chocolate pudding, 3.3 oz. each
3 1/2 cups milk
2 cups heavy cream
1/4 cup powdered sugar, or more to taste
1 teaspoon vanilla extract
Food coloring, blue, green, pink, and yellow
Instructions
1-Preheat the oven to a temperature specified: Preheat the oven to a temperature specified on the box. Grease a 9×13 inches baking dish with baking spray and set aside.
2-Prepare the cake mix according to the: Prepare the cake mix according to the directions listed on the box.
3-Next, divide the mixture into 4 equal: Next, divide the mixture into 4 equal portions and add a few drops of food coloring in each bowl, and stir well.
4-Then using a spoon, make small droops: Then using a spoon, make small droops of each mixture in the bottom of the baking dish. Drops will spread in greased dish so you should do this quickly. I suggest you to drop one color at the time leaving a few inches apart between the drops, then make the drops with second color, then the third, then the fourth, until you cover the bottom of the pan. Then drop another layer on top until use all the batter. Finally, tap the baking dish on the counter to flatten the surface, do not spread with the spatula to avoid mixing the colors. Using a toothpick, swirl the colors just a little bit. Do not over mix, you want the colors swirled not mixing together. Bake as directed on the box.
5-When the cake is baked, and sit: When the cake is baked, and sit at room temperature for about 10 minutes, poke the cake. Use the handle end of a wooden spoon poke holes all over the top of the cake, almost an inch apart, then allow it to cool completely.
6-In a bowl, combine the white chocolate: In a bowl, combine the white chocolate pudding and milk, whisking until the pudding is dissolved. Before the pudding sets completely, pour it over the cooled cake, trying to fill all the holes completely. Spread remaining pudding on top and place in the fridge to set completely.
7-When the pudding is set and the: When the pudding is set and the cake is completely cooled, top the cake with whipped cream. Mix chilled heavy cream and vanilla extract until soft peaks form. Add powdered sugar and mix until stiff peaks form. Spread over the pudding layer.
8-Garnish with sprinkles before serving: Garnish with sprinkles before serving.
9-Store in the fridge: Store in the fridge.
Last Step:
Please leave a rating and comment letting us know how you liked this recipe! This helps our business to thrive and continue providing free, high-quality recipes for you.- Prep Time: 20 min
- Cook Time: 30 min
- Method: bake


