Ingredients
– 1 can (15 oz) chickpeas, drained and rinsed
– ¼ cup tahini (smooth variety recommended)
– Juice of 1 large lemon (approximately 3 tablespoons)
– 1-2 garlic cloves, peeled
– 2-3 tablespoons aquafaba (liquid from canned chickpeas)
– 2 tablespoons extra-virgin olive oil
– ½ teaspoon ground cumin
– ½ teaspoon salt
– 1-2 tablespoons ice water (for extra creaminess)
– Paprika (optional garnish)
– additional olive oil (optional garnish)
Instructions
1-First Step: Prepare Your Chickpeas Begin by draining the chickpeas from the can and rinsing them thoroughly under cold water to remove any canning liquids. For the smoothest possible texture, you have two options: either peel the skins off the chickpeas by gently pinching them between your fingers, or boil the drained chickpeas in water for about 10 minutes until very soft. The peeling method takes more time but yields the silkiest results. If you are short on time, the boiling method helps soften the skins enough that they will blend seamlessly into your hummus. Once prepared, set the chickpeas aside while you prepare the other ingredients. This preparation step, while seemingly tedious, makes a significant difference in the final texture of your homemade hummus.
2-Second Step: Prepare the Flavor Base In your food processor, combine the tahini and lemon juice. Process this mixture for about 1 minute until it becomes thick and creamy. This step is crucial because it breaks down the tahini’s structure, which will help create a smoother final texture. Scrape down the sides of the bowl, then add the garlic, salt, and cumin. Process again for another 30 seconds until the garlic is well incorporated and the mixture appears pale and whipped. The garlic should be completely minced and distributed throughout the tahini mixture at this point. If you prefer a milder garlic flavor, you can roast the garlic cloves before adding them, which will impart a sweeter, less pungent taste to your hummus.
3-Third Step: Incorporate Liquids With the food processor running, slowly drizzle in the olive oil. Continue processing until the oil is fully emulsified into the mixture. Then, add 2 tablespoons of aquafaba (the liquid from the chickpea can) and process for another minute. The mixture should become very smooth and slightly fluffy. At this point, you can add 1-2 tablespoons of ice water to help create an even creamier texture. The ice-cold temperature helps prevent the tahini from seizing and contributes to a lighter, airier consistency. This combination of aquafaba and ice water is the secret to achieving that velvety smooth texture found in restaurant-quality hummus. The aquafaba acts similarly to egg whites in baking, adding structure and fluffiness without altering the flavor.
4-Fourth Step: Add the Chickpeas Now it is time to add the star ingredient. With the food processor running, add the prepared chickpeas gradually, about one-third at a time. This gradual addition helps ensure even processing and prevents the motor from working too hard. Process for 3-5 minutes, stopping occasionally to scrape down the sides of the bowl. You will notice the mixture becoming smoother and creamier with each passing minute. Do not rush this step the longer you process, the smoother your hummus will become. The goal is to break down the chickpeas completely until no texture remains, creating a perfectly uniform dip. Patience during the blending process is the key difference between homemade hummus and the commercial versions. The extra minutes of processing transform the texture from grainy to silky smooth.
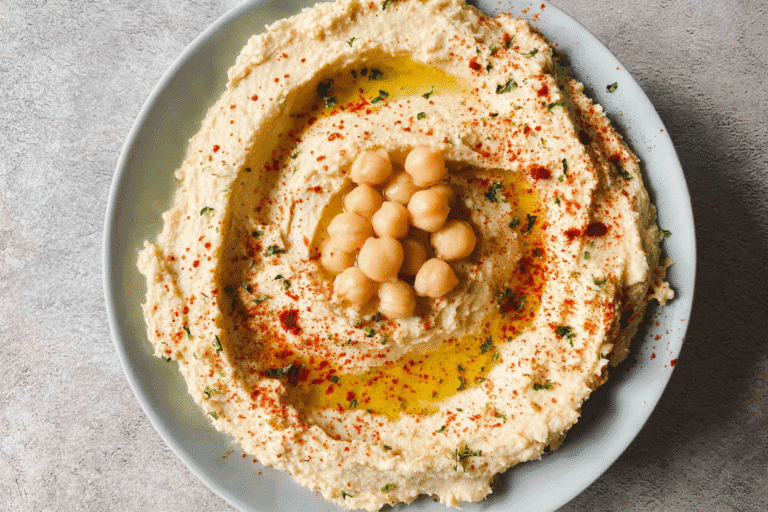
5-Final Step: Adjust Seasoning and Serve Taste your hummus and adjust the seasoning as needed. You might want to add more salt for depth, extra lemon juice for brightness, or another pinch of cumin for warmth. If the texture is too thick, add a little more ice water or aquafaba, one tablespoon at a time, until you reach your desired consistency. Transfer the hummus to a serving bowl and create a small well in the center. Drizzle generously with olive oil and sprinkle with paprika for a classic presentation. Serve immediately with fresh vegetables, warm pita bread, or crackers. This creamy hummus also makes an excellent spread for sandwiches, particularly in a chicken shawarma wrap, where it adds moisture and flavor that complements the seasoned meat perfectly.
Last Step:
Please leave a rating and comment letting us know how you liked this recipe! This helps our business to thrive and continue providing free, high-quality recipes for you.Notes
🫘 Peel chickpeas (pop skins off) for smoothest texture.
🧄 Start with 1 garlic clove; add more to taste as raw garlic mellows when blended.
❄️ Aquafaba (chickpea liquid) makes fluffier hummus than plain water.
- Prep Time: 10 minutes
- Category: Appetizer
- Method: No Cook
- Cuisine: Middle Eastern
- Diet: Vegan, Vegetarian, Gluten Free
Nutrition
- Serving Size: ¼ cup
- Calories: 150 kcal
- Sugar: 1g
- Sodium: 200mg
- Fat: 12g
- Saturated Fat: 2g
- Unsaturated Fat: 9g
- Trans Fat: 0g
- Carbohydrates: 9g
- Fiber: 2g
- Protein: 4g
- Cholesterol: 0mg