

Why You’ll Love This Christmas Pinwheel Cookies Recipe
If you want a Christmas Pinwheel Cookies Recipe that looks like it belongs on a holiday cookie tray but still stays doable for everyday home cooks, these pinwheels are a win. The swirl pattern is striking, the dough is sliceable, and the flavor feels classic and cozy.
- Ease of preparation: The dough comes together with simple mixing steps, and the bake time is quick at 12 to 15 minutes. Most of the “wait” is chilling, which helps you stay on schedule even when life gets busy.
- Health-conscious balance: Each cookie is about 173 calories with 2g protein and 9g fat, making them a reasonable treat for portion-minded holiday snacking.
- Versatility: You can adjust color intensity, try different flavor extracts like almond or peppermint, and tailor the dough for different preferences. Plus, the cookies freeze well for up to two months.
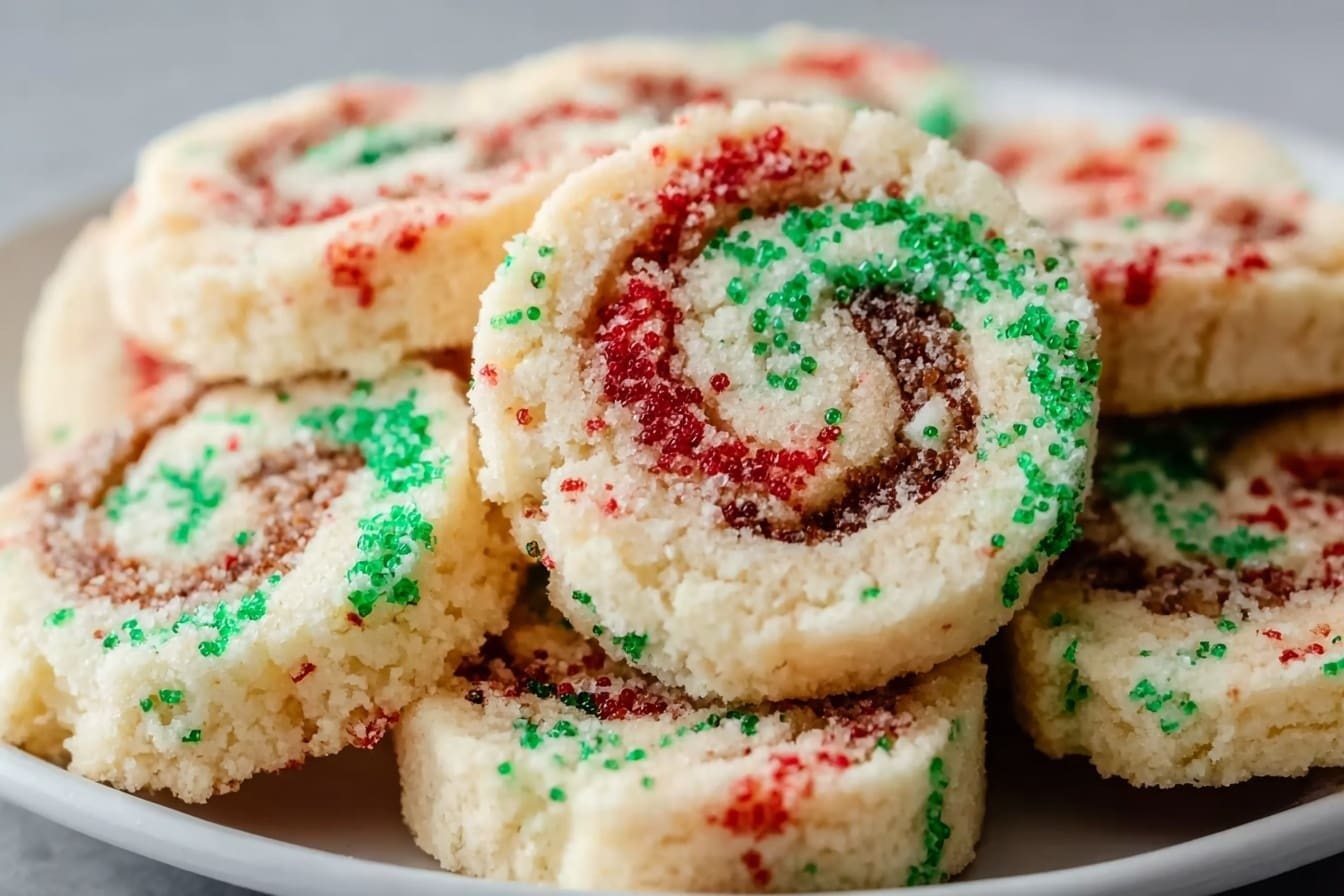
- Distinctive flavor and look: With vanilla-forward sweetness and vibrant red and green layers, these cookies deliver a festive bite and a “wow” visual spiral every time you slice a log.
Pro tip: Make your life easier by measuring ingredients precisely, and don’t skip the chilling time. It’s what keeps the swirl clean and crisp.
To get more ideas for holiday baking inspiration, you can also browse 50 creative Christmas cookie recipes for extra flavors and presentation ideas.
Jump To
- 1. Why You’ll Love This Christmas Pinwheel Cookies Recipe
- 2. Essential Ingredients for Christmas Pinwheel Cookies Recipe
- 3. How to Prepare the Perfect Christmas Pinwheel Cookies Recipe: Step-by-Step Guide
- 4. Dietary Substitutions to Customize Your Christmas Pinwheel Cookies Recipe
- 5. Mastering Christmas Pinwheel Cookies Recipe: Advanced Tips and Variations
- 6. How to Store Christmas Pinwheel Cookies Recipe: Best Practices
- 7. FAQs: Frequently Asked Questions About Christmas Pinwheel Cookies Recipe
- 8. Christmas Pinwheel Cookies Recipe
Essential Ingredients for Christmas Pinwheel Cookies Recipe
Below is everything you need for this Christmas Pinwheel Cookies Recipe, including the dough base and the red and green swirl colors. The measurements are exact so your pinwheels slice evenly and bake consistently.
Main ingredients (for classic pinwheel dough)
- All-purpose flour: Provides structure for a tender, sliceable cookie
- Baking powder and salt: Adds lift and balanced flavor
- Unsalted butter and granulated sugar: Creates the soft, pale, fluffy dough texture
- Egg and real vanilla extract: Binds everything and brings warm flavor
- Red and green food coloring: Makes the signature holiday swirl pop
Structured ingredients list (precise measurements)
For about 4 dozen cookies (as written in the nutritional estimates):
- 2 cups all-purpose flour plus extra for dusting
- 1/2 teaspoon baking powder
- 1/4 teaspoon salt
- 12 tablespoons unsalted butter at room temperature (salted butter can be used if salt is adjusted)
- 3/4 cup granulated sugar
- 1 egg at room temperature
- 1 teaspoon vanilla extract (real, not imitation)
- 1/2 to 1 teaspoon liquid red food coloring or gel food coloring for desired intensity
- 1/2 to 1 teaspoon liquid green food coloring or gel food coloring for desired intensity
Notes on special dietary options
This recipe is not inherently vegan or gluten-free because it uses butter, egg, and all-purpose flour. Still, you can adapt it with careful substitutions. Here are options to consider:
- Vegan: Use a plant-based butter substitute and a suitable egg replacer (such as a commercial egg replacer). For best texture, choose a butter replacement that measures like regular butter and holds shape when chilled.
- Gluten-free: Swap in a 1-to-1 gluten-free all-purpose flour blend. For pinwheel cookies, look for blends that include xanthan gum or similar binding so the dough rolls and slices cleanly.
- Low-calorie: Keep portions smaller and consider baking slightly thinner for a crispier bite. You can also reduce color intensity if you want, but don’t change the butter or sugar drastically unless you’re ready for texture changes.
Want another holiday treat idea after you finish baking? Check out cream cheese cookies for a different but equally festive cookie style.
How to Prepare the Perfect Christmas Pinwheel Cookies Recipe: Step-by-Step Guide
This Christmas Pinwheel Cookies Recipe is built for clean layers: mix, color, chill, roll into squares, stack, roll into a log, slice, then bake. If you’ve ever struggled with cookie dough that sticks or swirls that blur, you’ll appreciate how the chilling steps protect the design.
First Step: Prep your workspace and dry mix
Combine 2 cups all-purpose flour plus extra for dusting, 1/2 teaspoon baking powder, and 1/4 teaspoon salt in a medium bowl. Whisk it together, then set it aside. This keeps the dry ingredients evenly distributed so your dough stays consistent.
If you’re using gluten-free flour, whisk in any required binder (based on your blend) and follow that brand’s guidance.
Second Step: Cream butter and sugar until pale and fluffy
In a large bowl, beat 12 tablespoons unsalted butter at room temperature with 3/4 cup granulated sugar until pale and fluffy, about 1 to 2 minutes. Add 1 egg at room temperature and mix until combined, then add 1 teaspoon vanilla extract and stir.
For salted butter: you can use it, but you’ll want to adjust salt in your process to avoid over-salting.
Third Step: Combine dry and wet gently
Add the dry ingredients to the wet ingredients in two parts. Mix gently until just combined. Overmixing can make dough tougher, which affects the swirl look and sliceability.
For vegan adaptation, mix your vegan butter and sugar until fluffy, then use your egg replacer according to package instructions before adding the vanilla.
Fourth Step: Divide dough and color the layers
Divide the dough into three equal balls. Add 1/2 to 1 teaspoon red food coloring to one ball and 1/2 to 1 teaspoon green food coloring to another, mixing until fully blended. Leave the third ball plain so you have your white layer.
Gel food coloring is recommended for bright, vibrant colors with less quantity needed, while liquid coloring may require more volume and can sometimes thin the dough.
Fifth Step: Flatten, wrap, and chill at least 1 hour
Flatten each dough ball into a square, wrap in plastic, and refrigerate for at least one hour. This chilling step firms the dough so it rolls without tearing.
If the dough feels soft while coloring or shaping, chill again briefly. Your pinwheels will thank you.
Sixth Step: Roll each color into a 10-inch square
Roll each colored dough between parchment paper to a 10-inch square. Then refrigerate again for 30 minutes.
Keep flour on hand for dusting your surfaces and rolling pin. Don’t roll the dough too thin, or the swirl design can lose integrity.
Seventh Step: Layer squares and trim for straight edges
Layer the dough squares with red on bottom, white in the middle, and green on top, lining up the edges. Trim the edges with a pizza cutter to make straight, even lines.
Clean straight edges are the secret to crisp pinwheels. Trimming before rolling saves you from uneven spirals.
Eighth Step: Roll into a tight log and chill
Carefully roll the layered dough into a log starting from a straight edge. Pinch the seam to seal, wrap in plastic, and chill for one hour until firm.
If your dough becomes warm while rolling, re-chill until it’s firm again. For early slicing, a brief freeze can help the log hold its shape.
Ninth Step: Preheat and line baking sheets
Preheat the oven to 350°F (175°C). Line baking sheets with parchment or a silicone mat.
Working with multiple trays? Keep dough logs refrigerated while one batch bakes so the next round stays firm.
Tenth Step: Slice rounds and space them out
Slice the log into 1/4-inch thick rounds and discard the ends. Place cookies about 2 inches apart on the baking sheets.
Thinner slices bake up crisper. Thicker slices keep more chew and softness.
Eleventh Step: Bake, cool, and finish strong
Bake for 12 to 15 minutes until the cookies are set. Cool on the baking sheet for 5 minutes, then transfer to a wire rack to cool completely.
Avoid overbaking. When cookies finish baking, they continue setting as they cool, and you want the colors to stay vibrant.
Final Step: Store properly (and keep the swirl looking fresh)
Once fully cooled, store in an airtight container at room temperature for up to 4 to 5 days. For longer storage, freeze baked cookies for up to 2 months and thaw at room temperature before serving.
Dough logs also freeze well. Wrap tightly and freeze, then thaw in the fridge overnight before slicing.
Quick timing overview
| Stage | Time |
|---|---|
| Prep and mixing | Approx. 2 hours 45 minutes total (including chilling and rolling) |
| Baking | 12 to 15 minutes |
| Total | About 3 hours |
Dietary Substitutions to Customize Your Christmas Pinwheel Cookies Recipe
Everyone’s holiday menu looks a little different, so it’s helpful to know where substitutions matter most. Pinwheel cookies depend on dough structure, so the best swaps are the ones that mimic texture and chilling behavior.
Protein and main component alternatives
- Butter substitute: Use a plant-based butter replacement that can be creamed like regular butter. Keep it cold-to-room temperature and chill dough as directed so it stays rollable.
- Egg: Use a commercial egg replacer or another egg-free binder. Choose one designed for baking so the dough holds when sliced.
- Flour: For gluten-free, use a 1-to-1 gluten-free all-purpose blend. Look for blends with xanthan gum or add a binder recommended by the brand.
Because this cookie is all about clean layers, you may need a little extra chilling time when using substitutes. Don’t rush the rolling stage.
Vegetable, sauce, and seasoning modifications
- Food coloring: Keep the same red and green coloring approach, but choose gel colors for stronger results. Gel usually needs less quantity and won’t thin dough as much.
- Flavor extracts: Stick with vanilla or experiment with almond or peppermint extracts. Add the extract during the egg and vanilla step for even flavor.
- Salt adjustment: If using salted butter, reduce or adjust added salt to keep the dough balanced.
If you’re trying a new substitution for the first time, test with a small portion of dough. Once you see how it rolls and slices, you can confidently bake the full batch.
Mastering Christmas Pinwheel Cookies Recipe: Advanced Tips and Variations
Once you nail the basic method, you can level up your Christmas Pinwheel Cookies Recipe with techniques that make the swirl crispier and your flavor more memorable.
Pro cooking techniques
- Weigh your dough divisions: Use a kitchen scale to divide dough evenly into three portions for symmetrical pinwheels.
- Flour lightly: Flour surfaces and your rolling pin to avoid sticking, but don’t overdo it or the dough can get dry.
- Rolling thickness matters: Don’t roll too thin. A thicker layer helps preserve the swirl when you slice and bake.
- Trim for straight lines: Use a pizza cutter to trim edges before rolling so the log forms clean pinwheels.
Flavor variations
- Almond Christmas vibe: Substitute part or all of the vanilla extract with almond extract for a classic holiday flavor.
- Peppermint hint: Add a small amount of peppermint extract to keep it festive without overpowering.
- Vanilla-forward: Stick to real vanilla extract for a warm, crowd-friendly taste.
Presentation tips
- Slice into 1/4-inch rounds for the most even swirl look.
- Arrange cookies on a tray with a little spacing so the red, white, and green colors pop.
- For gifting, pack once fully cooled and include a note with storage instructions.
Make-ahead options
- Day-ahead dough: You can prepare the dough and refrigerate it wrapped, but not longer than a day. This reduces stress during busy holiday schedules.
- Chill strategically: Dough squares chill for at least one hour, then roll and chill again for 30 minutes before layering.
- Freeze the log: If you want to slice later, chill until firm, then freeze the wrapped log. Thaw in the fridge overnight.
Gel food coloring tends to give bright colors with less mess. It’s a small change that makes your pinwheels look professionally vibrant.
How to Store Christmas Pinwheel Cookies Recipe: Best Practices
Proper storage keeps your Christmas Pinwheel Cookies Recipe tasting fresh and your swirl looking good. Once cookies are fully cool, sealing is key.
Refrigeration
- For short-term storage after baking, keep cookies at room temperature in an airtight container.
- Room temp storage lasts about 4 to 5 days and keeps the cookie texture soft.
Freezing
- Baked cookies: Freeze in freezer bags for up to 2 months.
- Dough logs: Wrap tightly and freeze for up to 3 months, then thaw in the fridge overnight before slicing.
Reheating
- There’s usually no need to reheat. If you prefer a slightly warmed bite, thaw at room temperature and let them sit for a few minutes.
Meal prep considerations
- Slice only what you need for the next bake. Keep the log refrigerated so slices don’t distort.
- Label containers with the date so holiday planning stays easy.
If you care about maintaining a balanced holiday approach, you may also like these healthy holiday baking tips from Six effortless tips for healthy holiday baking.

FAQs: Frequently Asked Questions About Christmas Pinwheel Cookies Recipe
What ingredients do I need for Christmas pinwheel cookies?
For about 4 dozen cookies, gather these ingredients: 2 1/2 cups all-purpose flour, 1 teaspoon baking powder, 1/2 teaspoon salt, 1 cup unsalted butter (softened), 1 1/2 cups granulated sugar, 1 large egg, 2 teaspoons vanilla extract, and gel food coloring (red and green for best results). Start by whisking the dry ingredients together. In a separate bowl, beat the butter and sugar until creamy, then add the egg and vanilla. Gradually mix in the dry ingredients to form a dough. This base creates a tender, sliceable texture perfect for swirling colors. If using salted butter, skip the added salt to avoid over-salting. Measure precisely for consistent results, and have parchment paper ready for rolling to prevent sticking. Prep time is quick, under 30 minutes before chilling. (98 words)
How do I color the dough for Christmas pinwheel cookies?
Divide the dough into three equal portions. Leave one plain for the white layer. For the red and green, add 1/2 teaspoon gel food coloring to each portion and knead or beat with a mixer until evenly colored—gel works best for bright, vivid hues without thinning the dough. Avoid liquid coloring, as it can make the dough sticky and fade during baking. Work coloring in gradually to prevent streaks. If the dough softens, chill briefly between coloring. Flatten each into a square, wrap in plastic, and refrigerate for 1 hour. This step ensures easy rolling and sharp pinwheel designs. Pro tip: Wear gloves to keep hands clean from color transfer. Fully colored dough holds shape for perfect holiday spirals. (112 words)
How do I prepare and roll the dough for Christmas pinwheel cookies?
After chilling the colored dough squares for 1 hour, roll each 1/4-inch thick between parchment paper sheets into 12×9-inch rectangles—keep edges straight for neat layers. Trim if needed for even stacking. Gently stack green on white, then red on top, pressing lightly to adhere without mixing colors. Starting from a short end, roll tightly into a log using the parchment as a guide, like a jelly roll. Wrap the log in plastic and chill 2-4 hours (or overnight) until firm. This prevents crumbling during slicing and creates tight pinwheels. If dough warms up, re-chill. For flawless results, freeze the log briefly if slicing early. Yields a festive striped effect ready for baking. (108 words)
How thick should I slice and how do I bake Christmas pinwheel cookies?
Use a sharp knife to slice the chilled log into 1/4-inch thick rounds—thinner for crispier cookies, thicker for chewier ones. Place 2 inches apart on parchment-lined baking sheets. Bake at 350°F (175°C) for 12-15 minutes, until edges are lightly golden but centers look set (they firm up as they cool). Rotate sheets halfway for even baking. Cool on the sheet for 5 minutes, then transfer to a rack. Avoid overbaking to keep colors vibrant. A single batch fits two sheets; bake one at a time if needed. Freshly baked, they yield about 48 cookies—perfect for holiday sharing. Watch closely past 12 minutes for ideal texture. (104 words)
How do I store Christmas pinwheel cookies and can I make the dough ahead?
Cool cookies completely, then store in an airtight container at room temperature for 4-5 days—they stay soft and flavorful. For longer, freeze baked cookies in freezer bags up to 2 months; thaw at room temp before serving. Dough logs freeze well too: wrap tightly and store up to 3 months, then thaw in fridge overnight before slicing. Prep dough 1 day ahead in the fridge for convenience. This make-ahead option saves holiday stress. Layer with wax paper to prevent sticking in storage. They ship well for gifting—just add a ribbon. No need to thaw fully if eating frozen for a chewy treat. Keeps your Christmas baking efficient. (106 words)

Christmas Pinwheel Cookies Recipe
🎄🍪 Delight in festive red, white, and green swirls of buttery pinwheel cookies that capture holiday magic and make perfect gifts or party treats!
❄️ Make-ahead and freezer-friendly, these vibrant Christmas cookies are simple to bake for joyful sharing with family and friends.
- Total Time: 3 hours
- Yield: 24 cookies
Ingredients
– 2 cups all-purpose flour plus extra for dusting
– 1/2 teaspoon baking powder
– 1/4 teaspoon salt
– 12 tablespoons unsalted butter at room temperature
– 3/4 cup granulated sugar
– 1 egg at room temperature
– 1 teaspoon vanilla extract
– 1/2 to 1 teaspoon liquid red food coloring or gel food coloring for desired intensity
– 1/2 to 1 teaspoon liquid green food coloring or gel food coloring for desired intensity
Instructions
1-First Step: Prep your workspace and dry mix Combine 2 cups all-purpose flour plus extra for dusting, 1/2 teaspoon baking powder, and 1/4 teaspoon salt in a medium bowl. Whisk it together, then set it aside. This keeps the dry ingredients evenly distributed so your dough stays consistent.
2-Second Step: Cream butter and sugar until pale and fluffy In a large bowl, beat 12 tablespoons unsalted butter at room temperature with 3/4 cup granulated sugar until pale and fluffy, about 1 to 2 minutes. Add 1 egg at room temperature and mix until combined, then add 1 teaspoon vanilla extract and stir.
3-Third Step: Combine dry and wet gently Add the dry ingredients to the wet ingredients in two parts. Mix gently until just combined. Overmixing can make dough tougher, which affects the swirl look and sliceability.
4-Fourth Step: Divide dough and color the layers Divide the dough into three equal balls. Add 1/2 to 1 teaspoon red food coloring to one ball and 1/2 to 1 teaspoon green food coloring to another, mixing until fully blended. Leave the third ball plain so you have your white layer.
5-Fifth Step: Flatten, wrap, and chill at least 1 hour Flatten each dough ball into a square, wrap in plastic, and refrigerate for at least one hour. This chilling step firms the dough so it rolls without tearing.
6-Sixth Step: Roll each color into a 10-inch square Roll each colored dough between parchment paper to a 10-inch square. Then refrigerate again for 30 minutes.
7-Seventh Step: Layer squares and trim for straight edges Layer the dough squares with red on bottom, white in the middle, and green on top, lining up the edges. Trim the edges with a pizza cutter to make straight, even lines.
8-Eighth Step: Roll into a tight log and chill Carefully roll the layered dough into a log starting from a straight edge. Pinch the seam to seal, wrap in plastic, and chill for one hour until firm.
9-Ninth Step: Preheat and line baking sheets Preheat the oven to 350°F (175°C). Line baking sheets with parchment or a silicone mat.
10-Tenth Step: Slice rounds and space them out Slice the log into 1/4-inch thick rounds and discard the ends. Place cookies about 2 inches apart on the baking sheets.
11-Eleventh Step: Bake, cool, and finish strong Bake for 12 to 15 minutes until the cookies are set. Cool on the baking sheet for 5 minutes, then transfer to a wire rack to cool completely.
12-Final Step: Store properly (and keep the swirl looking fresh) Once fully cooled, store in an airtight container at room temperature for up to 4 to 5 days. For longer storage, freeze baked cookies for up to 2 months and thaw at room temperature before serving. Dough logs also freeze well. Wrap tightly and freeze, then thaw in the fridge overnight before slicing.
Last Step:
Please leave a rating and comment letting us know how you liked this recipe! This helps our business to thrive and continue providing free, high-quality recipes for you.Notes
🎨 Use gel food coloring for brighter colors with less liquid added.
⚖️ Weigh dough portions with a kitchen scale for even layers and perfect swirls.
🌡️ Flour surfaces generously to prevent sticking during rolling.
- Prep Time: 45 minutes
- Chill Time: 2 hours 30 minutes
- Cook Time: 15 minutes
- Category: Dessert
- Method: Baking
- Cuisine: American
- Diet: Vegetarian
Nutrition
- Serving Size: 1 cookie
- Calories: 173
- Sugar: 9g
- Sodium: 42mg
- Fat: 9g
- Saturated Fat: 6g
- Unsaturated Fat: 3g
- Trans Fat: 0g
- Carbohydrates: 21g
- Fiber: 1g
- Protein: 2g
- Cholesterol: 33mg


