Every October, my kitchen turns into a little cookie factory. Flour dusts the counter, the kids drag their stools over, and the bowl of malted milk balls somehow gets smaller before we even start decorating.
These Peanut Butter Spider Cookies are the recipe we come back to year after year, and they are the reason my children now believe Halloween officially begins the moment the first tray slides into the oven.
Peanut Butter Spider Cookies For A Spooky Halloween Treat 27
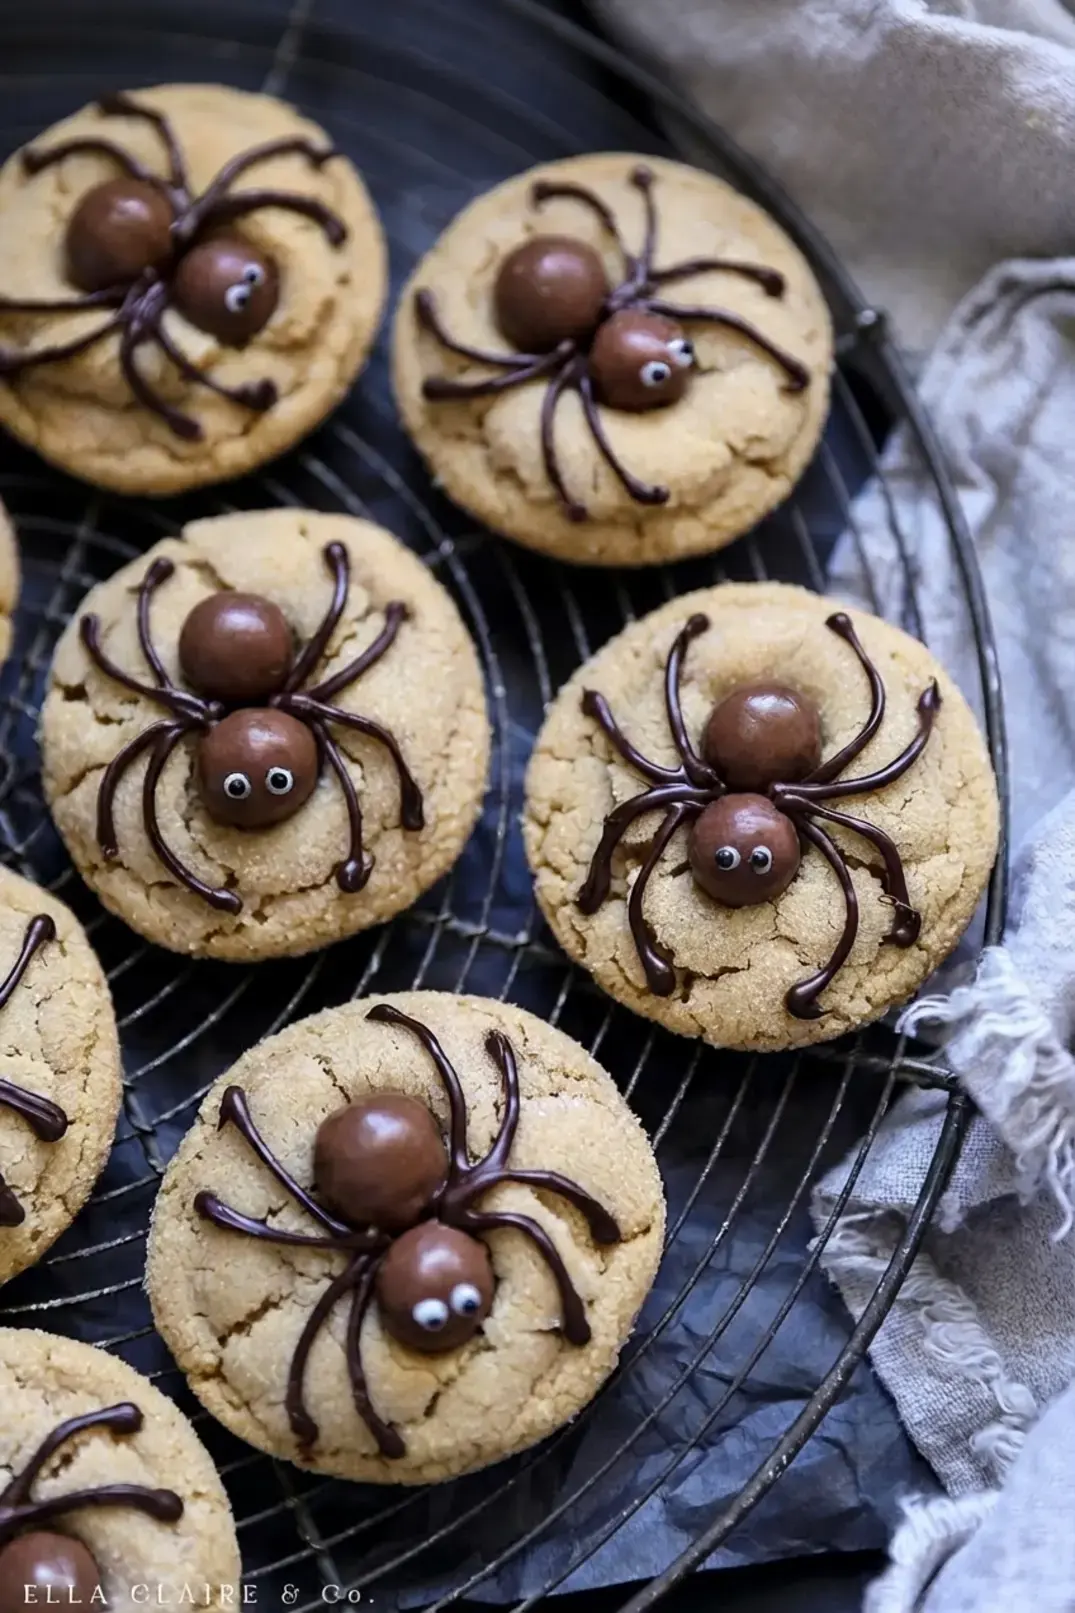
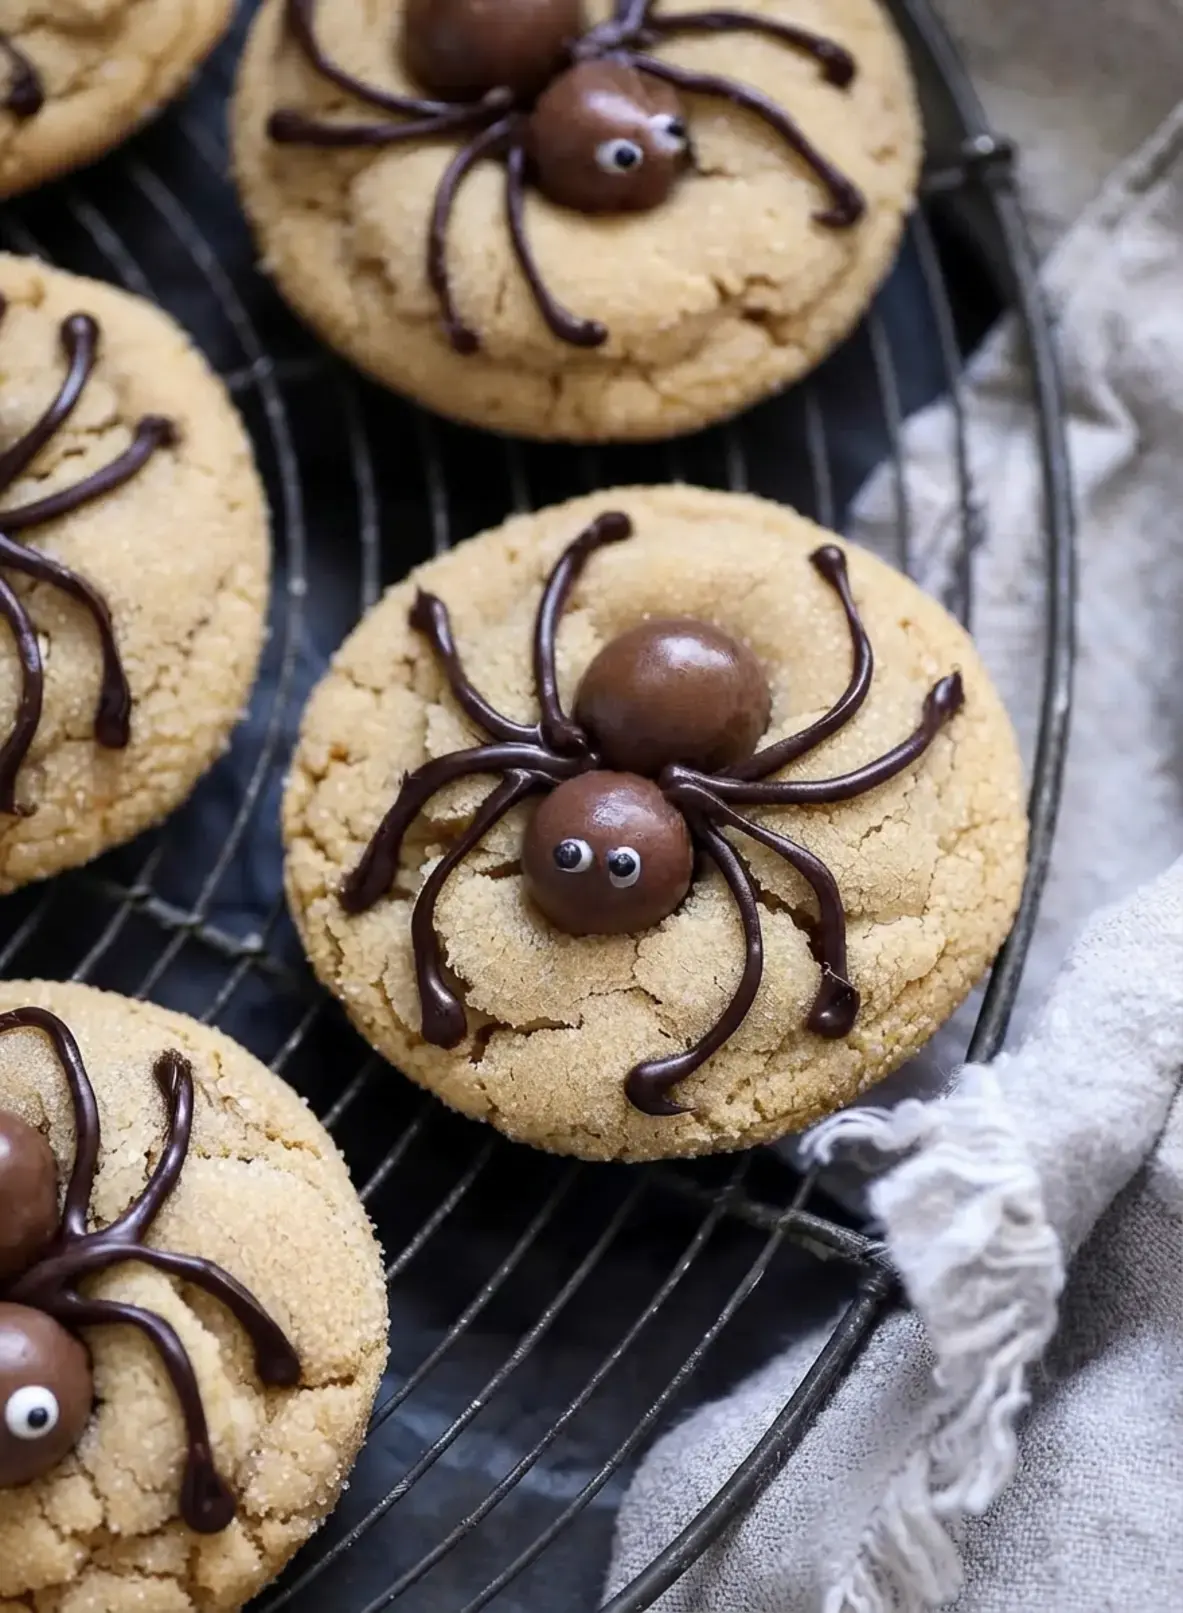
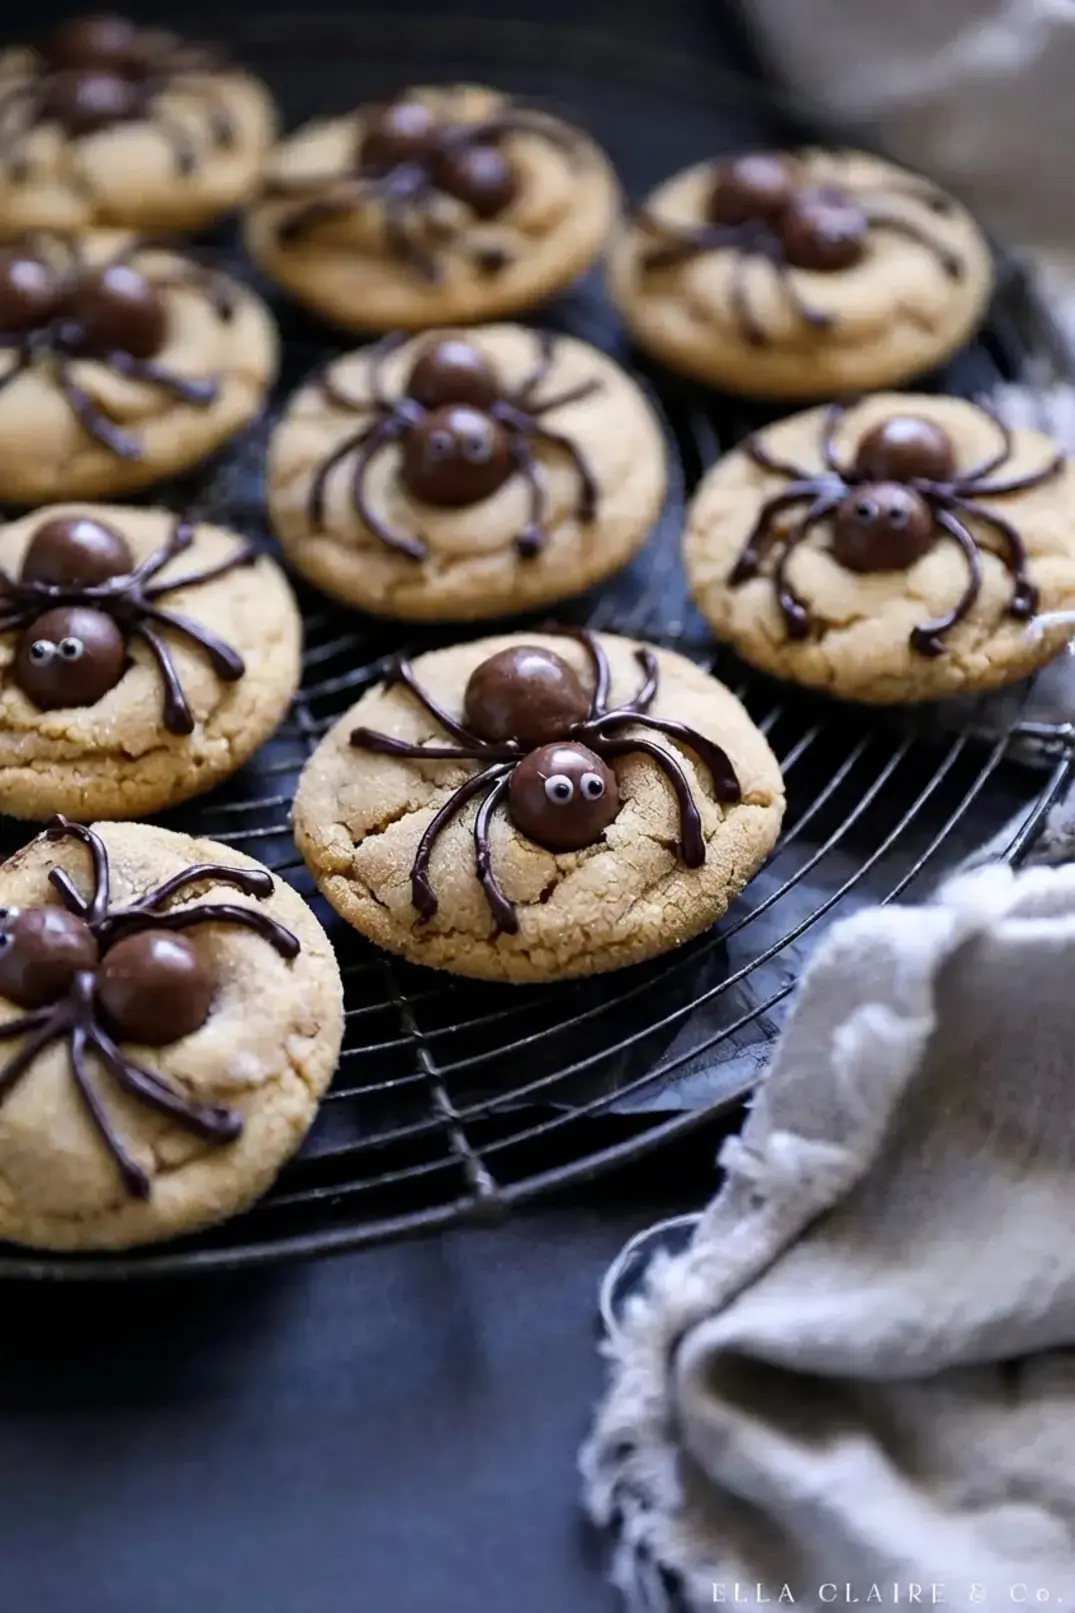
Think of them as peanut butter blossom cookies with a spooky twist. Instead of one chocolate kiss on top, each cookie gets a pair of malted milk balls sitting side by side to look like a spider.
Chocolate ganache legs are piped around them, and two little eyes finish the face. The cookie underneath stays soft and chewy, with plenty of peanut butter flavor in every bite.
Peanut Butter Spider Cookies For A Spooky Halloween Treat 28
Here is what makes this recipe such a keeper. One batch makes 22 cookies, and decorating them takes only a few minutes per batch once the chocolate is melted. Prep takes about 20 minutes, baking takes 8 minutes, and you will want roughly 20 more minutes for the cookies to cool and set before the legs go on.
They are perfect for a Halloween party, a school celebration, or a cookie box for the neighbors. And honestly? They never last long on the counter.
Why You’ll Love these Peanut Butter Spider Cookies
These cookies hit every note I want in a holiday baking project, and they have earned a permanent spot in our October rotation.
Peanut Butter Spider Cookies For A Spooky Halloween Treat 29
They are easy and fun to make with kids. The dough comes together quickly, and the decorating is basically edible craft time.
They are made for Halloween parties. A platter of these disappears fast at a class party, a neighborhood gathering, or a cozy movie night at home.
They use a short list of pantry staples. Flour, sugars, butter, peanut butter, an egg, and vanilla are probably in your kitchen right now.
They make lovely gifts. Tuck a few into a treat bag for family, friends, and neighbors, or slide one into a school lunch during October.
The legs are real chocolate. The spider legs are piped with chocolate ganache instead of frosting, so they taste as good as they look.
The bodies are Whoppers. Malted milk balls give each spider a crunchy, chocolatey center that pairs beautifully with peanut butter.
Peanut butter, chocolate, and a little candy crunch in one bite. What is not to love?
Peanut Butter Spider Cookies Ingredients
One batch makes 22 cookies, so gather everything before you start. Here is the full list.
Ingredient
Amount
All purpose flour
1 ½ cups
Baking soda
½ tsp
Baking powder
½ tsp
Salted butter, softened
½ cup
Granulated sugar
½ cup
Brown sugar
½ cup
Egg
1
Creamy peanut butter, not natural
½ cup
Vanilla
1 tsp
Whoppers
44
Semi sweet chocolate chips
1 cup (6 ounces)
White cake decorating gel
1 small tube
Granulated sugar, for rolling
¼ cup
A few notes before you bake. Measure the flour with the spoon and level method, spooning it into the cup and sweeping the top level. Scooping straight from the bag packs in too much flour, and that is the fastest way to end up with dry, crumbly cookies.
Salted butter is what the recipe calls for. If you only have unsalted butter on hand, add an extra pinch of salt to the dough. Use a large egg and pure vanilla extract when you can, because good vanilla really shows in a simple cookie like this one.
Peanut Butter Spider Cookies For A Spooky Halloween Treat 30
Please do not swap in natural peanut butter. It makes the dough greasy and the cookies spread too thin. Creamy peanut butter is what gives these cookies their soft, chewy texture.
For the decorations, Whoppers or any other malted milk balls will work. The semi sweet chocolate chips can be replaced with another kind of chocolate chip if that is what you have in the pantry.
The white decorating gel is for the eyes, and black nonpareil sprinkles are optional for the center of each eye. A tiny bit of chocolate works in their place.
Recipe Variations
Two easy swaps let you change things up without starting over.
Candy swap. Mini Reese’s peanut butter cups or Rolos can stand in for the Whoppers. Press them into the warm cookies exactly the same way.
Skip the sugar roll. Rolling the dough balls in granulated sugar adds a light, crackly texture, but you can leave that step out if you are short on time.
How to Make Peanut Butter Spider Cookies
Here is the whole process, start to finish. Prep takes about 20 minutes, the cookies bake for 8 to 10 minutes, and you will want another 20 minutes or so for cooling and decorating. Have your parchment lined baking sheets and your decorations ready before you begin.
Step 1: Prepare the Dough
Preheat the oven to 375°F and line 2 baking sheets with parchment paper. Set them aside.
In a medium bowl, whisk together the baking powder, the baking soda, and the flour. Set that bowl aside too.
In a separate bowl, cream the butter. Add the granulated sugar, the brown sugar, and the peanut butter and mix until everything is well combined. Add the egg and the vanilla and mix until incorporated.
Then add the dry ingredients to the wet ingredients and mix until fully combined. The dough should look soft and a little sticky, and that is exactly right.
Using a 2 tablespoon scoop, portion the dough and roll it into balls. Roll each ball in the granulated sugar, then place them on the prepared baking sheets with a little space between them. Bake for 8 to 10 minutes. The cookies should look dry on the outside and just start to turn golden at the base.
Add the Spiders
While the cookies are in the oven, open the package of malted milk balls and sort them into two piles: 22 large Whoppers and 22 small ones. The large candies become the spider bodies, and the small ones become the heads. This is my favorite job to hand off to the kids, and they take it very seriously.
As soon as the cookies come out of the oven, press the malted milk balls into the tops while the cookies are still warm and soft. Place the body and the head right next to each other so they touch. Work quickly, because the cookies firm up fast once they leave the oven.
Then slide the baking sheets into the refrigerator for a few minutes so the cookies cool until they are cool to the touch. That short chill keeps the candies from sliding around while you decorate.
Now for the chocolate legs. Pour the chocolate chips into a microwave safe bowl and heat them in 30 second increments, stirring between each one. Once the chocolate starts to look melty, switch to 15 second increments and stir between each round.
Do not overcook it. Heating the chocolate in a double boiler is an alternative to the microwave for this step if you prefer that method.
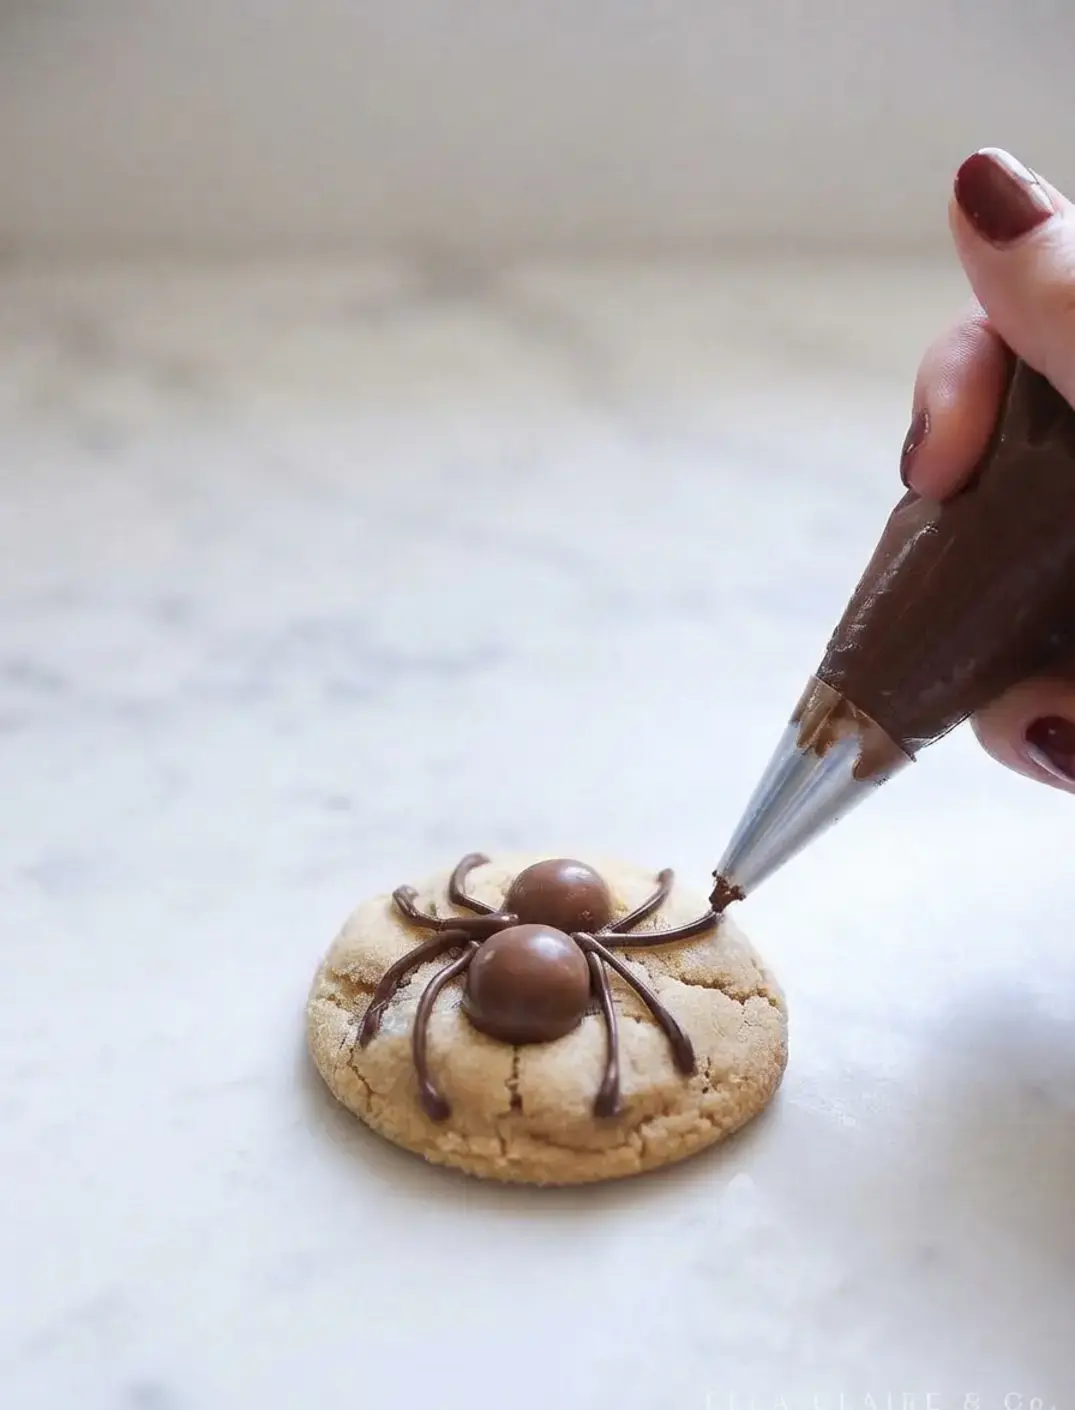
Pull the bowl out of the microwave and let the chocolate cool for a couple of minutes. Pour it into a piping bag and use it to make the spider legs.
Peanut Butter Spider Cookies For A Spooky Halloween Treat 31
The trick is to think in Vs. Pipe one V on the upper right, one on the lower right, and keep working around the candy.
All the points of the Vs meet in the middle of the Whoppers, which is what makes the legs look like they belong to one spider instead of a random squiggle.
For the eyes, add little dots of white cake decorating gel, then place a black nonpareil sprinkle in the center of each dot. A barely damp fingertip makes it easy to pick up those tiny sprinkles and place them where you want them.
If you would rather skip the sprinkles, a tiny drop of chocolate applied with the piping bag or a toothpick works too. I have tried both, and the nonpareils were much easier for me.
Let the cookies set on the counter, or pop them back in the refrigerator for a few minutes to speed things up. Once the chocolate is firm, they are ready to serve.
Tips
A few small habits make this recipe much smoother, especially when little hands are helping.
Peanut Butter Spider Cookies For A Spooky Halloween Treat 32
Sort the Whoppers while the cookies bake. Unbox and divide the candies during those 8 to 10 minutes in the oven. It is a great task for children, and it keeps everyone busy.
Work quickly once the cookies come out. Press each Whopper into the warm cookies right away. Wait too long and the tops firm up, which makes the candies pop off later.
Rescue seized chocolate. If the chocolate in your piping bag starts to seize, do not empty the bag to reheat it in the microwave. Seal the piping bag inside a zip lock bag and set it in a cup of hot tap water for about a minute instead.
Hunt for black nonpareils. I pick the black ones out of an orange and black Halloween nonpareil mix. That blend is much easier to find in October than a jar of black sprinkles alone.
Cool before piping. Chilling the cookies again after the Whoppers go on is not necessary, but I find it easier and faster to add the spider legs once the cookies are completely cooled.
Press the candies while the cookies are warm, then pipe the legs once the cookies are cool. Those two moments are the whole secret to neat looking spiders.
Peanut Butter Spider Cookies For A Spooky Halloween Treat 33
How to Store
These cookies store well, which is handy when you make a double batch for a party.
Room temperature: 4 to 5 days in an airtight container.
Refrigerator: up to 1 week in an airtight container or zip lock bag. Eating them sooner is better.
Freezer: up to 3 months in a freezer zip lock bag or airtight container, and they should not be bumped around.
I do not really recommend freezing finished cookies, because the chocolate legs become very fragile once they thaw. If you want to work ahead, freeze the dough instead.
Peanut Butter Spider Cookies For A Spooky Halloween Treat 34
Scoop the dough into balls, freeze them on a cookie sheet until firm, then transfer them to a freezer bag. Skip the sugar rolling step and roll the balls in sugar right before baking.
If you do freeze finished cookies, let them cool completely and let the chocolate harden fully before they go into the bag.
FAQs
How do you make peanut butter spider cookies?
Make peanut butter cookie dough using 1.5 cups all-purpose flour, 0.5 cup softened salted butter, 0.5 cup each granulated and brown sugar, one egg, 0.5 cup creamy peanut butter, and 1 teaspoon vanilla. Scoop two-tablespoon dough balls, roll in sugar, and bake at 375°F for 8 to 10 minutes. Press one large and one small Whopper into each warm cookie to form the spider body and head, then pipe melted chocolate legs and add white gel eyes with black sprinkle pupils.
What can I use instead of Whoppers for spider cookies?
Mini Reese's peanut butter cups or Rolo candies make good substitutes for Whoppers in these spider cookies. Use one mini peanut butter cup or one Rolo for the spider body. The flavor and texture will vary slightly from the original malted milk ball version but will still create a festive Halloween treat.
How should I store peanut butter spider cookies?
Store peanut butter spider cookies in an airtight container at room temperature for 4 to 5 days. They can also be refrigerated for up to 1 week, though they are best eaten sooner. Avoid freezing completed cookies because the chocolate legs become very fragile.
Why are my peanut butter cookies crumbly and dry?
Crumbly, dry peanut butter cookies are usually caused by using too much flour or overbaking them. Always measure flour using the spoon-and-level method to avoid packing it into the measuring cup. Bake the cookies only until they look dry on the outside and just begin to turn golden at the base, which takes about 8 to 10 minutes at 375°F.
Peanut Butter Spider Cookies Every October, my kitchen turns into a little cookie factory. Flour dusts the counter, the kids drag their stools over, and the bowl of malted milk balls somehow gets smaller before we even start decorating.
Total Time:0 min
Yield:22 cookies 1x
Ingredients
Scale
1 ½ cups all-purpose flour ½ tsp baking soda ½ tsp baking powder ½ cup salted butter, softened ½ cup granulated sugar ½ cup brown sugar 1 egg ½ cup creamy peanut butter, not natural 1 tsp vanilla 44 whoppers 1 cup semi-sweet chocolate chips, (6 ounces) 1 small tube white cake decorating gel ¼ cup granulated sugar, for rolling
Instructions
For the Cookies 1-Preheat Oven to 375°: Preheat Oven to 375°. Line 2 baking sheets with parchment paper and set aside. 2-In a medium bowl, mix together baking: In a medium bowl, mix together baking powder, baking soda and flour and set aside. 3-In a separate bowl, cream butter: In a separate bowl, cream butter. Add sugars and peanut butter and mix until well combined. Add the egg and vanilla and mix until incorporated. 4-Add the dry ingredients to the wet: Add the dry ingredients to the wet and mix until fully combined. 5-Using a 2 tablespoon scoop, scoop out: Using a 2 tablespoon scoop, scoop out batter and roll into balls. Roll them in sugar and then place them on the prepared baking sheet. Bake for 8 -10 minutes. 6-While the cookies are in the oven,: While the cookies are in the oven, open your package of malted milk balls and make a pile of 22 large and 22 small whoppers. The large ones will be the bodies of the spiders and the small ones will be the heads. 7-Remove cookies from the oven and immediately: Remove cookies from the oven and immediately press the malted milk balls into the tops of cookies, one next to the other. Let the cookies cool in the fridge for a few minutes until cool to the touch. 8-In the meantime, pour chocolate chips in: In the meantime, pour chocolate chips in a microwave safe bowl and heat in 30 second increments until melted, stirring in between each time. Once it starts to look melty, heat in 15 second increments, stirring in between. Do not overcook. (Heating in a double boiler is an alternative to the microwave for this step) Remove from microwave and allow it to cool for a couple minutes. Pour into a piping bag and use to make the spider legs. 9-Add little dots with the white cake: Add little dots with the white cake decorating gel for the eyes and add a little black nonpareil sprinkle to the middle of each one. 10-Cool completely before serving: Cool completely before serving.
Last Step:
Please leave a rating and comment letting us know how you liked this recipe! This helps our business to thrive and continue providing free, high-quality recipes for you.