Ingredients
– 100g glutinous rice flour
– 30g cornstarch
– 45g granulated sugar
– 180g milk
– 20g vegetable oil
– A few drops of food coloring (optional, for peach color)
– 500g fresh peaches, peeled and cored
– 150g water
– 100g granulated sugar
– 10g lemon juice
– 200g heavy cream
– 20g sugar
Instructions
1-Step 1: Prepare the Peach Filling Start by peeling and coring your fresh peaches, then chop them into small cubes. Place the chopped peaches in a bowl and mix with 100g of granulated sugar. Cover the bowl and refrigerate for 30 minutes. This process helps draw out the natural juices from the peaches, creating a syrup that will enhance the flavor of your filling. While the peaches are chilling, don’t discard the peach skins! Place them in a pot with 150g of water and boil for 5 minutes. This creates a beautifully colored and flavorful peach water. After boiling, strain the water to remove the skins, then set the liquid aside. After the 30 minutes are up, remove the chilled peach cubes from the refrigerator and add them to the peach water. Cook this mixture over medium heat, stirring continuously until it begins to thicken. Add the 10g of lemon juice and continue cooking until you achieve a jam-like consistency. This filling should be thick enough to hold its shape but still have some moisture. Remove from heat and allow it to cool completely before using. The filling can be made ahead of time and stored in the refrigerator until you’re ready to assemble the mochi.
2-Step 2: Create the Mochi Dough In a large bowl, combine 100g of glutinous rice flour, 30g of cornstarch, 45g of granulated sugar, 180g of milk, and a few drops of food coloring if you’re using it. Mix these ingredients thoroughly until well combined and no lumps remain. The mixture should be smooth and slightly thinner than pancake batter. Stir in 20g of vegetable oil, which will help keep the dough pliable and prevent sticking later. Once everything is well mixed, transfer the mixture to a nonstick pan. Cook over medium heat, stirring continuously to prevent burning. The mixture will gradually thicken and begin to form a dough. Continue cooking and stirring until the mixture forms a stretchy, translucent dough ball. This process usually takes about 5-7 minutes. The dough should pull away from the sides of the pan and have a glossy appearance. Once done, remove the dough from heat and let it cool slightly. It should still be warm enough to work with but not so hot that it burns your hands.
3-Step 3: Knead the Dough Dust a clean work surface or silicone mat with cornstarch to prevent sticking. Transfer the slightly cooled mochi dough onto the prepared surface. Begin kneading the dough, folding it over itself repeatedly, until it becomes smooth and elastic. This process helps develop the gluten-free proteins in the rice flour, creating that characteristic chewy texture mochi is known for. If the dough feels too sticky during kneading, add a little more cornstarch. However, be careful not to add too much, as this can make the final mochi tough rather than chewy. Continue kneading for about 5-7 minutes until the dough has a uniform color and smooth texture. It should feel soft, pliable, and slightly tacky but not sticky.
4-Step 4: Prepare the Whipped Cream While your dough is cooling, prepare the whipped cream component of the filling. In a clean bowl, whip 200g of heavy cream with 20g of sugar until stiff peaks form. This should take about 3-5 minutes with a hand mixer or longer if whisking by hand. The cream should hold its shape well when the whisk is lifted but still have a smooth, silky texture. Transfer the whipped cream to a piping bag fitted with a medium round tip. If you don’t have a piping bag, you can simply place it in a plastic bag and snip off one corner. Refrigerate the whipped cream until you’re ready to assemble the mochi. This helps maintain its structure and prevents it from becoming too soft during the assembly process.
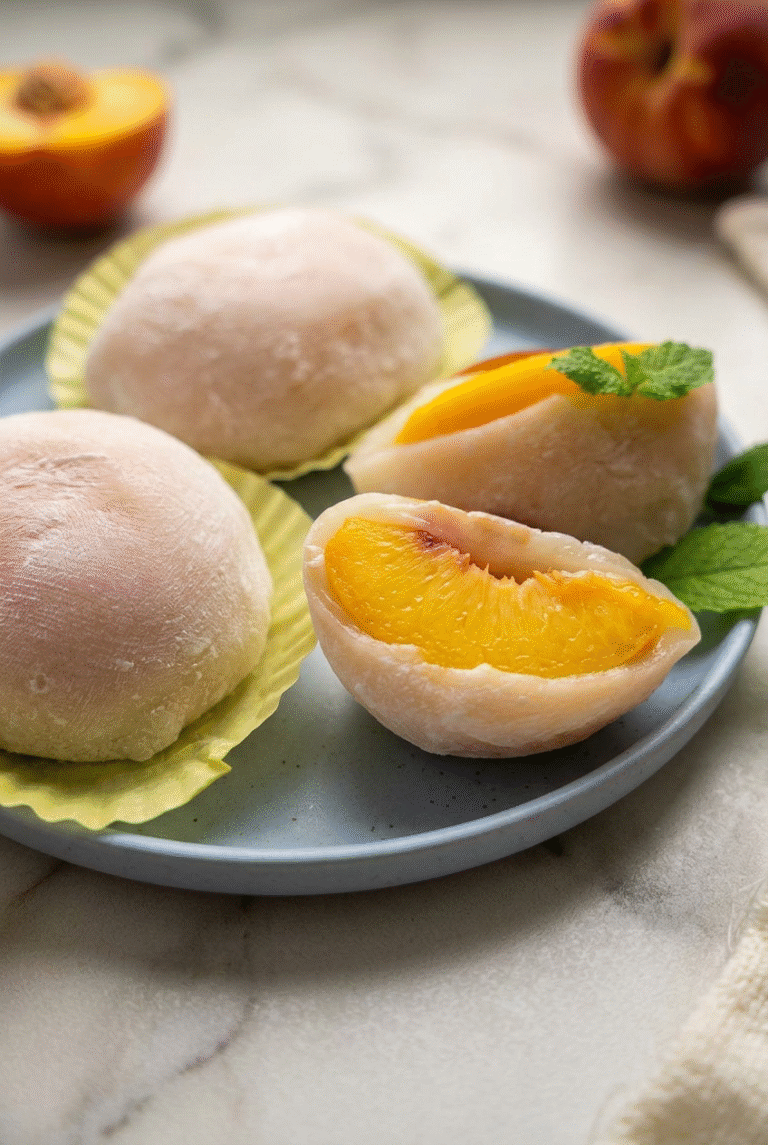
5-Step 5: Assemble the Peach Mochi Now comes the fun part – putting everything together! Divide your kneaded mochi dough into 8 equal pieces. Working with one piece at a time, roll each piece into a ball, then flatten it into a circle using your hands or a rolling pin. The circles should be about 4-5 inches in diameter and roughly 1/8 inch thick in the center, slightly thicker around the edges to help seal the filling inside. Pipe a small dollop of whipped cream in the center of each dough circle. Then, add about a tablespoon of the cooled peach filling on top of the cream. Be careful not to overfill, as this will make sealing difficult. Gently gather the edges of the dough around the filling, pinching them together at the top to seal. If you like, you can shape the filled mochi slightly to resemble a peach by creating a small indentation at the top and giving it a gentle squeeze to create a subtle point at the bottom. Place each completed mochi in a cupcake liner to help maintain its shape and make serving easier. For an extra touch, garnish with a small mint leaf attached to the top with a tiny dab of water or honey. This not only adds visual appeal but also provides a lovely contrast to the sweet, fruity flavors. Repeat this process with the remaining dough and filling until all 8 Peach Mochi are assembled. Serve immediately for the best texture and flavor experience. If you need to store them, see our storage guidelines below.
Last Step:
Please leave a rating and comment letting us know how you liked this recipe! This helps our business to thrive and continue providing free, high-quality recipes for you.Notes
🎨 Use food coloring sparingly to achieve a natural peach hue without overpowering the flavor.
🤲 Dust the dough generously with cornstarch during kneading to prevent sticking and make handling easier.
❄️ Serve peach mochi at room temperature for the best chewy texture; store in fridge up to 2 days.
- Prep Time: 45 minutes
- Chilling Time: 30 minutes
- Cook Time: 20 minutes
- Category: Dessert
- Method: Pan-Cooked
- Cuisine: Japanese
- Diet: Vegetarian
Nutrition
- Serving Size: 1 mochi
- Calories: 390 kcal
- Sugar: 35g
- Sodium: 50mg
- Fat: 12g
- Saturated Fat: 7g
- Unsaturated Fat: 4g
- Trans Fat: 0g
- Carbohydrates: 55g
- Fiber: 1g
- Protein: 4g
- Cholesterol: 40mg