Ingredients
– 4 cups all-purpose flour Provides structure and forms the base of your dough
– 1.5 cups warm water Activates yeast and creates proper dough consistency
– 1 teaspoon instant yeast Leavens the dough without needing proofing
– 2 teaspoons salt Enhances flavor and strengthens gluten structure
– 2 tablespoons granulated sugar Feeds yeast for fermentation and adds subtle sweetness
– 1.5 cups cold butter (European-style preferred) Creates flaky layers through lamination
– 1/2 cup brown sugar Forms the sweet filling that caramelizes during baking
– 2 tablespoons ground cinnamon Provides the classic warm, spiced flavor
– 1/4 cup softened butter Spreads easily over dough for the filling layer
– 4 ounces cream cheese, softened Creates rich, tangy frosting
– 2 cups powdered sugar Sweetens and thickens the glaze
– 2 tablespoons milk Adjusts consistency for drizzling
– 1 teaspoon vanilla extract Adds depth to the frosting flavor
Instructions
1-First Step: Prepare the Dough Start your no knead cinnamon rolls recipe the night before you plan to serve them. In a large mixing bowl, combine 4 cups of all-purpose flour, 1 teaspoon of instant yeast, 2 teaspoons of salt, and 2 tablespoons of granulated sugar. Whisk these dry ingredients together until evenly distributed. Gradually add 1.5 cups of warm water (about 100-110°F) to the flour mixture. Stir with a wooden spoon or spatula until a shaggy, sticky dough forms. The dough will look rough and uneven this is perfectly normal for a no knead dough. You don’t need to knead it at all. Cover the bowl tightly with plastic wrap and place it in the refrigerator. Let the dough rest for 12-18 hours. This slow fermentation allows the yeast to work gradually, developing flavor and strengthening the gluten structure without any kneading. The dough will puff up and develop bubbles on the surface.
2-Second Step: Prepare the Butter While your dough chills, prepare the butter for lamination. About 30 minutes before you’re ready to work with the dough, remove 1.5 cups of cold butter from the refrigerator. Cut it into small cubes and let it soften slightly until it’s pliable but still cold. Place the butter cubes between two sheets of parchment paper. Use a rolling pin to pound and roll the butter into a flat rectangle, approximately 8×10 inches. The butter should be smooth and evenly thick, but still cool to the touch. If it becomes too soft, return it to the refrigerator for a few minutes. This butter slab is essential for creating those signature flaky layers in your soft no knead crescent rolls.
3-Third Step: First Lamination Remove the chilled dough from the refrigerator. Dust your work surface generously with flour and turn the dough out onto it. Using a floured rolling pin, roll the dough into a large rectangle, approximately 12×16 inches. The dough should be about 1/4 inch thick. Place your prepared butter slab in the center of the dough rectangle. Fold the sides of the dough over the butter, like you’re folding a letter. First, fold the left side over the butter, then fold the right side over to cover it completely. You should now have three layers of dough with butter sandwiched between them. Press the edges of the dough together to seal in the butter. Rotate the dough 90 degrees so the open ends face you. Roll the dough out again into a 12×16 inch rectangle. Fold it into thirds again, like a letter. This completes your first turn. Wrap the dough in plastic wrap and refrigerate for 30 minutes to relax the gluten and keep the butter cold. Cold butter is crucial if it melts into the dough, you’ll lose the flaky layers.
4-Fourth Step: Second Lamination After the 30-minute chill, remove the dough from the refrigerator and repeat the rolling and folding process one more time. Roll the dough into a 12×16 inch rectangle and fold it into thirds. This second turn creates even more layers, which translates to more flakiness in your finished rolls. Wrap the dough again and refrigerate for another 30 minutes. During this final rest, you can prepare your cinnamon filling by mixing 1/2 cup of brown sugar with 2 tablespoons of ground cinnamon in a small bowl. Also, set aside 1/4 cup of softened butter for spreading over the dough.
5-Fifth Step: Shape the Rolls Remove the dough from the refrigerator and roll it out one final time into a large rectangle, approximately 10×18 inches. The dough should be evenly thick, about 1/4 inch. If the dough springs back while rolling, let it rest for a few minutes to relax the gluten. Spread the softened butter evenly over the entire surface of the dough, leaving a small border around the edges. Sprinkle the cinnamon-sugar mixture over the butter, ensuring even coverage across the entire rectangle. Starting from one of the longer sides, roll the dough tightly into a log. Use a gentle sawing motion with your hands to create an even roll without pressing down too hard. Once rolled, place the log seam-side down on your work surface. Using a sharp knife or unflavored dental floss, cut the log into 12 equal pieces, each about 1.5 inches thick. For clean cuts, use a sawing motion rather than pressing straight down. Arrange the rolls in a greased 9×13 inch baking pan, cut-side up. Space them evenly so they have room to expand during proofing and baking.
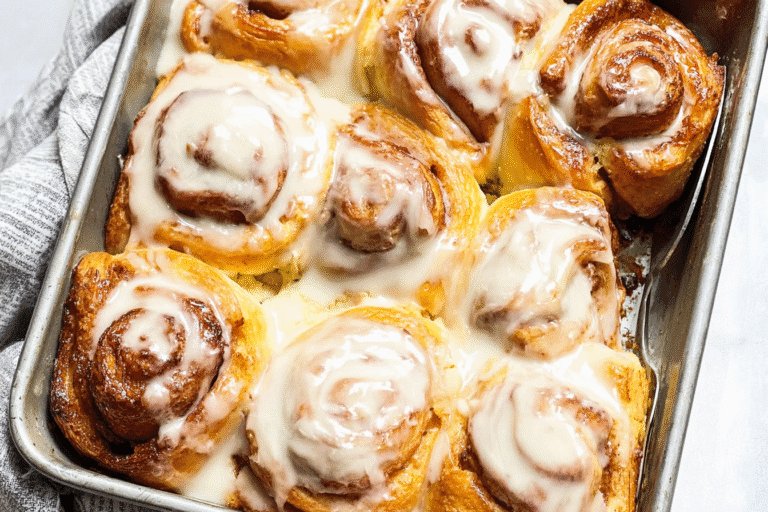
6-Final Step: Proof, Bake, and Serve Cover the pan loosely with plastic wrap or a clean kitchen towel. Let the rolls proof at room temperature for 2-3 hours, until they’re noticeably puffy and nearly doubled in size. The exact time will depend on the temperature of your kitchen. Preheat your oven to 375°F (190°C) while the rolls finish proofing. Once the rolls have risen, remove the covering and bake for 25-30 minutes, until golden brown on top. The internal temperature should reach 190°F to ensure they’re fully baked. While the rolls bake, prepare the glaze by beating together 4 ounces of softened cream cheese, 2 cups of powdered sugar, 2 tablespoons of milk, and 1 teaspoon of vanilla extract until smooth. Remove the rolls from the oven and let them cool in the pan for 10 minutes. Drizzle the cream cheese glaze generously over the warm rolls. Serve immediately for the best texture and flavor. These easy homemade croissant rolls are absolutely divine when enjoyed fresh from the oven.
Last Step:
Please leave a rating and comment letting us know how you liked this recipe! This helps our business to thrive and continue providing free, high-quality recipes for you.Notes
❄️ Chill dough overnight after first rise for even better flavor and easier rolling.
🌡️ Proof in a turned-off oven with light on or near warm stove for optimal rise.
🧈 Brush with extra butter post-bake for shiny, flavorful tops.
- Prep Time: 20 minutes
- Rise + Chill (optional): 3 hours
- Cook Time: 15 minutes
- Category: Side Dish
- Method: Bake
- Cuisine: American
- Diet: Vegetarian
Nutrition
- Serving Size: 1 roll
- Calories: 140 kcal
- Sugar: 4g
- Sodium: 130mg
- Fat: 5g
- Saturated Fat: 3g
- Unsaturated Fat: 2g
- Trans Fat: 0g
- Carbohydrates: 20g
- Fiber: 1g
- Protein: 3g
- Cholesterol: 20mg