Why I Love this Charcuterie Board
This Halloween charcuterie board is built around an assortment of cheeses, meats, crackers, fresh fruits, nuts and other Halloween themed treats, so there is something for nearly everyone at the table. It is easy to customize, fun to put together, and it brings sweet and savory bites together in one festive spread.
The Halloween decorations are what turn an everyday snack platter into a party centerpiece. Plastic spiders, candy eyeballs, skeleton hands, cobwebs and a skeleton centerpiece give the board a spooky look, and none of it requires any extra cooking.

Whether you are planning a Halloween party, putting together an after school snack board for kids, or setting out an easy appetizer to share with friends, this board works for all three.
If you want the full ingredient list and the original step by step assembly order, the Halloween charcuterie board recipe from Eat Yourself Skinny is the best place to start.
Jump To
How to Make a Halloween Charcuterie Board
The good news is that this is a no cook project. There is no baking, no simmering and no last minute timing to worry about. You only need to cut, shape, roll and arrange.
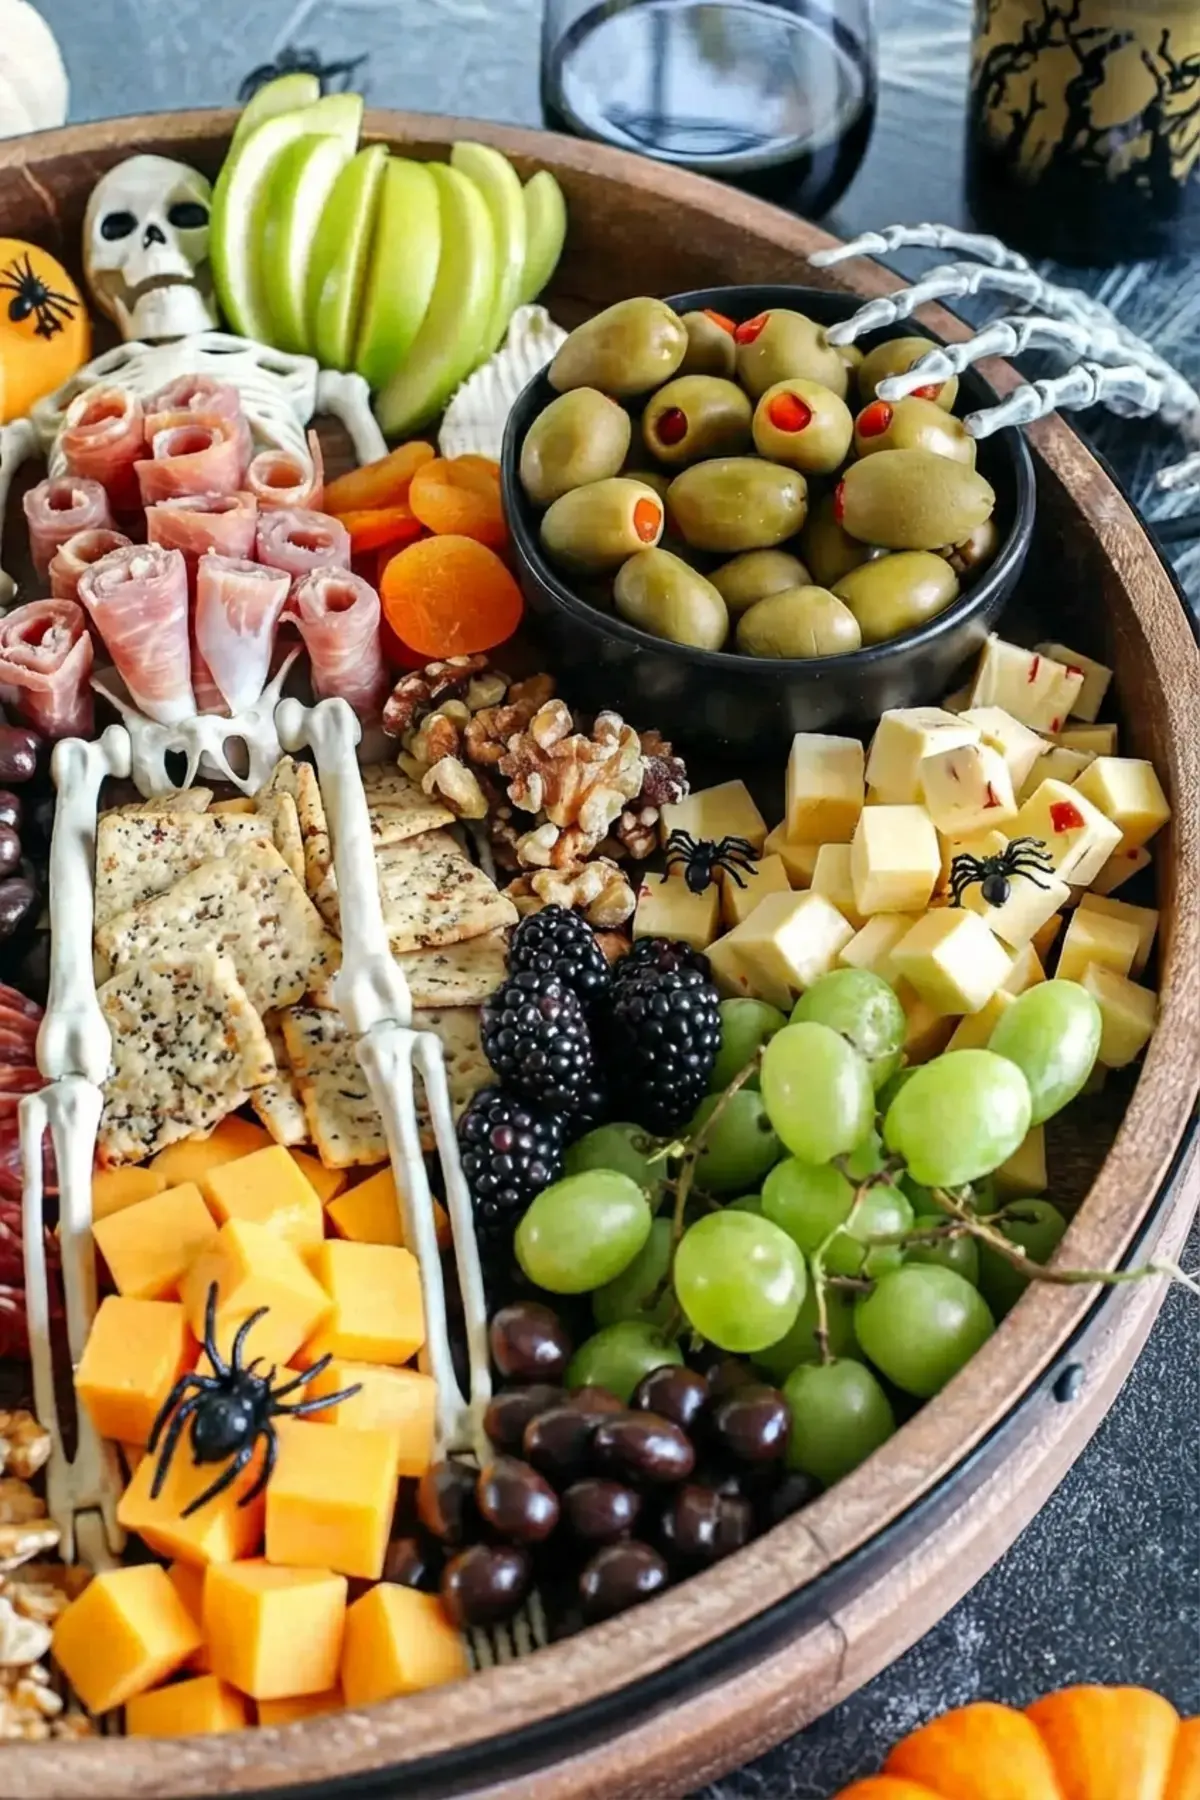
Keep the Halloween palette in mind as you work: orange from cheddar and dried apricots, green from grapes and apples, and deep dark purple from blackberries. A mix of heights, textures and colors is what makes the finished board look full and inviting.

The assembly order is short. Place the largest items first, such as small bowls and the skeleton centerpiece if you are using one, then add all the cheeses. Next come the meats and fruits. Finally, fill every gap with the crackers, nuts and chocolate covered peanuts, then top everything with spooky little spiders and your other fun additions.
The Cheeses
Cheese is the heart of the board. The original calls for four different kinds so there is variety in flavor and texture, and the guideline behind it is simple: serve at least three cheese types and cover firm, soft and semi soft options, since everyone has a favorite.
Sharp cheddar is the classic choice and its orange color looks festive, creamy brie brings a soft spreadable contrast, jalapeño pepper jack adds gentle heat, and fresh mozzarella balls supply a cool, mild bite.
| Cheese | Amount | How it is served |
|---|---|---|
| Sharp cheddar cheese | 16 oz | Cut into pumpkins with Halloween cookie cutters, leftover scraps cut into cubes |
| Creamy brie cheese round | 8 oz | Cut into small ghosts with small cookie cutters, sliced in half first |
| Jalapeño pepper jack cheese | 8 oz | Cut into cubes for height and dimension |
| Fresh mozzarella balls, ciliegine | 8 oz | Topped with candy eyeballs and arranged in a bowl |
The cheddar pumpkins are the easiest win on the whole board. Press a Halloween cookie cutter into the cheese and you have an instant pumpkin shape. Instead of tossing the scraps, cube them and tuck them into open spots so nothing goes to waste.
Brie ghosts need one important detail: brie has to be really cold and firm before small cookie cutters touch it. Take it straight from the fridge and slice the round in half horizontally first.
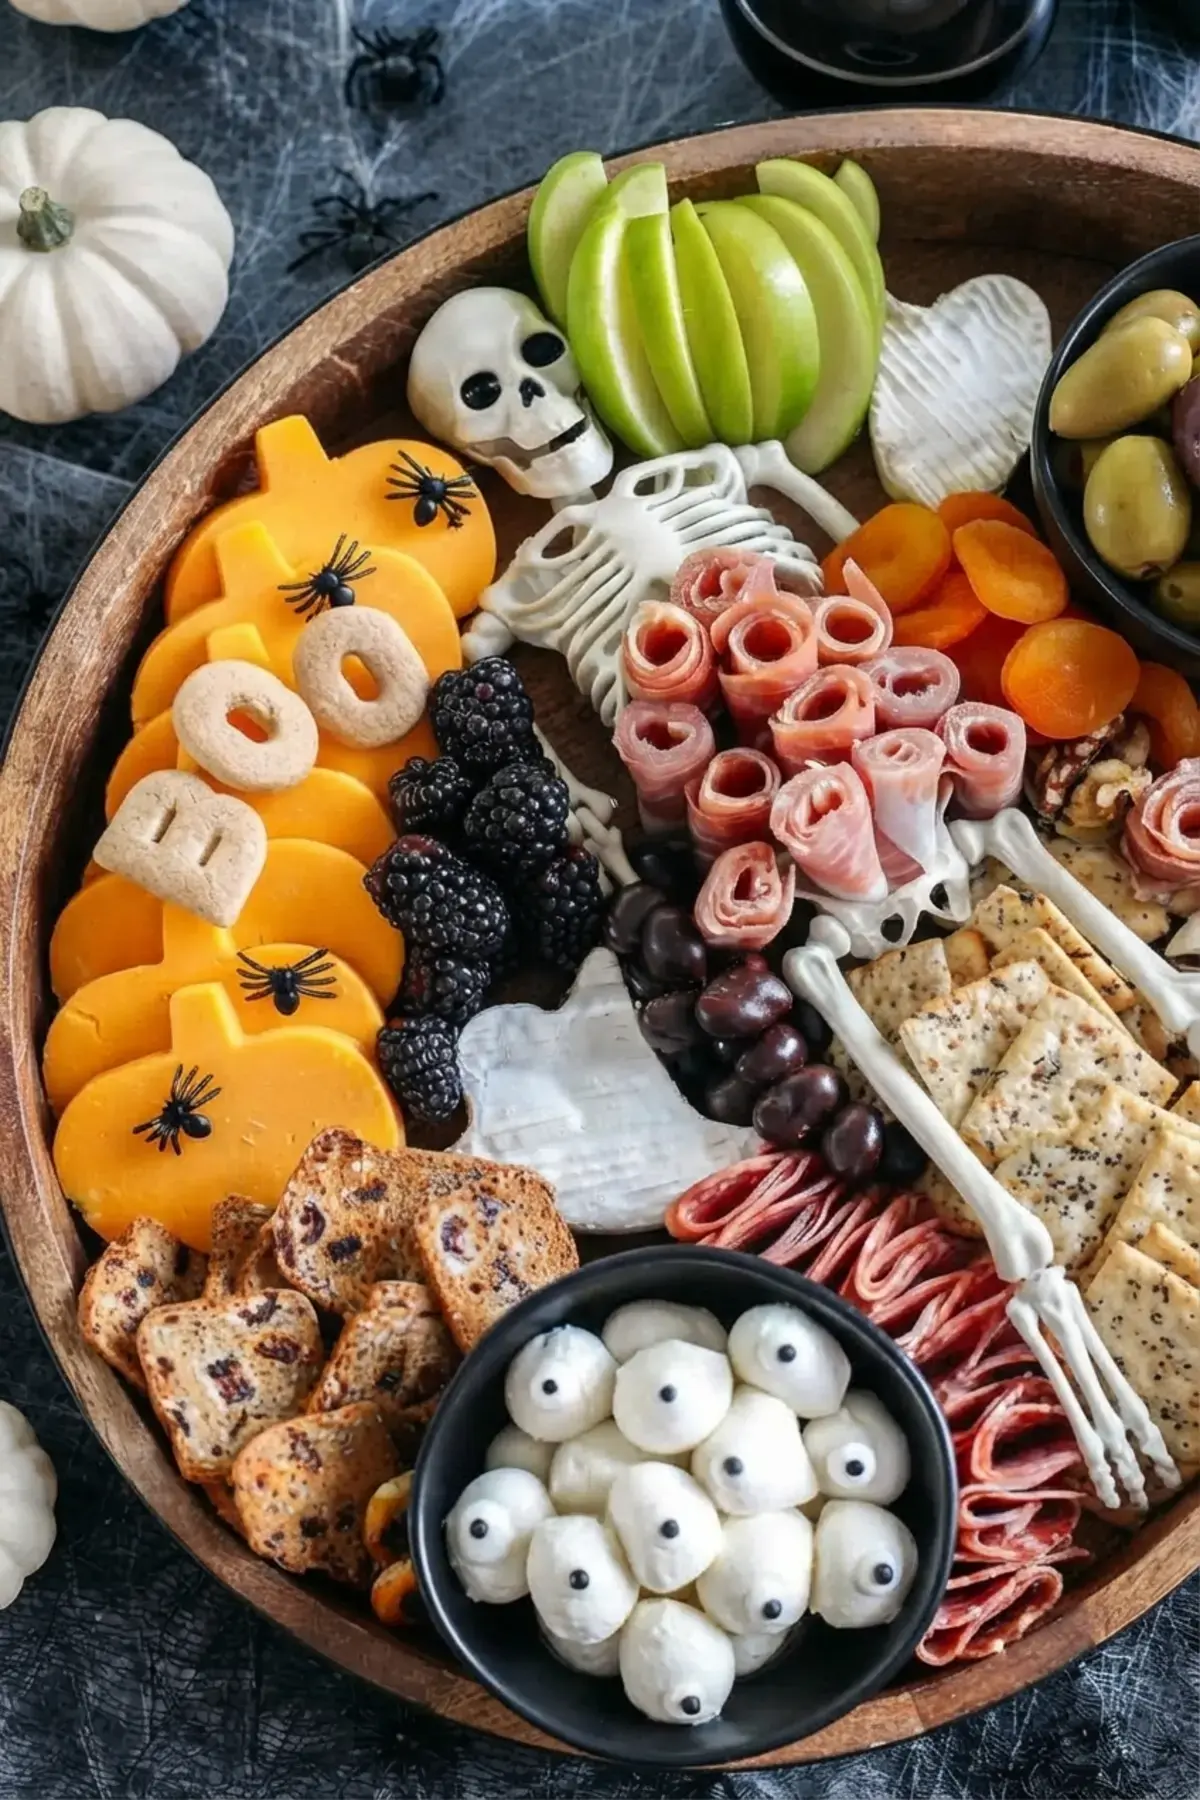
That single step makes the cutter much easier to push through, and it gives you double the number of ghosts. Once the ghosts are on the board, a drizzle of honey or a spoonful of jam on top is a lovely touch.
Jalapeño pepper jack is cubed because cubes stack up and add height and dimension to the spread. Slices work just as well, and a whole block broken into chunks is another option.
Mozzarella balls are not a typical charcuterie board cheese, and that is exactly why they are fun here. Candy eyeballs go on top of each ball, and the balls are arranged in a small bowl so the little eyes stare up at your guests.
Want more variety? Smoked gouda and goat cheese both work beautifully in place of, or alongside, the four above.
The Meats
A variety of cured meats gives the board texture and a salty contrast to all that fruit. The trick is arranging them in fun shapes instead of laying them flat, because folds and rolls fill gaps and add dimension.
Prosciutto is rolled, cut in half, and placed cut side down into the chest of the skeleton centerpiece. It looks like the skeleton is clutching a little bundle of meat, which is exactly the kind of silly detail that gets a laugh at a Halloween party.
Genoa salami is even easier to style. Fold each slice and arrange the folds around the cheeses or bowls, or pile salami into any open area to fill the gap and build height.
Both meats are cured and ready to serve, so there is nothing to cook. If you are feeding a crowd, buy a little extra, since prosciutto and salami tend to disappear first. The original amounts are 4 oz of prosciutto and 4 oz of genoa salami.
Fresh and dried fruit
Fruit brings the sweetness that balances the salty and savory items, and seasonal fruit is the smartest choice. For a Halloween board, look for colors that match the theme.
Green grapes are a favorite on boards any time of year, and their green color fits the Halloween palette perfectly. Blackberries bring a deep dark color that suits a spooky theme, and figs or raspberries are excellent alternatives if blackberries are not available.

Fresh apple slices suit fall beautifully. Green apples were used originally to match the board colors, but any type of apple works, so use what you have.
Dried apricots are the detail that makes the fruit section feel complete. Mixing fresh and dried fruit adds a chewy texture, and the orange color of apricots keeps everything on theme.
Assortment of crackers
Crackers are the vehicle for all that cheese, so it is worth choosing more than one kind. An assortment gives guests options and keeps the board interesting, and mixing different sizes and shapes fills awkward gaps nicely.
The original uses everything bagel seasoned crackers and fig and olive crisps, both found at Trader Joe’s. That pairing works well because one is savory and crunchy while the other is slightly sweet and sturdy enough for a thick slice of brie.
To display them, spread crackers around the cheeses, fan them out in a few different spots, or pile them into open gaps. Once the board is full, most guests will not even notice where the crackers came from.
Spooky Extras!
This is the fun part, and it is where the board gets its personality. Garnishes and small extras make a spread look festive and abundant, and they are the easiest way to fill the last few holes.
Walnuts, chocolate covered peanuts and pimento stuffed green olives all earned a place on the original board, and the olives add a spooky green element. If you want more options, marcona almonds, spiced pecans or cashews are great for texture.
Salty snack items such as pickles or popcorn work too, and small bowls of spreads like jam, honey or hummus give guests something to dip into.
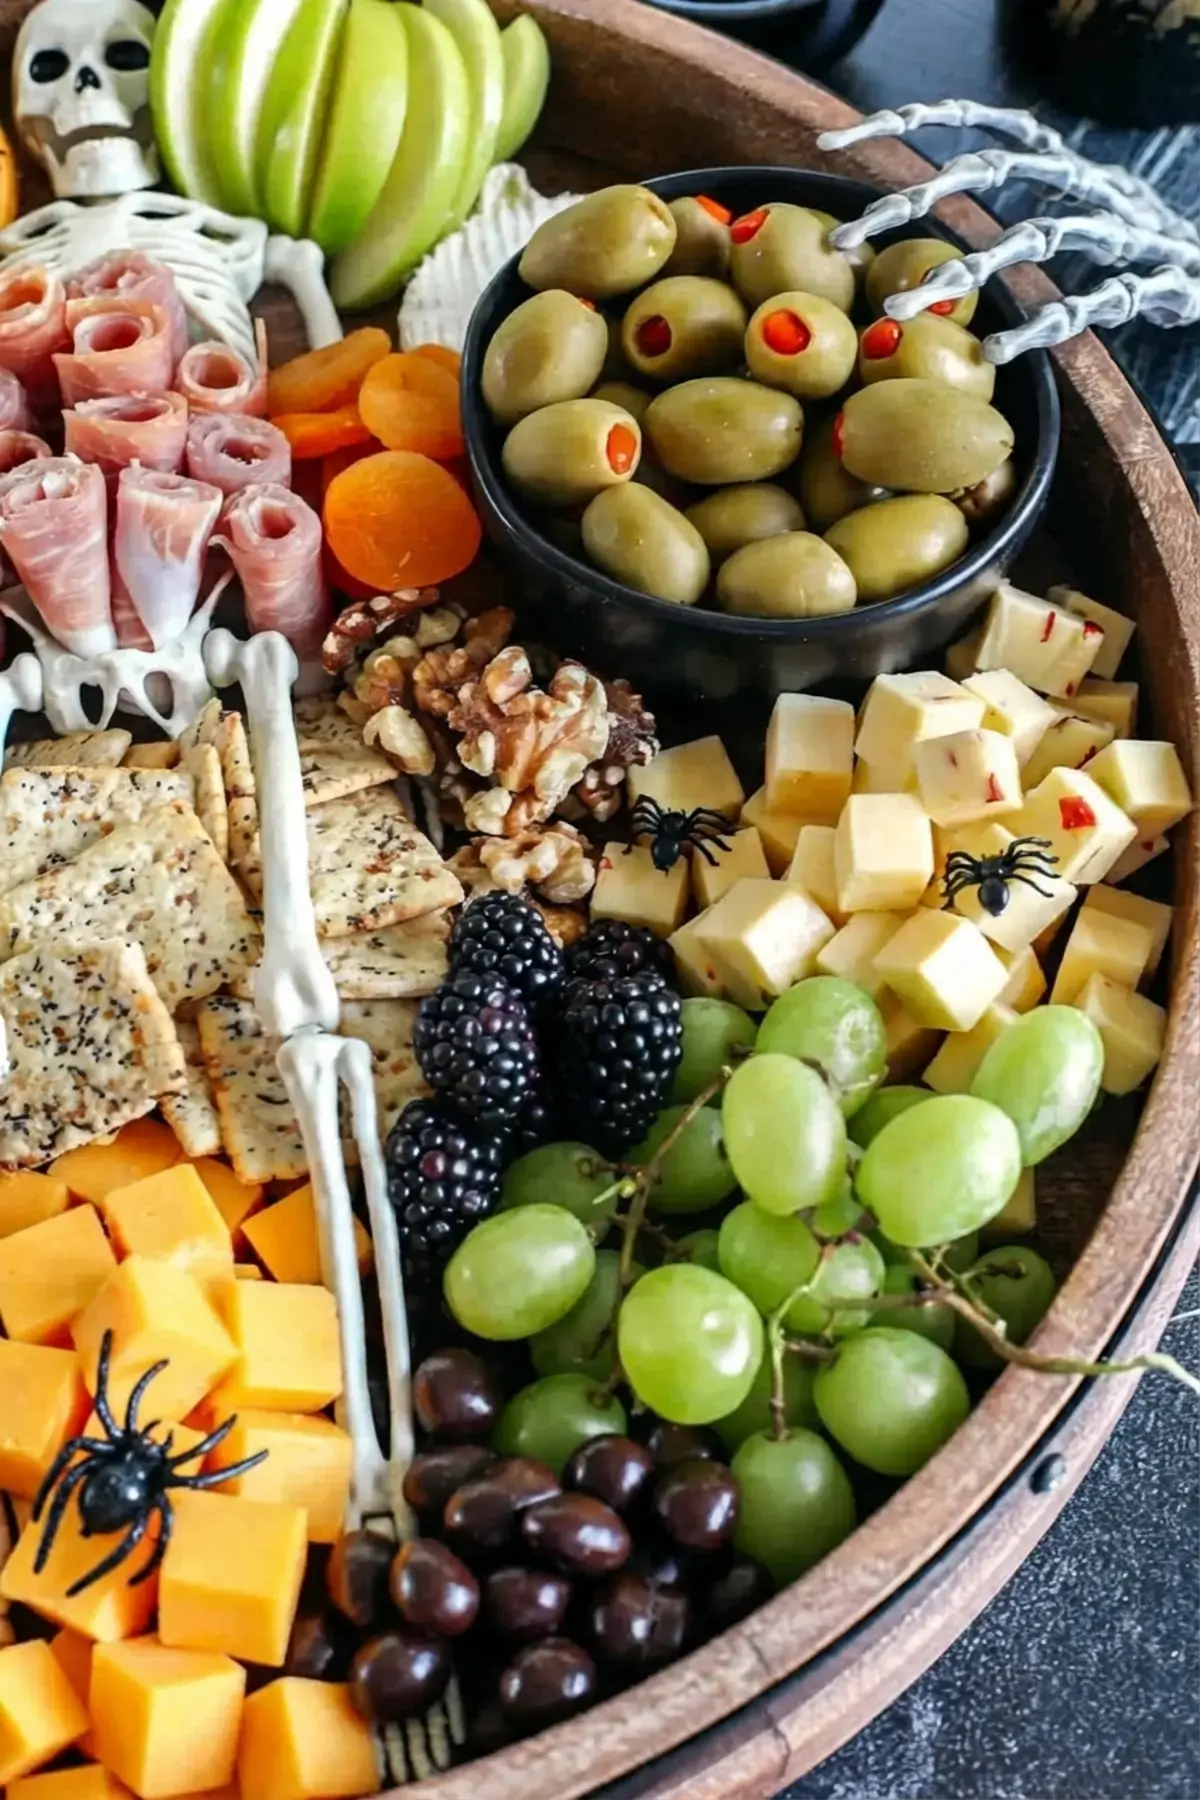
For decorations, fake plastic spiders and mini spiders scattered across the board create a creepy look, while skeleton hands and cobwebs finish the scene. Fun Halloween candy such as classic candy corn or mini pumpkins can be tucked in as well.
If you want more sweet inspiration, browse these Halloween candy ideas and pick a few that match your color scheme.
One practical note: keep plastic spiders, skeleton hands and cobwebs clearly decorative. Set them to the side before eating, or place them where guests will not grab food right next to them.
What Kind of Board Should I Use?
Here is the best part of this whole project: you do not need a special cheese board. A medium sized board is usually a good choice depending on where the platter will be displayed, but the decision is yours, and this is a good place to get creative.
Any flat surface can work:
- A classic cutting board
- A round or square wooden pizza board
- Different serving platters, including a large one for a big crowd
- A slate or stone board
- A large baking sheet, which is perfect when you need a lot of space
You can even skip the board entirely. Lay brown paper down on the table and build the spread right there as a centerpiece, which is a relaxed look that invites people to dig in. Use whatever you have on hand.
The original post notes that a personal favorite board for everyday entertaining has handles, which makes it easy to carry from the kitchen to the table.
Tips and Tricks for Creating this Cheese Board
A few small habits make a big difference between a board that looks crowded and one that looks designed.
Start with the largest items. Place bowls for spreads and the cheeses first, along with the skeleton if you are using one, because they take up the most room and set the structure.
Then work from large to small, adding the meats and fruits before moving on to the smaller items. Nuts and dried fruit go in last, piled into gaps to fill the empty spots.
Vary the textures. Slice some cheeses, crumble others and leave a few pieces whole. The mix of shapes reads as abundance and gives guests more ways to enjoy their cheese.
Let board size guide how much cheese you use. On a smaller board, use only two cheeses and spread them out in different places so the board looks fuller. A large board can handle more textures, more bowls and more fun items, so fill it generously.
Spreads deserve their own bowls. Fig or apricot jam, honey mustard, hummus or honey all work well, and separate bowls keep everything tidy. Remember spreaders and cheese knives so guests can serve themselves easily.
Timing matters more than people expect. Cheese tastes best at room temperature, so assemble the board about an hour or 30 minutes before serving and keep it wrapped so the cheese does not dry out. Unwrap it right before guests arrive, and if you like to serve wine with your board, this is the moment to open it.
For more inspiration on shapes, colors and candy ideas, this guide to how to make a spooky charcuterie board is a handy read.
More Charcuterie Boards You’ll Love
If you enjoy building boards for holidays and gatherings, there are plenty of other themes to try. The original post points readers to a few favorites: How to Build a Simple Cheese Board, The Perfect Holiday Cheese Board, Valentine’s Day Dessert Board and The Ultimate Patriotic Cheese Board.
Holiday boards follow the same basic idea as this Halloween one. Pick a color palette, build around a few cheeses and meats, add seasonal fruit, then fill the gaps with crackers and nuts.
Once you have made one, the format becomes second nature and you can adapt it to almost any celebration. For a fall or winter gathering, this Thanksgiving Charcuterie Board is a great next project.
FAQs
How do you make a Halloween charcuterie board?
Start by placing the largest items, such as bowls and a skeleton centerpiece, on your board. Next, arrange all the cheeses, including cheddar pumpkin shapes, brie ghosts, pepper jack cubes, and mozzarella eyeballs. Then add meats and fruits, and fill gaps with crackers, nuts, and chocolate covered peanuts. Finally, top with plastic spiders and other spooky decorations.
What meats and cheeses work best on a spooky charcuterie board?
Sharp cheddar, creamy brie, jalapeno pepper jack, and fresh mozzarella balls make excellent cheese choices. Cheddar can be cut into pumpkin shapes and brie into ghost shapes with cookie cutters. For meats, prosciutto and genoa salami are ideal, as prosciutto can be rolled into ribbons and salami folded to add texture and dimension.
How do you make cheese ghosts for a Halloween board?
Use a very cold, firm 8 oz round of creamy brie cheese. Slice it in half horizontally and then cut out ghost shapes with small Halloween-themed cookie cutters. This technique yields double the number of ghosts and ensures clean, crisp edges. Arrange the ghosts on the board among your other cheeses.
How far ahead can you assemble a Halloween charcuterie board?
The board should be assembled about 30 minutes to 1 hour before serving to allow the cheeses to come to room temperature for the best flavor. Keep the completed board covered and refrigerated until just before serving to prevent it from drying out. Perishable items should not sit at room temperature for more than 2 hours for food safety.

Halloween Charcuterie Board
Why I Love this Charcuterie Board This Halloween charcuterie board is built around an assortment of cheeses, meats, crackers, fresh fruits, nuts and other Halloween themed treats, so there is something for nearly everyone at the table. It is easy to customize, fun to put together, and it brings sweet and savory bites together in one festive spread.
Ingredients
Cheese
16 oz sharp cheddar cheese
8 oz creamy brie cheese round
8 oz jalapeño pepper jack cheese
8 oz fresh mozzarella balls, ciliegine with decorative eyeballs
Meat
4 oz prosciutto
4 oz genoa salami
Fruit
Blackberries
Green grapes
Green apple slices
Dried apricots
Crackers
Everything bagel seasoned crackers
Fig and olive crisps
Other Additions
Walnuts
Pimento stuffed green olives
Chocolate covered peanuts
Decorations like plastic spiders, candy eyeballs, skeleton hands and a skeleton centerpiece
Instructions
1-Start by adding the largest items first: Start by adding the largest items first like any bowls (along with the skeleton if you are using that) and then add all the cheeses.
2-Next add the meats and fruits: Next add the meats and fruits.
3-Then fill in all the gaps with: Then fill in all the gaps with the assorted crackers, nuts and chocolate covered peanuts. Top with spooky little spiders and other fun additions. Enjoy!
Last Step:
Please leave a rating and comment letting us know how you liked this recipe! This helps our business to thrive and continue providing free, high-quality recipes for you.- Method: no_cook