Ingredients
1 ½ lb (≈ 680 g) raw shrimp, peeled and deveined
6 cloves garlic, minced
3 Tbsp (≈ 45 ml) white wine (optional: dry vermouth or chicken broth)
Kosher salt, to taste
Freshly ground black pepper, to taste
¼ cup (or 1–2 Tbsp / 15–30 ml) freshly squeezed lemon juice
2 Tbsp (≈ 8 g) fresh Italian-leaf parsley, finely chopped
Pinch of red-pepper flakes
2–3 Tbsp grated Parmesan or mozzarella
Diced vegetables (asparagus, mushrooms, zucchini)
Instructions
First Step: Get Your Setup Ready Start by preheating your oven to 425°F (220°C) this ensures your garlicky baked shrimp cooks up perfectly without drying out. In a large bowl, combine the 1 ½ lb of raw shrimp, 6 minced garlic cloves, and 3 Tbsp of white wine. Season with kosher salt and freshly ground black pepper, then toss everything together for an even coat. For dietary tweaks, if you’re going dairy-free, swap the wine for chicken broth to keep that flavorful shrimp dish light and fresh.
Second Step: Prep the Topping While the oven heats up, mix melted butter with panko breadcrumbs in a separate bowl add in any optional cheese or red-pepper flakes if you’re feeling spicy. This creates that crispy topping that makes your garlicky shrimp extra special. Spread the shrimp mixture in a single layer in a shallow baking dish, then sprinkle the breadcrumb mix evenly on top. If you’re making this gluten-free, use gluten-free breadcrumbs here to keep your baked shrimp recipe inclusive.
Third Step: Bake It Up Pop the dish into the preheated oven and bake for about 7 minutes, or until the shrimp turn pink and opaque that’s your cue they’re done. Keep an eye on it to avoid overcooking, which can make the shrimp tough. This step works great for busy professionals since it’s hands-off, and you can add veggies like asparagus for a one-pan meal if you’re aiming for extra nutrition.
Fourth Step: Broil for Crunch Switch your oven to broil on high and let it go for another 2-3 minutes, watching closely so the panko topping turns a golden brown without burning. This quick broil adds that irresistible crunch to your garlicky baked shrimp. If you’re adapting for low-calorie preferences, skip extra cheese here to keep things light while maintaining that easy shrimp recipe vibe.
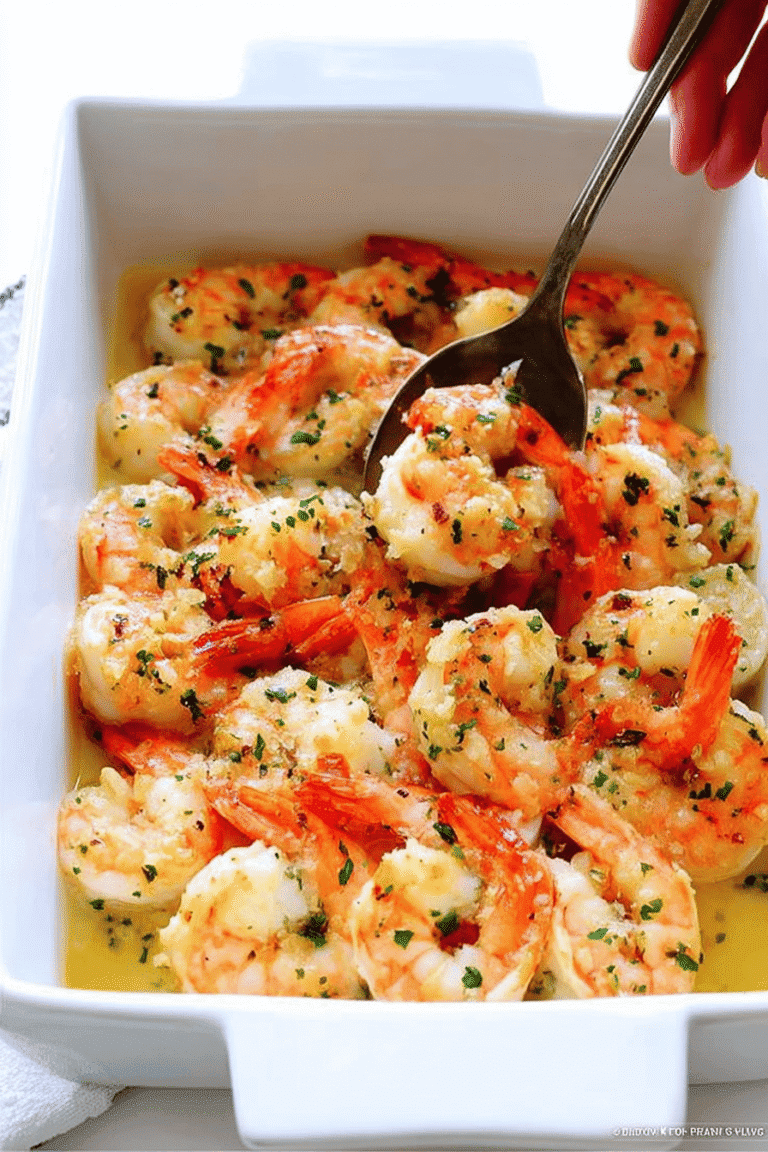
Fifth Step: Finish and Serve Pull it out of the oven, drizzle with 1-2 Tbsp of freshly squeezed lemon juice, and sprinkle on 2 Tbsp of chopped fresh parsley for a fresh finish. Serve immediately to enjoy the garlicky baked shrimp at its best it’s ready in under 20 minutes total. For a fun twist, pair it with sides like rice or salad, and if you’re into more shrimp ideas, check out our grilled shrimp tacos recipe for another quick dinner option.
Last Step:
Please leave a rating and comment letting us know how you liked this recipe! This helps our business to thrive and continue providing free, high-quality recipes for you.Notes
🧊 Thaw shrimp fully in the refrigerator and pat dry before seasoning for best texture.
🌱 Use plant‑based butter and gluten‑free breadcrumbs to keep the dish dairy‑free and gluten‑free.
🥦 Toss quick‑cooking vegetables with the shrimp before baking for a complete one‑pan meal.
- Prep Time: 9 minutes
- Cook Time: 11 minutes
- Category: Main Course
- Method: Bake and broil
- Cuisine: American
- Diet: Pescatarian
Nutrition
- Serving Size: 6‑8 shrimp (approximately 150 g)