Ingredients
– 2½ cups chocolate cookie crumbs for providing the chocolate foundation
– ½ cup melted vegan butter or coconut oil for binding the crumbs together and adding richness
– 32 oz vegan cream cheese, softened for creating the creamy cheesecake base
– 1¼ cups powdered sugar for sweetening without adding grittiness
– 1 cup dairy-free heavy cream or coconut cream for adding luxurious texture and stability
– 2 teaspoons vanilla extract for enhancing the overall flavor profile
– 4½ tablespoons cocoa powder, divided for creating the ombre effect
Instructions
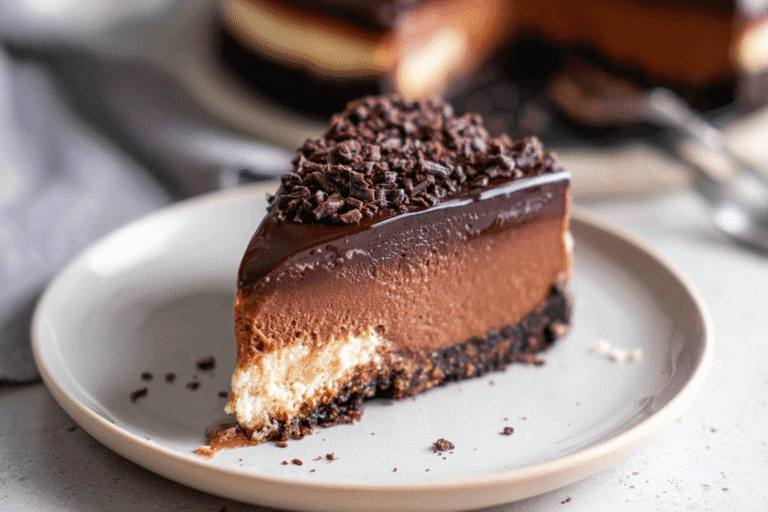
1-First Step: Begin by preparing your crust. In a medium bowl, combine the chocolate cookie crumbs with the melted vegan butter or coconut oil. Mix thoroughly until all crumbs are evenly coated and the mixture resembles wet sand. Press this mixture firmly into the bottom of a 9-inch springform pan, using the back of a spoon or measuring cup to create an even layer. Place the crust in the refrigerator to set while you prepare the filling.
2-Second Step: Prepare the filling base. In a large mixing bowl, beat the vegan cream cheese with an electric mixer until smooth and creamy. This may take 3-5 minutes, and it’s important to ensure there are no lumps. Gradually add the powdered sugar, continuing to beat until well combined and smooth. Pour in the dairy-free heavy cream and vanilla extract, mixing until the filling is thick and fluffy.
3-Third Step: Divide the filling equally into four separate bowls. This will create your gradient layers. Label your bowls from lightest to darkest. Leave the first bowl as is for your lightest layer. To the second bowl, add ½ tablespoon of cocoa powder and mix well until fully incorporated. Add 1 tablespoon of cocoa powder to the third bowl, and 2 tablespoons to the fourth bowl (your darkest layer), mixing each thoroughly to ensure no streaks remain.
4-Fourth Step: Carefully pour the darkest filling over the chilled crust, spreading it evenly with an offset spatula. Gently spoon the second-darkest layer on top, being careful not to mix the two colors. Repeat with the third and lightest layers, smoothing the top with your spatula after each addition. Tap the pan gently on the counter to release any air bubbles and settle the layers.
5-Final Step: Cover the cheesecake with plastic wrap and refrigerate for at least 6-8 hours, or overnight for best results. The filling needs this time to set completely. When ready to serve, carefully release the springform ring, run a thin knife around the edge if needed, and slice with a sharp knife dipped in hot water for clean cuts. Top with dairy-free whipped cream, chocolate shavings, or fresh berries if desired.
Last Step:
Please leave a rating and comment letting us know how you liked this recipe! This helps our business to thrive and continue providing free, high-quality recipes for you.Notes
💧 Soak cashews in boiling water 20 minutes if short on time for creaminess.
🌈 Strain raspberry puree removes seeds for smoother color gradient.
❄️ Freeze between layers prevents bleeding for sharp ombre effect.
- Prep Time: 30 minutes
- Chill/Freeze: 6 hours
- Category: Dessert
- Method: No Bake
- Cuisine: American
- Diet: Vegan, Gluten Free
Nutrition
- Serving Size: 1 slice
- Calories: 380 kcal
- Sugar: 22g
- Sodium: 40mg
- Fat: 28g
- Saturated Fat: 12g
- Unsaturated Fat: 15g
- Trans Fat: 0g
- Carbohydrates: 30g
- Fiber: 4g
- Protein: 8g
- Cholesterol: 0mg