Ingredients
– 2 boneless/skinless chicken breasts Provides lean, tender protein that stays juicy when properly cooked
– 1/2 cup self-rising flour Contains leavening agents that help the batter rise and become crispy
– 1/2 cup cornstarch Creates an extra crispy coating and helps prevent sogginess
– 1.5 teaspoons salt Enhances flavor and helps season the chicken throughout
– 1/2 teaspoon sugar Balances flavors and promotes golden browning
– 1/2 cup seltzer water Carbonation reduces gluten development for a lighter, crispier batter
– 1 quart canola oil Provides neutral flavor and high smoke point for perfect frying
Instructions
1-First Step: Prepare Your Workstation Before diving in, set up your workstation for efficiency. Gather all ingredients, measure them out, and have your equipment ready. You’ll need a large mixing bowl, a whisk or fork for mixing batter, a cutting board, a sharp knife, paper towels for draining, and either a deep fryer or a deep, heavy-bottomed pan for frying. Having everything ready before you start will make the process smooth and enjoyable.
2-Second Step: Mix the Batter Sift together 1/2 cup self-rising flour, 1/2 cup cornstarch, 1.5 teaspoons salt, and 1/2 teaspoon sugar in a large bowl. Whisk these dry ingredients well to ensure they’re evenly combined. This sifting process prevents lumps in your batter and helps create a smoother coating on the chicken. Slowly add 1/2 cup seltzer water while whisking continuously. The key here is to achieve a batter consistency that’s slightly thicker than pancake batter. It should coat the back of a spoon without running off immediately. If your batter is too thin, add more flour a tablespoon at a time. If it’s too thick, add more seltzer water a tablespoon at a time.
3-Third Step: Prepare the Chicken While your batter rests for a few minutes, prepare the chicken. Take 2 boneless, skinless chicken breasts and slice them into strips about 1 inch wide and 3-4 inches long. Sprinkle the strips lightly with additional salt, ensuring they’re evenly seasoned. This step is crucial because it means the chicken itself is flavorful, not just the coating. Pat the chicken strips dry with paper towels before seasoning. This removes excess moisture that could make the batter slide off during frying. The drier the chicken surface, the better the batter will adhere.
4-Fourth Step: Coat the Chicken Now for the fun part! Dunk each chicken strip into the prepared batter, ensuring thorough coating. Use tongs or your hands to completely submerge each piece in the batter, then lift and let any excess drip off. You want a nice, even layer of batter covering each strip. If you’re making a large batch, consider setting up a breading station with the batter in a shallow dish rather than a bowl. This makes the dunking process easier and more efficient.
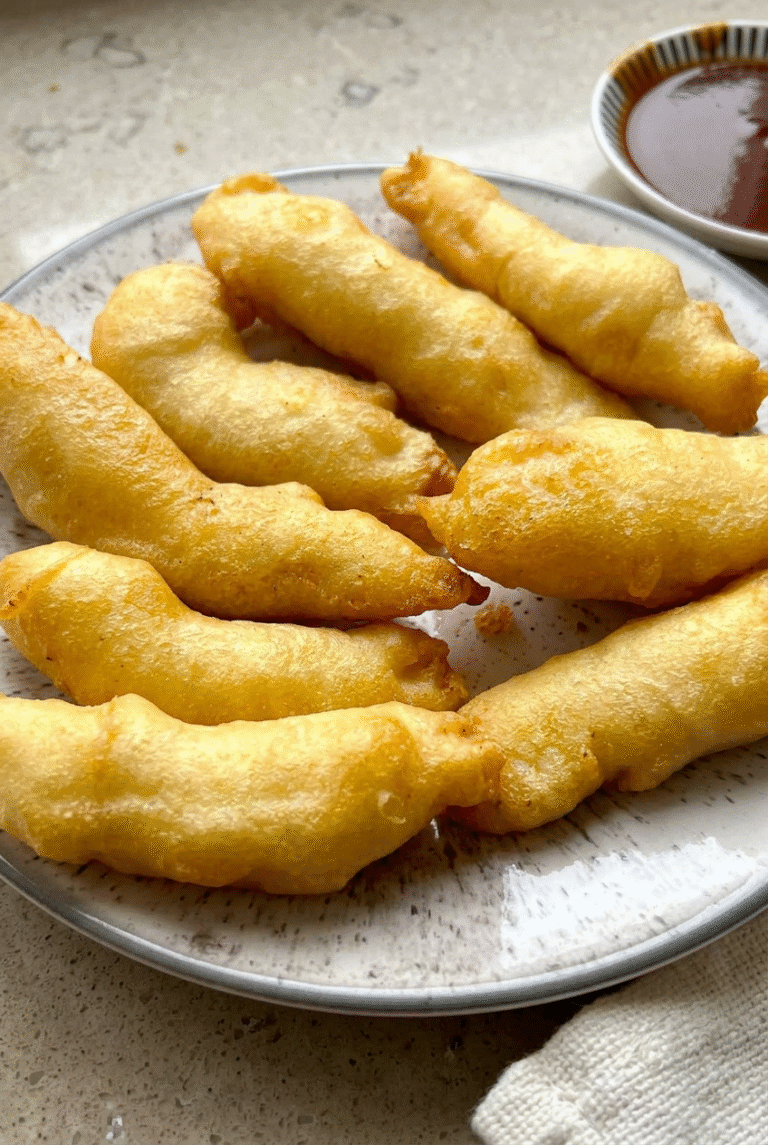
5-Final Step: Fry to Golden Perfection Carefully lower each coated chicken strip into preheated oil (350-375°F). If using a deep fryer, follow your appliance’s instructions. For pan frying, use a heavy-bottomed pan filled with about 2 inches of oil. Don’t overcrowd the pan fry in batches if necessary to maintain oil temperature. Cook for about 10 minutes, turning occasionally, until golden brown. Here’s where patience is key! The chicken will initially appear white but will brown with time. Resist the urge to remove them too early allowing that golden brown color to develop ensures the coating is crispy and fully cooked. Once perfectly golden, remove with a slotted spoon and drain on paper towels to remove excess oil. Serve immediately with sweet and sour sauce for the authentic Chinese takeout experience. These crispy homemade Chinese chicken fingers are best enjoyed fresh and hot!
Last Step:
Please leave a rating and comment letting us know how you liked this recipe! This helps our business to thrive and continue providing free, high-quality recipes for you.Notes
💧 Use seltzer water for its carbonation, which creates a light, crispy batter without chewiness – ice water works as a substitute.
🔥 Heat oil slowly to 350-375°F for the best frying results and even golden color.
♻️ Reheat day-old fingers in the oven or air fryer to restore crispiness; best enjoyed fresh.
- Prep Time: 15 minutes
- Storage: Up to 3 days in refrigerator
- Cook Time: 10 minutes
- Category: Appetizer
- Method: Deep-Frying
- Cuisine: Chinese
Nutrition
- Serving Size: 5-6 fingers
- Calories: 117 kcal
- Sugar: 1g
- Sodium: 150mg
- Fat: 10g
- Saturated Fat: 1g
- Unsaturated Fat: 9g
- Trans Fat: 0g
- Carbohydrates: 4g
- Fiber: 0g
- Protein: 2g
- Cholesterol: 5mg