
Introduction to Tart crust
A sweet tart crust, with its flaky and buttery allure, serves as the foundational element for a myriad of delightful desserts. This tart crust recipe is simple, healthy, and can be tailored to meet a variety of dietary needs, making it an ideal choice for all—including home cooks, busy parents, and baking enthusiasts. The tart shell’s versatility transforms it into a canvas for creative fillings, whether you prefer fruity, creamy, or chocolaty. By following this recipe, you’ll discover the ease of crafting a sweet tart crust that complements any dessert tableau.
Benefits and Advantages of Tart crust
The sweet tart crust recipe stands out due to its simplicity and adaptability. It requires only basic ingredients, ensuring ease of preparation even for those on tight schedules. The health-conscious reader will appreciate the potential for dietary substitutions, allowing for vegan and gluten-free variations. Moreover, this tart crust’s unique texture, akin to shortbread, distinguishes it from traditional pie dough, providing a tender crunch that pairs perfectly with any filling. Its role in enhancing the presentation of desserts makes it a staple in culinary repertoire.
Ingredients Overview
Essential Ingredients for Tart Crust
Creating a perfectly crumbly and sweet tart crust requires a careful selection of ingredients that balance flavor and texture. Here’s a detailed list of all the must-have components:
- All-Purpose Flour: Typically, 1 1/4 cups provide the structure needed for the dough.
- Powdered Sugar: 1/4 cup sweetens the dough without making it too sugary.
- Pinch of Salt: This enhances the flavor of all the ingredients combined.
- Cold Unsalted Butter: 1/2 cup, cut into small cubes, ensures a flaky consistency once baked.
- Egg Yolk: Adds rich flavor and promotes binding.
- Vanilla Extract: 1 teaspoon to infuse a subtle aroma.
These ingredients create a classic tart crust that’s perfect for various fillings. For readers following specific diets, consider adding almond flour for extra flavor, which complements both sweet and savory toppings.
Dietary Substitutions to Customize Your Tart Crust
Accommodating dietary preferences or ingredient limitations doesn’t mean sacrificing taste or texture. Here are some suggested substitutions:
- Vegan Butter: Replace the cold unsalted butter with an equal amount of plant-based butter to cater to vegan diets.
- Gluten-Free Flour: Swap the all-purpose flour for a gluten-free mix to make the crust celiac-friendly.
- Coconut Sugar: Use instead of powdered sugar for a lower glycemic index and a hint of caramel flavor.
- Aquafaba: Substitute the egg yolk with 3 tablespoons of aquafaba (chickpea brine) for a plant-based option.
These alternatives allow you to modify the tart crust recipe without losing its delightful taste and texture.
How to Prepare the Perfect Tart Crust: Step-by-Step Guide
Here’s a comprehensive guide to help you prepare a tart crust that’s both delicious and beautiful. Let’s get started:
Initial Preparation
First Step: Start by gathering all your ingredients. Chilling your butter in advance is crucial, as it leads to a flakier crust. It’s essential to weigh your flour and sugar to ensure accuracy.
Mixing Ingredients
Second Step: In a large bowl, sift the all-purpose flour, powdered sugar, and salt together. Mixing these dry ingredients thoroughly will distribute the flavor uniformly.
Third Step: Add the cold, cubed butter to the flour mixture. Using a pastry cutter or your fingertips, blend until the mixture resembles coarse crumbs. Be cautious not to overwork the dough, as this can cause toughness.
Adding Wet Ingredients
Fourth Step: In a separate bowl, whisk the egg yolk with vanilla extract. Pour this into the flour-butter mixture. Gently combine the wet and dry ingredients until the dough starts coming together.
Forming the Dough
Fifth Step: Transfer the dough onto a clean surface. Knead it lightly until it forms a cohesive ball. Wrap the dough in plastic wrap and refrigerate for at least 30 minutes. Chilling helps solidify the fats in the dough, aiding in its flakiness.
Rolling and Shaping
Sixth Step: Once chilled, place the dough on a lightly floured surface. Roll it out to your desired thickness, typically about 1/8 inch to ensure optimal texture. Carefully transfer to a tart pan and press to fit into the edges.
Blind Baking
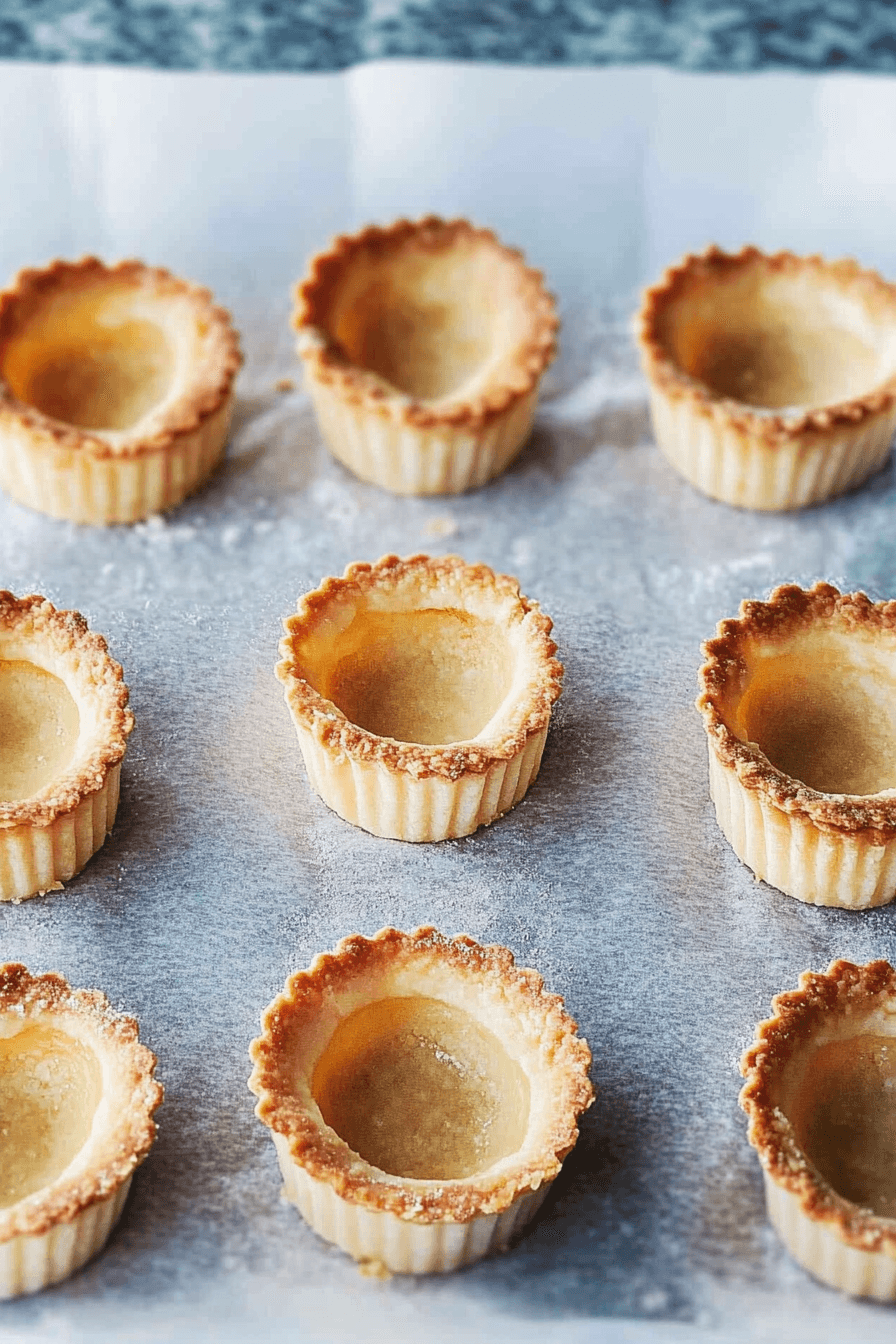
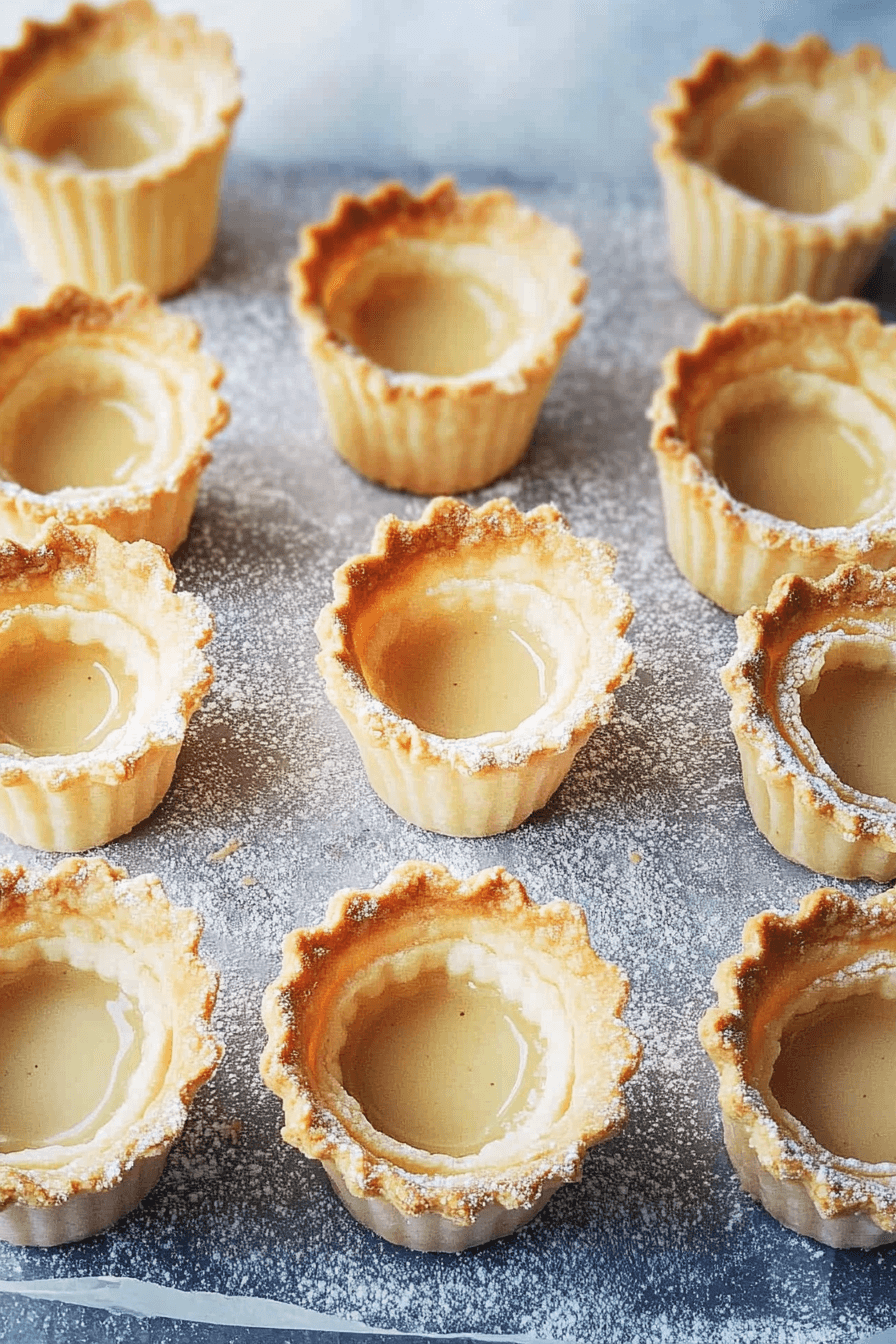
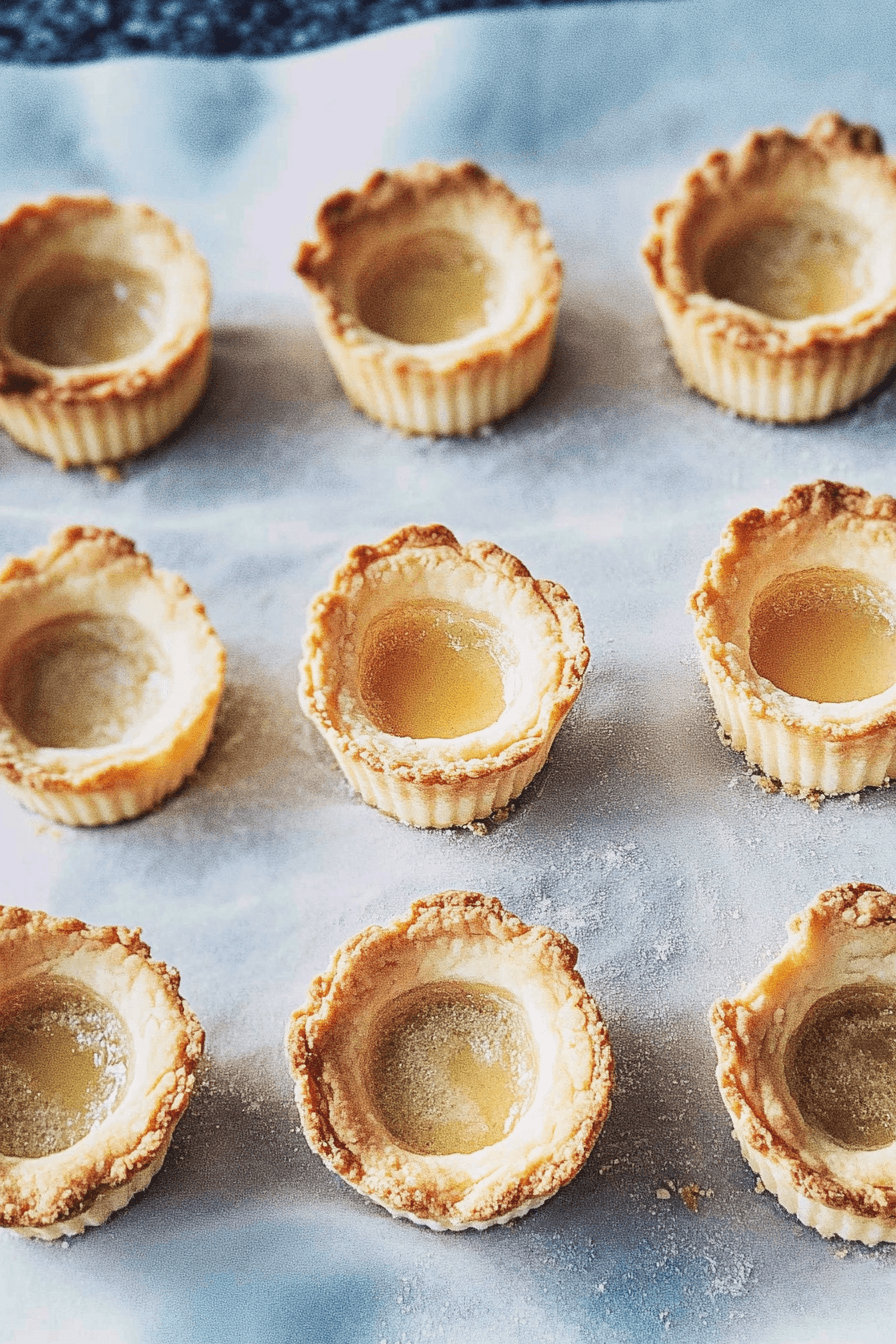
Seventh Step: Preheat your oven to 350°F (175°C). Line the tart crust with parchment paper and fill with pie weights or dried beans. This prevents the crust from puffing up during baking.
Eighth Step: Bake for 15 minutes, remove the weights and parchment, and continue baking for another 5-10 minutes until lightly golden. Your tart crust is now ready for your favorite sweet or savory filling.
For more culinary inspiration, consider pairing this tart crust with a French cinnamon apple tart. If you’re interested in a perfect dinner accompaniment, explore this garlic parmesan chicken pasta recipe.
Mastering Tart Crust: Advanced Tips and Variations
Creating a tart crust that is both delicious and visually appealing can be quite an art. To help you master the tart crust recipe, consider employing these advanced tips and experimenting with variations that cater to different tastes and preferences. By mastering these techniques, you’ll not only enhance your baking skills but also delight your friends and family with unique and memorable tarts.
Advanced Tips for a Perfect Tart Crust
- Keep Ingredients Cold: Always use cold butter and chilled liquids to prevent the dough from becoming too soft. This ensures a flaky texture that is characteristic of an ideal tart crust.
- Avoid Overworking the Dough: Mix the dough until it just comes together. Overworking can activate the gluten in the flour, leading to a dense and chewy result rather than a light and crisp crust.
- Chill the Dough Twice: Refrigerate the dough before rolling it out and then again before baking. This double-chilling process helps in minimizing shrinkage during baking, ensuring the finished crust fits perfectly in the tart pan.
- Use Pie Weights: When you blind bake the crust, cover it with parchment paper and fill it with pie weights or dried beans. This prevents the crust from puffing up and losing its shape.
- Uniform Thickness: Roll out the dough evenly, aiming for a thickness of about 1/8 to 1/4 inch. This ensures consistent baking and prevents the edges from burning before the center is fully cooked.
Variations to Try
- Nutty Twist: Include almond flour or ground nuts in the dough for an added depth of flavor and a pleasant crunch. This pairs beautifully with fruit-based fillings.
- Sweet and Savory Options: Though traditionally used for sweet tarts, you can try adding herbs like thyme or rosemary to the dough for savory versions, perfect as a base for quiches or vegetable tarts.
- Spice it Up: Incorporate warm spices such as cinnamon or ginger into the dough when preparing a tart with a filling that complements these flavors, such as apple or pumpkin.
- Gluten-Free Alternatives: For those with gluten sensitivities, experiment with a mix of gluten-free flours, like rice flour and tapioca starch, maintaining a balanced ratio to ensure a crispy and delicious crust.
By applying these advanced tips and trying out different variations, you can create a tart crust that is not only expertly crafted but also tailored to the tastes of your guests. Whether you choose to stick with a traditional recipe or opt for something a bit more adventurous, the possibilities are deliciously endless.
How to Store Tart Crust: Best Practices
Proper storage of tart crust is essential to maintaining its freshness and taste. By following these best practices, you can ensure that your tart crust remains delicious whether you’ve baked it ahead of time or have leftovers. Here’s how you can store your tart crust effectively.
Refrigeration Techniques
Once your tart crust is baked, allow it to cool completely at room temperature. Once cooled, wrap the crust tightly in plastic wrap or place it in an airtight container. Store it in the refrigerator if you plan to use it within a few days. This method helps to retain the crust’s texture and flavor for up to three days.
Freezing for Long-Term Storage
If you need to store the tart crust for an extended period, freezing is the best option. After cooling, wrap the crust securely in plastic wrap, and then place it in a freezer-safe bag or container. Make sure to squeeze out any excess air to prevent freezer burn. The crust can be frozen for up to three months without losing its quality.
Reheating Tips
When you are ready to use your stored tart crust, it’s crucial to reheat it properly to maintain its texture. For refrigerated crusts, take them out of the fridge about 30 minutes before adding fillings; this allows them to return to room temperature. For frozen crusts, allow them to thaw overnight in the refrigerator before reheating. Preheat your oven to 350°F (175°C) and warm the crust for about 5-10 minutes to restore its crispiness.
By adhering to these storage practices, your tart crust will stay fresh and ready for whenever you decide to use it. Whether you’re making a new tart or reheating leftovers, these methods ensure your tart crust is of the highest quality.
Nutritional Value of Tart Crust
When creating a tart crust, many bakers are curious about its nutritional content, as understanding this can help with dietary planning, especially for those who are health-conscious. A typical tart crust, made from ingredients like flour, butter, sugar, and eggs, provides a balance of carbohydrates, fats, and proteins.
Caloric Breakdown
The tart crust’s calorie content generally comes from its core ingredients. One serving of a standard tart crust can contain approximately:
- Calories: 150-200 kcal per slice, depending on the size and thickness of the crust.
- Fats: 9-12g, largely derived from butter, which can be substituted with healthier options like coconut oil for a lower saturated fat content.
- Carbohydrates: 15-20g, with the majority coming from flour and sugar, and almond flour can be used for lower-carb options.
- Proteins: 2-4g, typically from eggs and any additional nut flour.
Healthy Modifications
To cater to different nutritional needs, consider these adjustments:
- For reducing calories: Use less sugar or substitute with a natural sweetener like stevia.
- For gluten-free diets: Opt for a gluten-free flour blend instead of all-purpose flour.
- For a dairy-free diet: Replace butter with a plant-based alternative or coconut oil.
Understanding these nutritional components helps you enjoy a tart crust as part of a balanced diet, allowing home cooks to make educated decisions when preparing their dishes.
FAQs: Frequently Asked Questions About Tart Crust
What are the basic ingredients needed to make a tart crust?
A classic tart crust typically requires flour, butter, sugar, salt, and a binding agent like egg yolk. These ingredients combine to create a dough with a rich, buttery flavor, crucial for both sweet and savory tarts.
How do I prevent my tart crust from becoming too soggy or fragile?
To avoid a soggy or fragile crust, it’s essential to blind bake the crust before adding the filling. Use pie weights or dried beans to keep the crust flat, and ensure ingredients like butter are cold to maintain the dough’s structure.
Do I need to pre-bake my tart crust before adding the filling?
Yes, pre-baking or blind baking the tart crust is crucial to achieve a firm texture that holds fillings well and prevents the base from becoming soggy.
Can I make a tart crust without using a food processor or stand mixer?
Absolutely! A tart crust can be made by hand using a pastry cutter to work the cold butter into the flour, sugar, and salt. This method ensures a flaky texture, closely resembling the traditional technique. For more tips, you might find additional insights on how to prepare a tart crust particularly beneficial.
These frequently asked questions should help demystify the process of making a perfect tart crust, providing confidence to both novice and experienced home bakers.
Print
Tart Crust Recipe Sweet
- Total Time: 55 minutes
Description
🍰 Treat yourself to a crisp, buttery tart crust that’s melt-in-your-mouth delicious—perfect for any sweet or savory creation! 😍
🥄 With simple ingredients and easy steps, this foolproof recipe guarantees a golden, tender base for your favorite fillings! 💕
Ingredients
All-purpose flour
Powdered sugar
Cold butter
Egg yolk
Vanilla extract
Salt
(Optional) Almond flour
Instructions
1. Gather all ingredients: all-purpose flour, powdered sugar, cold butter, egg yolk, salt, and vanilla.
2. In a food processor or bowl, combine flour, powdered sugar, and salt.
3. Add cold butter, cut into small pieces, and pulse or mix until the mixture resembles coarse crumbs.
4. Add egg yolk and vanilla, then mix until the dough comes together.
5. Form the dough into a disk, wrap it in plastic wrap, and chill for at least 30 minutes.
6. Preheat the oven to 350°F (175°C).
7. Roll out the chilled dough on a lightly floured surface to about 1/8 to 1/4 inch thickness.
8. Carefully transfer the dough to a tart pan with a removable bottom and press it into the edges.
9. Trim excess dough and prick the bottom with a fork to prevent air bubbles.
10. Chill the tart shell in the refrigerator for another 15-30 minutes to prevent shrinkage.
11. Line the tart crust with parchment paper and fill with pie weights or dried beans.
12. Blind bake in the preheated oven for about 15-20 minutes until the edges are lightly golden.
13. Remove the parchment paper and weights, then bake for another 5-10 minutes until fully baked and golden.
14. Let the tart crust cool completely before adding fillings.
15. Use immediately or store in an airtight container, or freeze for later use.
Notes
Chill the dough before rolling it out to keep the butter cold and maintain a flaky texture.
Use pie weights or dried beans when blind baking to prevent the crust from puffing up.
Avoid overworking the dough to keep the crust tender instead of tough.
- Prep Time: 30
- Cook Time: 25
- Category: Dessert
- Method: Baking
- Cuisine: French