
Introduction to pita bread
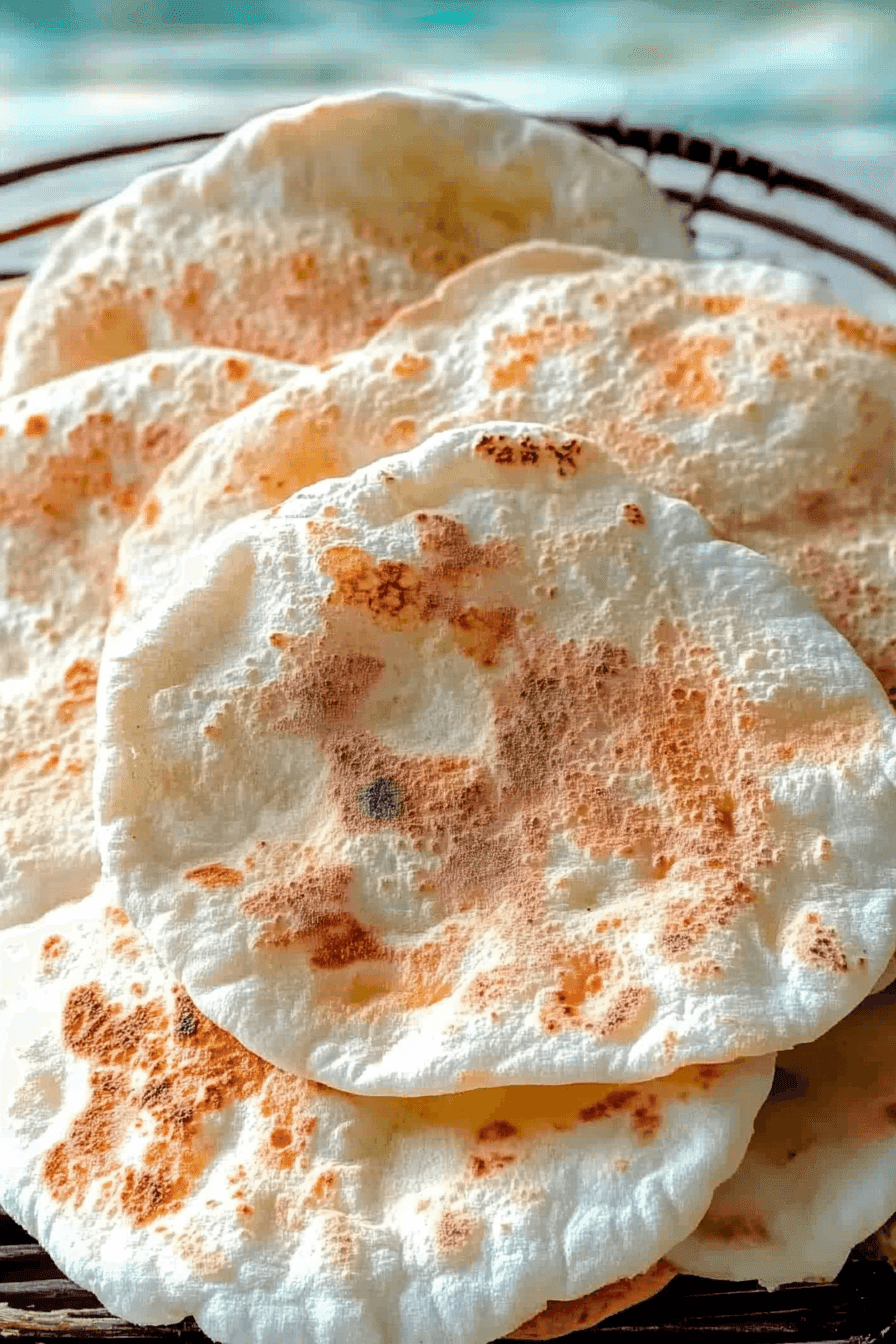
Pita bread is a beloved staple in many kitchens, known for its soft texture and versatility. Originating from the Middle East and Mediterranean, this round, leavened flatbread offers a delightful culinary experience. Made with simple ingredients like flour, water, yeast, and salt, preparing pita at home is both easy and rewarding. In this recipe, we’ll guide you through creating perfectly puffed pockets, which can be enjoyed with various dips or filled with your favorite ingredients. Whether you are a busy parent or a baking enthusiast, mastering the art of pita bread is an essential skill to enhance your recipe repertoire.
Benefits and Advantages of pita bread
Homemade pita bread offers several advantages that make it an excellent choice for anyone looking to add a wholesome option to their meals. This recipe’s simplicity allows even beginners to experience success in the kitchen. Beyond its ease of preparation, pita bread is healthy, vegan, and can be adapted for gluten-free diets, making it accessible to a wide range of dietary needs. Offering a lower calorie alternative to traditional sandwich bread, pita bread is a source of complex carbohydrates, providing energy while contributing to a balanced diet. Its ability to serve as a wrap, dipper, or sandwich base highlights its adaptability in diverse culinary applications. Explore the wider uses and historical significance of pita by checking out this fascinating article.
Ingredients Overview
Essential Ingredients for Pita Bread
- All-Purpose Flour: 2 ½ cups. Forms the base of the dough, provides structure.
- Warm Water: 1 cup. Activates the yeast and helps form a dough consistency.
- Active Dry Yeast: 2 ¼ teaspoons. Leavens the dough, creating the signature pocket.
- Sugar: 1 teaspoon. Feeds the yeast and aids in fermentation.
- Salt: 1 teaspoon. Enhances flavor and balances sweetness.
- Olive Oil: 1 tablespoon. Adds a slight richness and improves dough elasticity.
For those seeking vegan options or gluten-free alternatives, consider using gluten-free flours blended with xanthan gum to mimic gluten’s elasticity. These won’t puff as traditionally as regular pita, but they provide suitable alternatives.
Dietary Substitutions to Customize Your Pita Bread
Catering to diverse dietary needs and ingredient availability, here are some suggested substitutions:
- For Gluten-Free: Use a gluten-free flour mix with 1 teaspoon of xanthan gum. Note: The pita won’t puff up as traditional pita bread.
- For Lower Calories: Replace half the all-purpose flour with whole wheat flour to enhance fiber content but maintain a wholesome taste.
- Vegan Preference: Ensure all your ingredients are certified vegan, though the listed ingredients should fit standard vegan diets.
By adjusting these elements, you maintain control over the diet applicability while enjoying delicious homemade pita bread.
How to Prepare the Perfect Pita Bread: Step-by-Step Guide
Creating fluffy and inviting pita bread at home involves a precise yet rewarding process, ensuring a perfect puff with every batch:
- First Step: In a small bowl, mix warm water, sugar, and yeast. Allow it to sit for about 5 minutes until frothy and active.
- Second Step: In a large mixing bowl, combine flour and salt. Gradually add the yeast mixture and olive oil. Stir until a shaggy dough forms.
- Third Step: Knead the dough on a floured surface for 8-10 minutes. It should become smooth and elastic. Alternatively, use a stand mixer with a dough hook for convenience.
- Fourth Step: Place the kneaded dough in a lightly oiled bowl, cover with a damp cloth, and let it rise in a warm place for about 1 hour, or until it doubles in size.
- Fifth Step: Preheat your oven to 475°F (245°C), placing a baking stone or heavy baking tray inside to heat as well.
- Sixth Step: Punch down the risen dough and divide it into 8 equal pieces. Shape each dough piece into a ball and then flatten with a rolling pin to about ¼ inch thick.
- Seventh Step: Place the rolled dough onto the preheated baking surface immediately, baking for 3-5 minutes, until puffed and lightly golden.
- Eighth Step: Remove from the oven and wrap in a clean towel to keep them soft. Serve warm or at room temperature.
These steps allow for easy adaptation, whether you incorporate specific dietary preferences or ingredient substitutions. Now, enjoy your freshly baked pita bread, perfect for scooping your favorite dips or sandwiches.
For more diverse delights, explore other baked wonders like sweet pretzel sticks and your very own homemade dinner rolls.
Mastering Pita Bread: Advanced Tips and Variations
Once you’ve mastered the basic pita bread recipe, it’s time to dive into some advanced tips and variations that can make your homemade pita even more delightful. With these tricks up your sleeve, you can tailor the taste and texture to suit your preferences, bringing a personal touch to every batch. Additionally, experimenting with different flavors and ingredients can help you discover the perfect pita bread for your family’s tastes.
Advanced Tips for Perfect Pita Bread
- Rest the Dough: Allowing the dough to rest longer can improve the texture, making the pita softer and fluffier. Consider letting the dough rise in the fridge overnight for even better results.
- High-Temperature Baking: Make sure your oven is thoroughly preheated and is very hot before baking; a minimum of 475°F is recommended to ensure the pita puffs up correctly.
- Perfect Thickness: Roll the dough evenly to about ¼ inch thick. Uneven rolling can cause uneven puffing where some areas are flat, while others are overly inflated.
- Steam Enhancement: Placing a pot of boiling water in the oven while baking will add humidity, helping the pita to puff up more efficiently, resulting in perfectly puffed pockets.
Exciting Variations to Try
| Variation | Description |
|---|---|
| Whole Wheat Pita | Use whole wheat flour instead of all-purpose flour for a more nutritious option that’s high in fiber. |
| Herbed Pita | Incorporate dried herbs such as oregano, basil, or rosemary into the dough for added flavor. |
| Garlic Pita | Add minced garlic or garlic powder to the dough for a garlicky twist. |
| Cheese Stuffed Pita | Insert a cheese filling into the dough before baking for a gooey surprise in every bite. Consider exploring variations like jalapeno cheese crisps for inspiration. |
How to Store Pita Bread: Best Practices
Proper storage is crucial to maintain the freshness and taste of your homemade pita bread. Understanding the best storage methods will ensure that your pita remains soft and delicious for longer, maximizing its lifespan.
Refrigeration
- Wrap Properly: Use an airtight container or wrap the pita bread in plastic wrap or aluminum foil before placing it in the refrigerator. This prevents it from drying out and helps maintain freshness.
- Short-Term Storage: For best results, use refrigerated pita bread within a week to enjoy its fresh texture and flavor.
Freezing
- Freeze Promptly: To ensure maximum freshness, freeze pita bread immediately after cooling completely. Double wrap it in plastic and a freezer-safe bag to protect against freezer burn.
- Thawing Tips: When ready to enjoy, thaw pita at room temperature or gently reheat it straight from the freezer. Avoid microwaving, as it can make the bread chewy.
Reheating
- Reheat with Moisture: To bring back the day-one freshness, lightly sprinkle the pita with water and warm it in the oven for a few minutes.
- Grilling or Toasting: Consider lightly grilling or toasting your pita for a quick and tasty way to reheat and enjoy a slightly crispy texture.
- Recipe Ideas: For a delicious treat, consider transforming your leftover pita into chips or trying them as an accompaniment with dishes like spicy Korean fried chicken.

Nutritional Value of Pita Bread
Pita bread, a staple in many culinary traditions, not only offers versatility in recipes but also boasts a noteworthy nutritional profile. Understanding the nutrients it provides can help individuals make informed dietary choices.
Each standard large pita bread, typically around 6.5 inches in diameter, contains approximately 165 calories. This caloric content is distributed across macronutrients as follows:
- Carbohydrates: About 83% of the calorie content consists of carbohydrates, making it an excellent source of energy. For those mindful of carb intake, pita bread serves as a source of complex carbohydrates.
- Protein: With approximately 13% of its calories coming from protein, pita bread can contribute to muscle repair and growth, especially when paired with high-protein fillings or dips.
- Fat: A minimal portion, around 4%, comes from fats, most of which are heart-healthy unsaturated fats.
In terms of micronutrients, whole wheat pita bread stands out. It offers more fiber, aiding in digestion and providing sustained energy release. It also contains a variety of essential vitamins and minerals, such as B-vitamins and iron, which are crucial for metabolism and red blood cell production.
When compared to white pita bread, whole wheat versions offer more dietary fiber and nutrients, making them a nutritious choice for those focused on maintaining a balanced diet. Moreover, pita bread generally has fewer calories than traditional sandwich bread, making it a favorable option for diet-conscious individuals.
Ultimately, pita bread can be a part of a healthful eating plan when consumed in moderation. Its ability to pair with nutrient-dense fillings and toppings further enhances its nutritional benefits.
For a delicious addition that complements pita bread perfectly, consider trying a Rice Krispie Cheddar Cracker or the versatile flavors of Strawberry Honeybun Cake from Valentina Recipes.
FAQs: Frequently Asked Questions About Pita Bread
1. What is pita bread and where does it originate from?
Pita bread is a round, leavened flatbread that dates back over 4,000 years, originating in the Middle East and Mediterranean regions. It has spread across the world due to trade and cultural exchange, becoming integral to Greek, Lebanese, and other Mediterranean cuisines according to Bodrum NYC.
2. How is pita bread typically made and what ingredients are used?
Traditional pita bread is made with simple ingredients: flour, water, yeast, and salt, with some variations incorporating olive oil. These elements are kneaded into a dough, shaped into disks, and baked at high temperatures to form the characteristic pocket.
3. What are some common uses for pita bread in cooking?
Pita bread is incredibly versatile, serving as a vessel for sandwiches and wraps, an accompaniment to dips like hummus, and a base for small pizzas. It can also be cut into chips for a delightful snack.
4. How should pita bread be stored to maintain freshness?
To keep pita bread fresh, store it in an airtight container or plastic wrap at room temperature for short-term use. For longer storage, pita bread can be frozen for up to 3 months. When ready to use, thaw it at room temperature or reheat briefly in an oven before serving.
For more insights into the fascinating history of this practical bread, you can explore informative resources such as the Tasting Table.
Print
Pita Bread Recipe: Soft and Fluffy
- Total Time: 1 hour 5 minutes
Description
🍞✨ Enjoy the wholesome goodness of homemade pita bread—light, fluffy, and packed with complex carbs for lasting energy! ✨🍞
🥙🔥 Perfect for wraps, dips, and snacks, this simple yet nutritious recipe brings Mediterranean flavors straight to your kitchen! 🔥🥙
Ingredients
Flour
Water
Yeast
Salt
Olive oil (optional)
Instructions
1. Mix warm water, yeast, and a pinch of sugar in a bowl and let it sit until foamy.
2. In a large mixing bowl, combine flour and salt.
3. Add the yeast mixture and olive oil (if using) to the flour mixture.
4. Knead the dough for about 8-10 minutes until smooth and elastic.
5. Place the dough in a lightly oiled bowl, cover, and let it rise for about 1-2 hours until doubled in size.
6. Preheat the oven to 450-475°F (230-245°C) and place a baking stone or inverted baking sheet inside.
7. Punch down the dough and divide it into equal portions.
8. Roll each portion into a round, thin disc about ¼ inch thick.
9. Place the dough rounds onto the preheated baking surface.
10. Bake for 2-3 minutes until the pitas puff up and develop a golden color.
11. Remove the pitas from the oven and cover them with a clean kitchen towel to keep them soft.
12. Serve warm or at room temperature with dips, as a wrap, or in various dishes.
Notes
Let your dough rest properly to allow the gluten to develop, making the pita soft and pliable.
Bake at a high temperature to create steam inside, which forms the signature pocket.
Use whole wheat flour for added fiber and nutrients, making your pita more wholesome.
- Prep Time: 60
- Cook Time: 5
- Category: Bread
- Method: Baked
- Cuisine: Middle Eastern, Mediterranean